Surface Pro comes with BitLocker encryption enabled by default. Many Surface Pro users don’t realize that BitLocker was turned on until they get locked out of Windows 10, or be asked for a recovery key during advanced boot up. In this tutorial we’ll show you 2 simple methods to turn off / disable BitLocker on Surface Pro 4 running Windows 10.
Option 1: Disable BitLocker from Settings
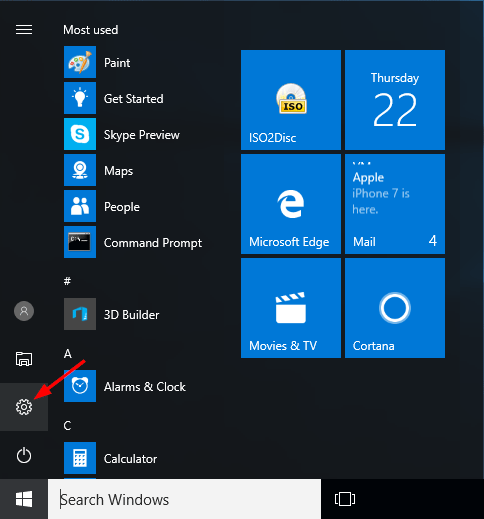
- Press the Windows key + I to open the Settings screen, or click the Settings icon from Windows 10 Start Menu.
- Click on System.

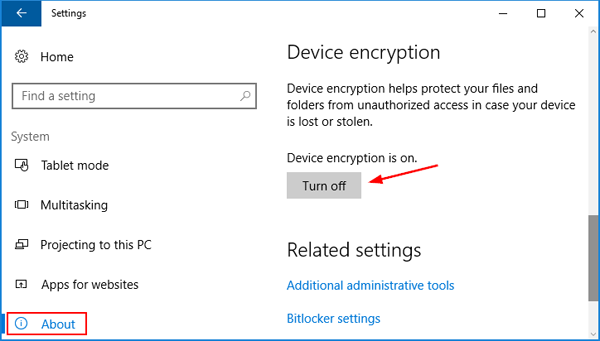
- Click About on the left side. From the right side, scroll down to the Device encryption section and click Turn off button.
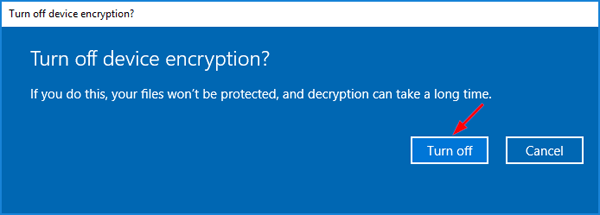
- A pop-up window will open, saying “If you turn off device encryption, your files won’t be protected, and decryption can take a long time“. Just click Turn off button to proceed.
Option 2: Disable BitLocker from Control Panel
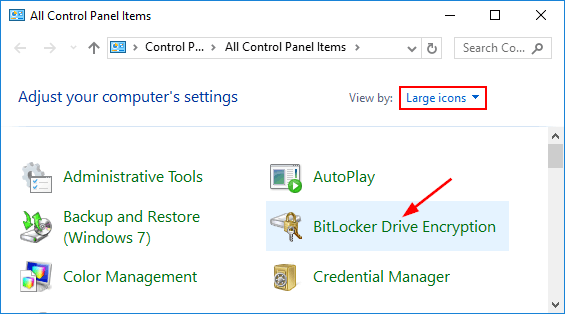
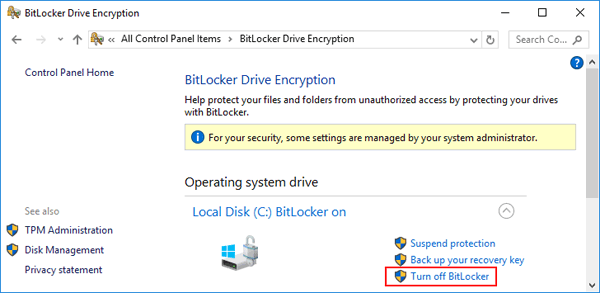
- Open the Control Panel in Large icons view. Click BitLocker Drive Encryption.
- Click the Turn off BitLocker link where it appears next to your drive.
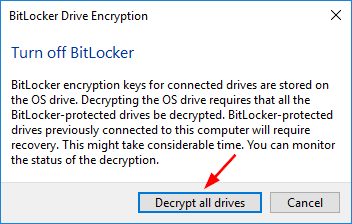
- Click Decrypt all drives to begin the decryption process.
How to Know if Your Drive is Decrypted?
BitLocker decryption is running in the background and you won’t be informed when it’s complete. Depending on the amount of data on your drive, it can take several hours to get the job done. To check out the decryption progress, open an elevated Command Prompt and run the following command:
manage-bde -status
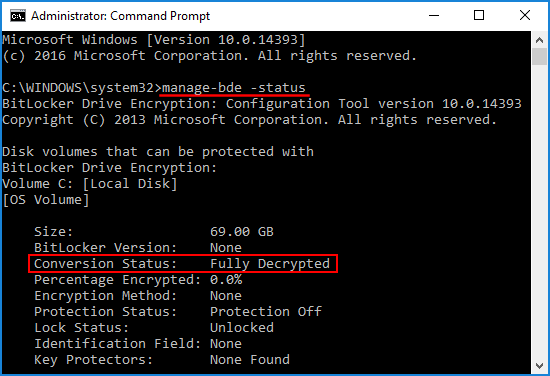
This will display the Bitlocker stauts for all disks. In this example, the conversion status shows my OS drive is fully decrypted. If the decryption is still in progress, the conversion status will shown as “Decrytpion in Progress”, and you need to wait for “Percentage Encrypted” reaches 100%.