How to prevent others from accessing the Control Panel? Control Panel exposes lots of system settings to users that you may not want to mess up. In this tutorial we’ll show you 2 simple ways to disable or enable Control Panel in Windows 10 / 8 / 7.
Tips: The Settings app is supposed to replace the classic Control Panel in Windows 10. If you want to disable Settings, you can try this method: Hide Certain or All Settings Pages in Windows 10.
Method 1: Disable / Enable Control Panel Using Group Policy
- Use the Windows key + R keyboard shortcut to open the Run command. Type gpedit.msc and click OK to access Local Group Policy Editor.
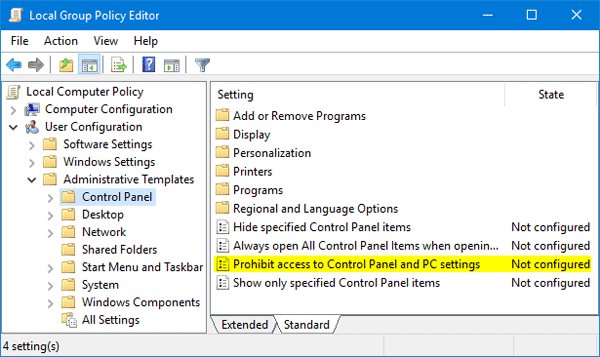
- Navigate to the User Configuration > Administrative Templates > Control Panel option from the left sidebar. Next, double-click the “Prohibit access to Control Panel and PC settings” or “Prohibit access to the Control Panel” policy on the right side.

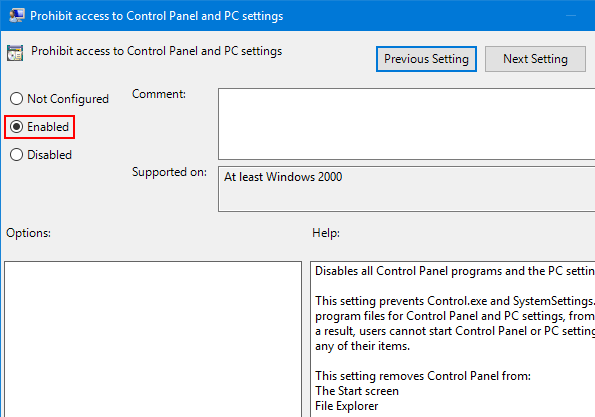
- Select the Enabled option, click Apply and then OK. If you want to enable the Control Panel later, just set the value to Not Configured or Disabled.

- This policy should take effect immediately. No restart is required. When you try to open the Control Panel, you’ll get this error message: “This operation has been canceled due to restrictions in effect on this computer. Please contact your system administrator.”

Method 2: Disable / Enable Control Panel Using Registry Editor
- Use the Windows key + R keyboard shortcut to open the Run command. Type regedit and click OK to access Registry Editor.
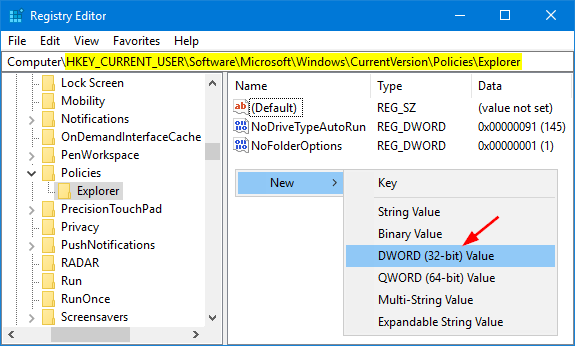
- Navigate to
HKEY_CURRENT_USER\Software\Microsoft\Windows\CurrentVersion\Policies\Explorerfrom the left sidebar, right-click empty space in the right pane and choose New > DWORD (32-bit) Value.
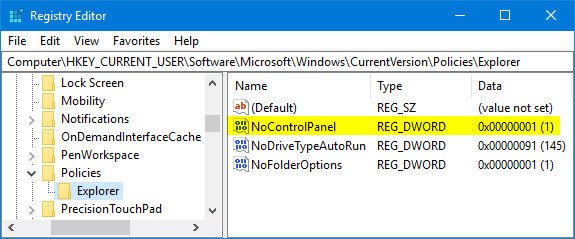
- Name your new value NoControlPanel and change the value from 0 to 1.

- Restart needed for the registry changes to take effect. After rebooting you’ll be unable to open Control Panel. If you want to restore access to Control Panel, just change the NoControlPanel value from 1 back to 0. That’s it!