Starting with Microsoft Office 2013, hardware graphics acceleration is enabled by default, which moves all graphics and text rendering from CPU to GPU (a chip on your graphics card) for getting better performance, but it may also increase the burden on the graphic card. If you experienced crash, slowness, blurred text and cursor hanging when running Office, turning off hardware graphics acceleration should solve the problem. Here are 2 ways to disable hardware graphics acceleration in Office 2019 / 2016 / 2013.
Method 1: Disable Hardware Graphic Acceleration from within Office Application
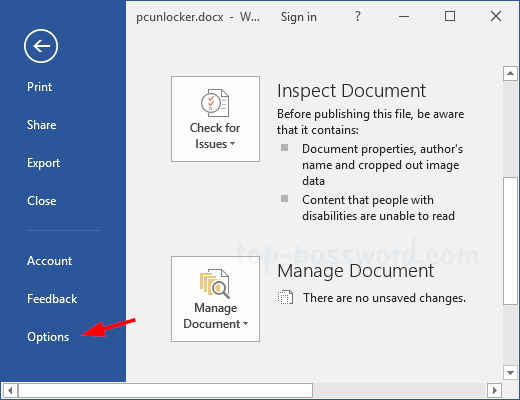
- Open any Office program like Word. Click the File tab and then choose Options in the left pane.

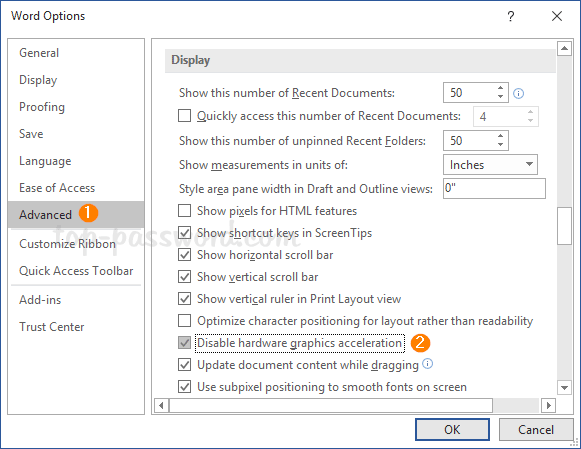
- Select the Advanced tab. In the right-hand pane, scroll down to the Display section and check the box that says Disable hardware graphics acceleration.

- Click OK to save the settings and restart your PC. After making these changes, the system will automatically turn off hardware graphics acceleration on all the other Office programs like Excel, PowerPoint, Outlook, etc.
Method 2: Disable Hardware Graphic Acceleration for Office with Registry Tweak
- Press the Windows + R key together, type regedit in the Run dialog box and hit Enter to open Registry Editor.

- Under the left-hand pane, navigate to one of the following registry keys depend on your Office version. If the Graphics key doesn’t exist, you have to create it manually.
- Office 2010: HKEY_CURRENT_USER\Software\Microsoft\Office\14.0\Common\Graphics
- Office 2013: HKEY_CURRENT_USER\Software\Microsoft\Office\15.0\Common\Graphics
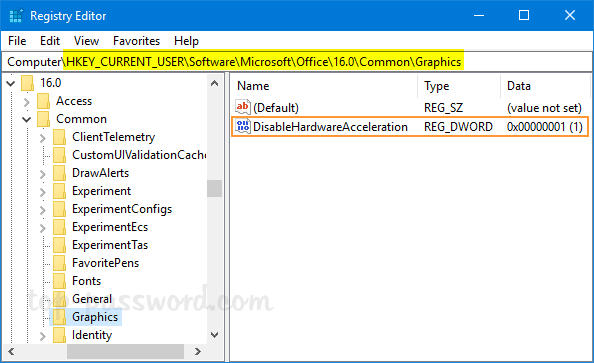
- Office 2016 / 2019: HKEY_CURRENT_USER\Software\Microsoft\Office\16.0\Common\Graphics
- On the right pane, create a new DWORD (32-bit) DisableHardwareAcceleration. Double-click it and change the value data from 0 to 1.

- Close the Registry Editor and reboot the machine to apply the changes.