Is there a way to block PowerShell from running through group policy? Windows PowerShell comes pre-installed in Windows 10 and it’s a command-line shell designed especially for programmers and IT professionals. If you’re a standard Windows user, you may want to get rid of it. In this tutorial we’ll show you how to disable PowerShell for all user accounts in Windows 10, using Software Restriction Policies GPO.
Part 1: Find the PowerShell Executable Program
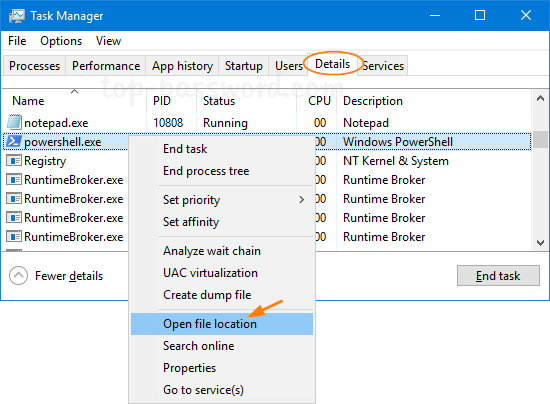
- After launching Windows PowerShell, press the Ctrl + Shift + Esc keys simultaneously to bring up the Task Manager window. Go to the Details tab, scroll down to find the process called powershell.exe. Right-click on it and select “Open file location“.
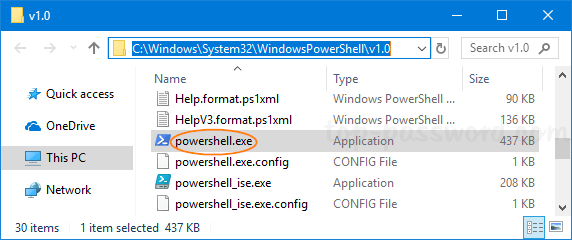
- Windows Explorer will open the folder where the powershell.exe file is located. Note down the full path as we’ll need it later.
Part 2: Disable PowerShell with Software Restriction Policies
- Open the Local Group Policy Editor and navigate to:
Computer Configuration > Windows Settings > Security Settings > Software Restriction Policies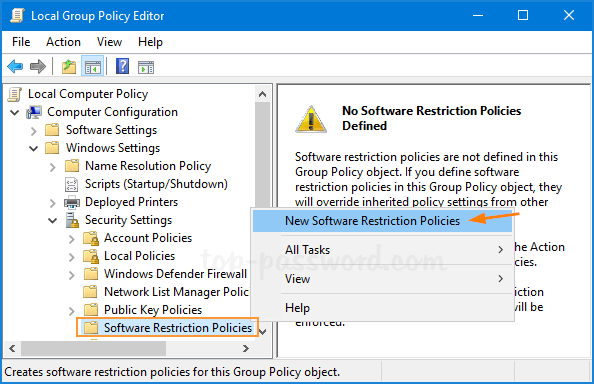
Right-click on Software Restriction Policies on the left console tree, and then select New Software Restriction Policies.
- Select the newly-created “Additional Rules” node. Right-click any empty space in the right pane and choose “New Hash Rule“.
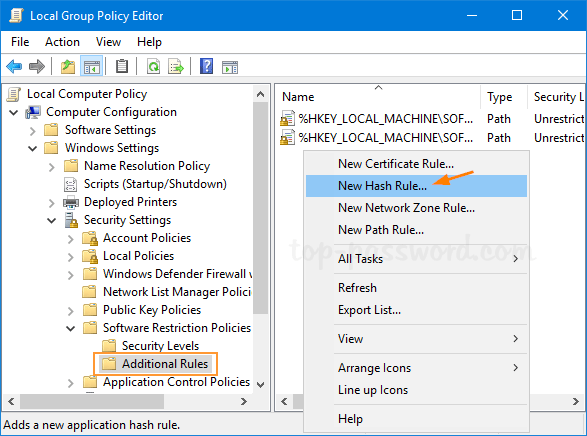
- Click the Browse button to select the powershell.exe file we’ve located previously, and set the Security level to Disallowed. Click OK.
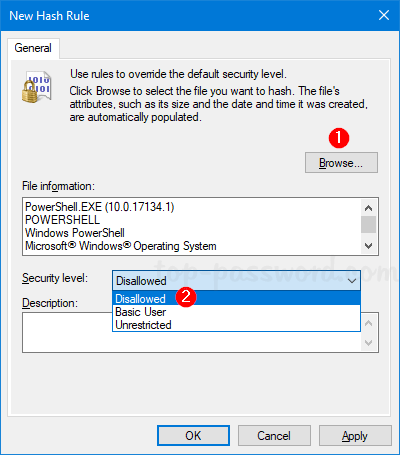
- If you also want to block the Windows PowerShell ISE from running, just repeat the above steps to add a new rule to block powershell_ise.exe.
- Reboot your computer for the policies to take effect. When you try to run PowerShell you should receive the following error message “This app has been blocked by your system administrator“.

Renaming the PowerShell executable file couldn’t bypass the above message as well.