The Settings app is the most used tool in Windows 11, which lets you control almost all aspects of the system. When you need to share your PC with others, you may want to disable access to the Settings app. In this tutorial we’ll show you 2 simple methods to disable the Settings app in Windows 11.
Method 1: Disable the Settings App Using Group Policy
- Open Local Group Policy Editor and browse to:
User Configuration > Administrative Templates > Control Panel. On the right pane, locate and double-click the “Prohibit access to Control Panel and PC settings” policy.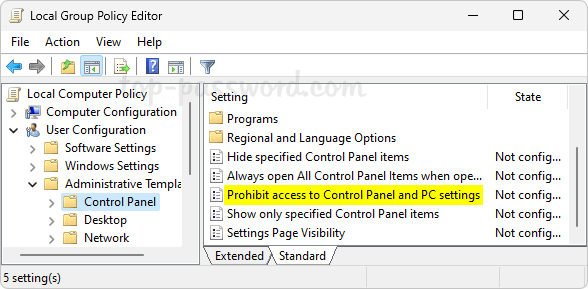
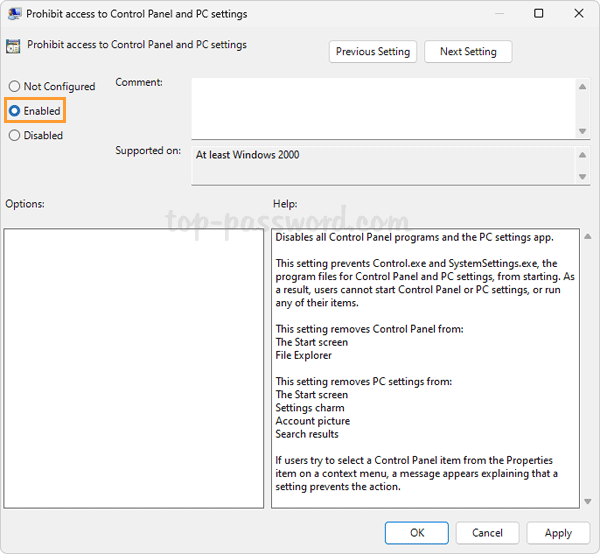
- Choose the Enabled option. Click Apply and then OK.
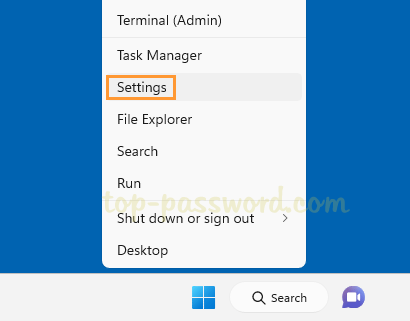
- Reboot your computer to apply the changes. The next time you right-click the Start button and choose Settings, the Settings app will no longer launch.
Method 2: Disable the Settings App Using Registry Editor
- Open Registry Editor and navigate to:
HKEY_CURRENT_USER\Software\Microsoft\Windows\CurrentVersion\Policies\Explorer. In the right pane, right-click the blank area and select New -> DWORD (32-bit) Value.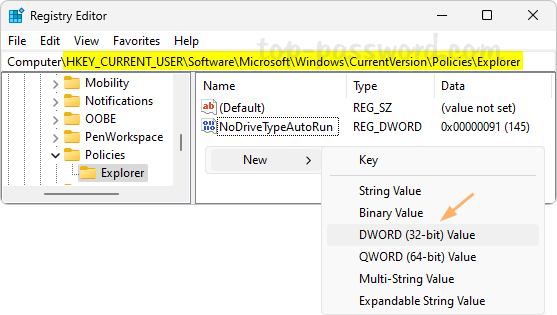
- Name the newly created DWORD as NoControlPanel, and set its value data to 1.
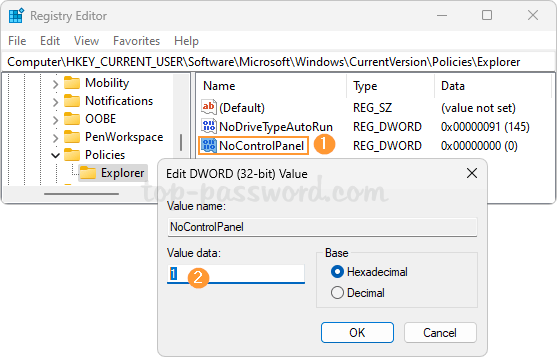
- Close Registry Editor and restart your system. The Settings app will no longer be accessible to anyone using your computer.
That’s it!