In Windows 11, apps can declare an unique alias name used to run the app from Command Prompt. When the App Execution Aliases feature is turned on, you can use an alias to start your app without having to specify the full path to your app. In this tutorial we’ll show you how to enable or disable App Execution Aliases in Windows 11.
How to Enable or Disable App Execution Aliases in Windows 11
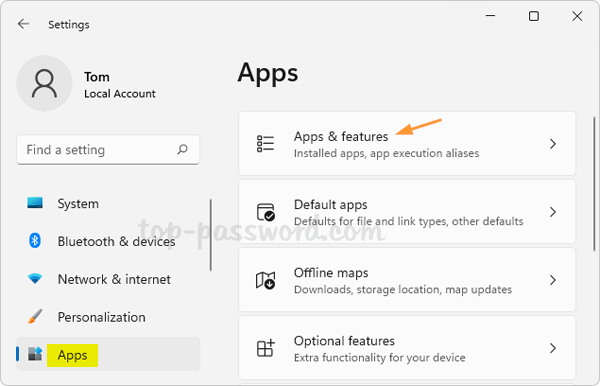
- Open Windows Settings app by pressing the Windows + I keyboard shortcut, and then navigate to Apps -> Apps & features.

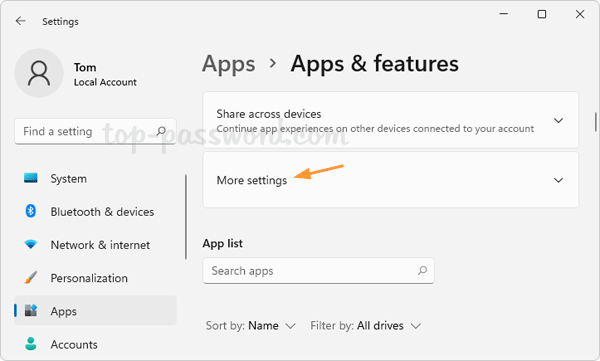
- Click More settings on the right side.

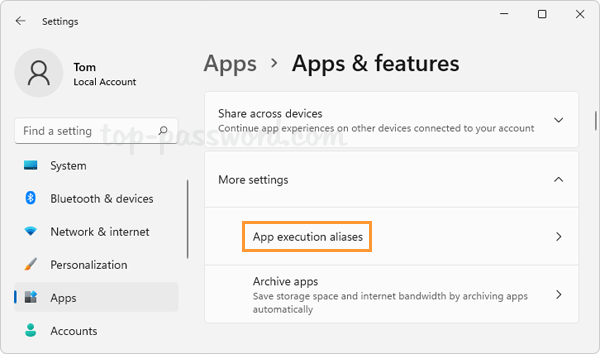
- Click App execution aliases.

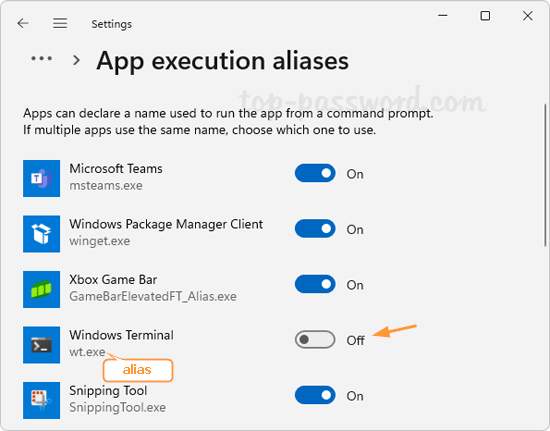
- You’ll see a list of apps as well as their alias names. The alias names always end with the “.exe” extension. You can turn on or off the toggle switch next to your desired apps.

For example, if you’ve enabled App Execution Aliases for the “Windows Terminal” app, then you can simply type
wt.exein the Command Prompt to launch Windows Terminal. When you disable its alias name, you’ll get the error message:‘wt’ is not recognized as an internal or external command, operable program or batch file.
That’s it!