When you try to log on to your Windows account, you might encounter the error “The group Policy Client service failed the logon. Access is denied.”
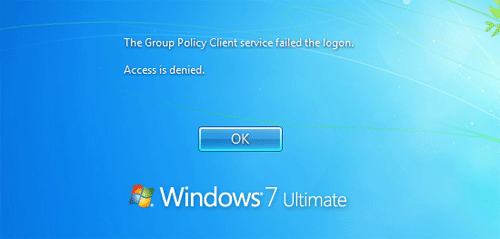
When you click OK, the system will return you back to the login screen. Searching this on the net gave a lot of answers but none of them seemed to solve it. In the end we discovered that it is a permissions problem and not a corrupt profile problem. Here’s two methods to fix this issue.
Before getting started, you need to log on to your computer with a working administrator account. Then follow the solutions below to fix the problem for your affected account.
Method 1: Regain Registry Permissions
- Press the Windows key + R to bring up the Run box. Type regedit and hit Enter.
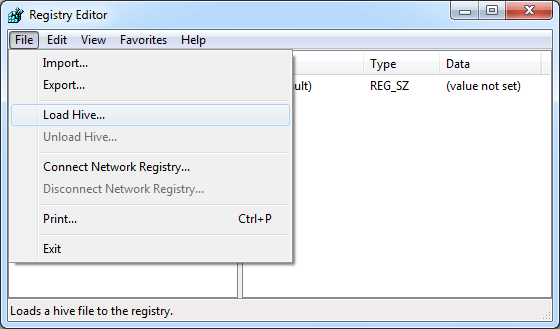
- When the Registry Editor opens, select HKEY_USERS in the left pane. Now, pull down the File menu and choose the Load Hive option.
- When the Load Hive dialog appears, select All Files in the Files of type box. Navigate to your affected profile folder (for example, C:\Users\<user_name>) and select the NTUSER.DAT hive. Click Open.
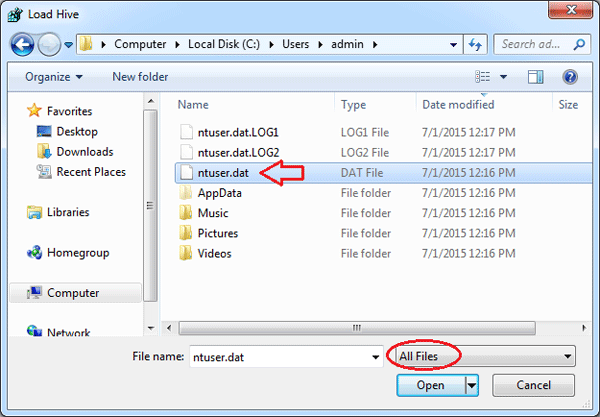
Note: if the NTUSER.DAT file doesn’t show up, you might need to configure Windows to display the hidden files.
- It will ask you for a name. Give it any name, it doesn’t matter what it is.
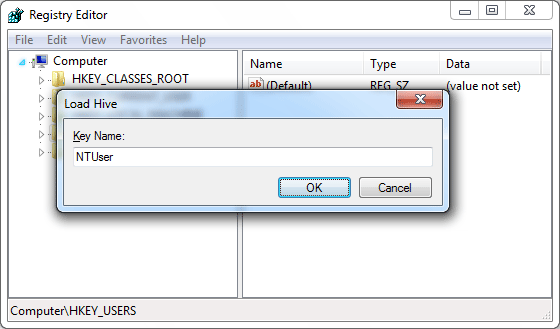
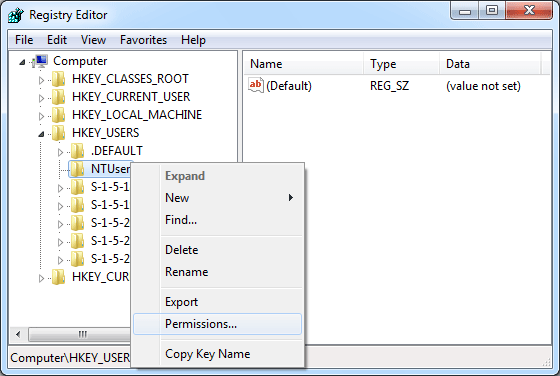
- You will now see the hive you just loaded with the name you gave it under the HKEY_USERS key. In my example, the entire NTUSER.DAT hive has been loaded into the Registry Editor under the registry location: HKEY_USERS\NTUSER.
- Right-click on HKEY_USERS\NTUSER and select Permissions.
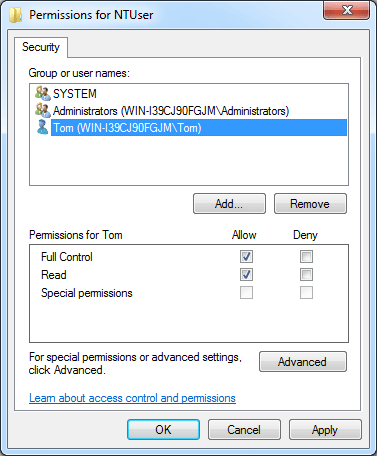
- Here you should see at least three accounts: System, Administrators and the name of your affected user account who’s profile you are fixing. If ANY of these are not shown it will not work. You need to add all three and then give them full control in the Permissions section.
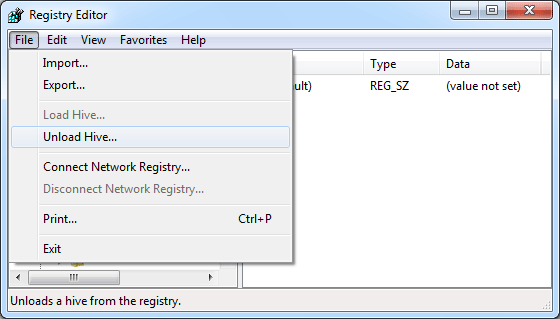
- Once you have added all three and given them the correct permissions, click the File menu and select Unload Hive. Close the Registry Editor.
- Log off or restart your computer. You should be able to login successfully with your account that you were having trouble with.
Method 2: Deleting the Local Profile
This method works by deleting your affected local profile, so you can then log back on. After successfully logging on, Windows will automatically create a new profile for your account. Here’s how to delete the profile for your affected Windows account in Windows 10, 8, 7 and Vista:
- Right-click on My Computer icon on your desktop, and then select Properties.
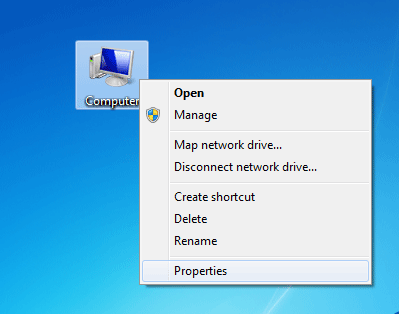
- From there, click the Advanced System Settings link on the left-hand side.

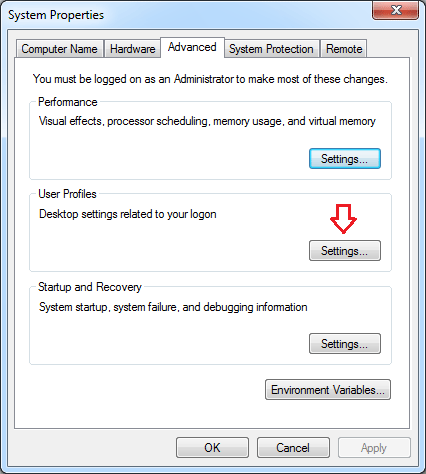
- When you see the System Properties dialog, click the Settings button in the User Profiles section.
- In the User Profiles dialog box, select the profile of your affected user account and click on Delete.
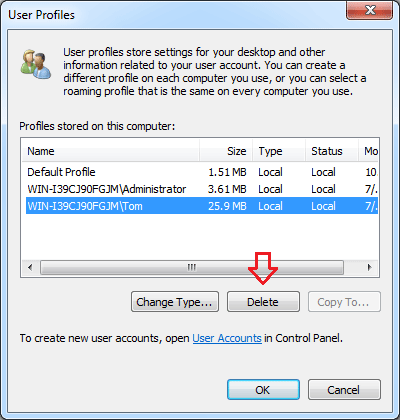
- Click OK to confirm. Now you’ve successfully deleted a user profile. Your problem should be fixed by now.