When you need to give a presentation or capture screenshots, it’s good idea to temporarily hide all desktop items so others can’t see what’s on your desktop. In this tutorial we’ll show you 3 easy ways to hide all shortcuts, folders and files from your desktop in Windows 10.
![]()
Method 1: Hide All Desktop Icons via Desktop’s Context Menu
Right-click any blank area on your desktop, and choose View from the resulting context menu, then uncheck Show desktop icons. This will hide all icons, folders and files from your desktop immediately.
![]()
Method 2: Hide All Desktop Icons via Group Policy
- Open the Local Group Policy Editor and navigate to:
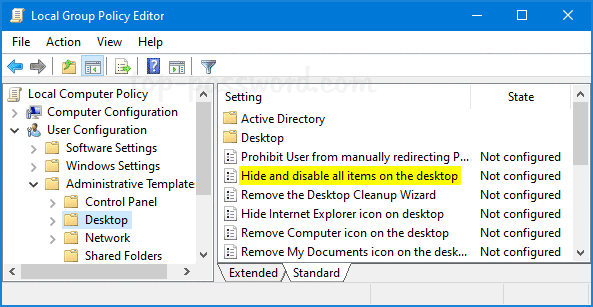
User Configuration -> Administrative Templates -> Desktop. On the right panel, double-click on the policy called Hide and disable all items on the desktop.
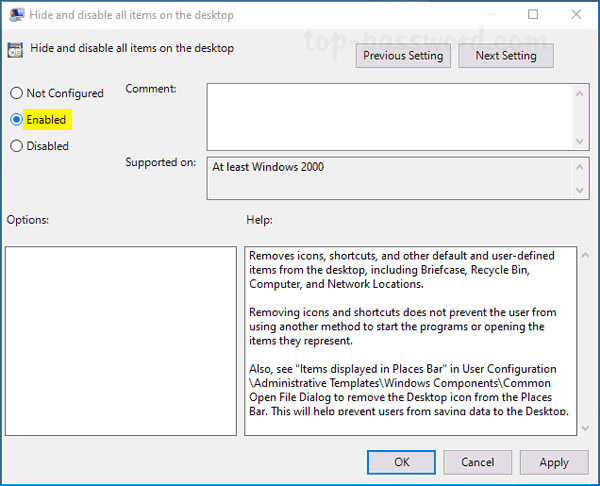
- Select the Enabled option. Click Apply and then OK.

- After rebooting your PC, all the desktop icons will disappear and you’re unable to right-click on the desktop any longer. If you need to unhide the desktop icons later, just change the group policy setting back to Not Configured.
Method 3: Hide All Desktop Icons via Registry Tweak
- Open Registry Editor and browse to the following key:
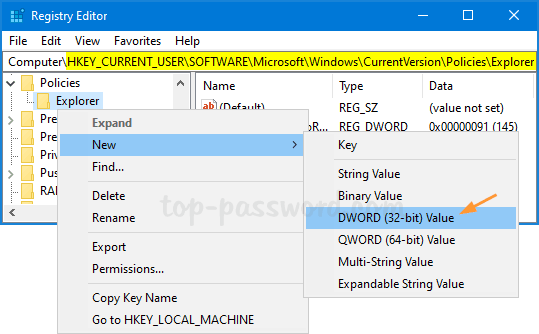
HKEY_CURRENT_USER\Software\Microsoft\Windows\CurrentVersion\Policies\ExplorerIf the Explorer key doesn’t key, you have to create it manually.
- Next, right-click on the Explorer key in the left-side panel, and select New -> DWORD (32-bit) Value.

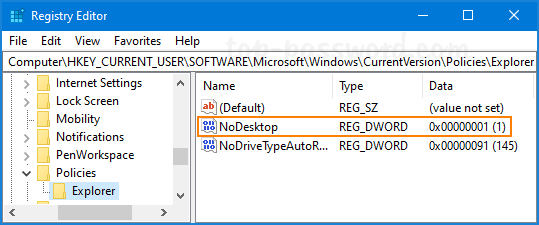
- Name the DWORD NoDesktop and set its value to 1.

- Finally, close Registry Editor and reboot Windows 10 to apply the changes.
Conclusion
Using the above methods you can hide everything on your Windows 10 desktop with ease. If you need to hide certain desktop shortcuts, files or folders but allow others to remain visible on the desktop, try the third-party program – Protect My Folders, which lets you hide any confidential stuff on your desktop with a password.