Is there a way to block a nearby network from appearing on your Windows 10 system? When you click on the Wi-Fi icon in the system tray, you can see a long list of nearby wireless networks. Some of them are not secure or using offensive names, and you may want to get rid of them. In this tutorial we’ll show you the easy way to hide or block specific Wi-Fi network in Windows 10.
How to Hide or Block Specific WiFi Network in Windows 10
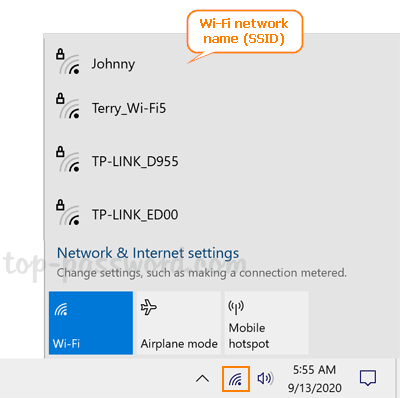
- Before getting started, click the Wi-Fi icon in the notification area and find the SSID of the Wi-Fi network you want to hide from the list.

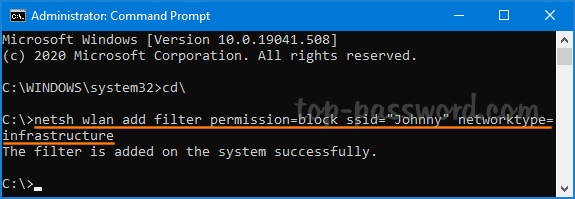
- Open an elevated Command Prompt. Type the next command to hide or block any specific Wi-Fi network, replacing “WiFi_Name” with the SSID you found in the step above.
netsh wlan add filter permission=block ssid="WiFi_Name" networktype=infrastructure
Note: This command applies to your system so you only hide the Wi-Fi network for yourself.
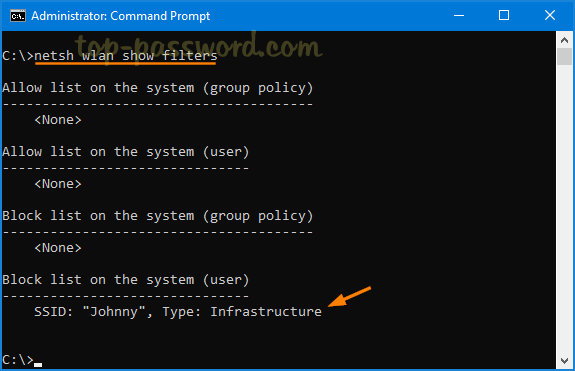
- You can view all the blocked Wi-Fi networks by running this command:
netsh wlan show filters
- To unhide a hidden / blocked Wi-Fi network, execute the following command to remove it from the blocked list.
netsh wlan delete filter permission=block ssid="WiFi_Name" networktype=infrastructure
Sometimes, you may want to configure Windows 10 to block all other Wi-Fi networks except your own SSID. To do so, run these commands:
netsh wlan add filter permission=allow ssid="Your_Own_WiFi" networktype=infrastructure

netsh wlan add filter permission=denyall networktype=infrastructure
That’s it!