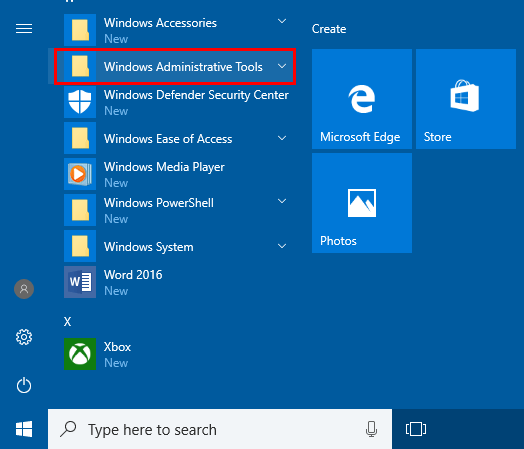
How do I hide Administrative Tools on the Start Menu? Administrative Tools is a folder that contains a collection of system maintenance tools for advanced users. If you are system administrator, you may want to hide, remove or disable Administrative Tools in Windows 10 and prevent others from using them.

In this tutorial we’ll show you how to hide / remove Administrative Tools from Start Menu in Windows 10, without deleting any files on your computer.
How to Hide / Remove Administrative Tools from Windows 10 Start Menu?
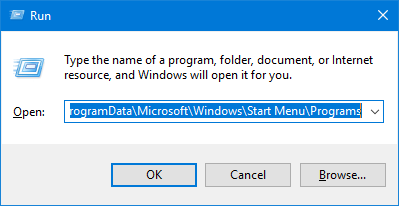
- Press the Windows key + R hotkey to open the Run box. Type the following path and hit Enter.
C:\ProgramData\Microsoft\Windows\Start Menu\Programs

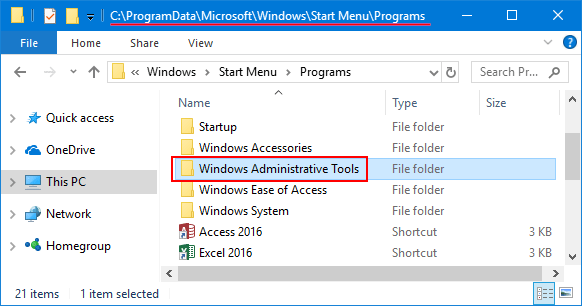
- File Explorer will open the Programs folder on the Start Menu. From there you can see the “Windows Administrative Tools” folder that you want to restrict others from accessing.

- In order to hide / remove Administrative Tools from Start Menu, you have to download and install the Protect My Folders program on your computer.
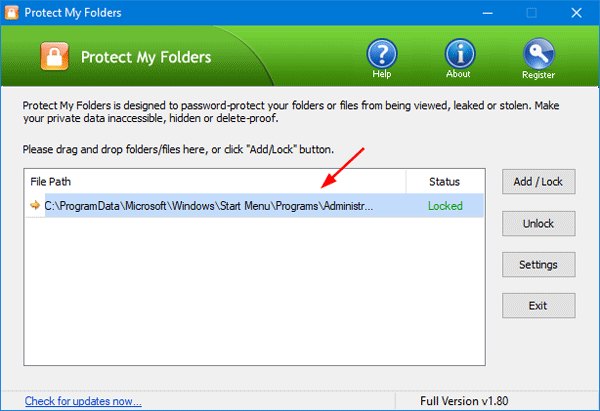
- Protect My Folders will ask you to set a password the first time you launch it. When you get to its main interface, drag the “Windows Administrative Tools” folder from File Explorer, and then drop it into the program.

- Your folder will be locked and hidden from File Explorer. Restart your computer and you’ll find that the “Windows Administrative Tools” folder is hidden/removed from the Start Menu for all user accounts in Windows 10. If you open the Administrative Tools from Control Panel, you’ll get “Access denied” error.
If you want to restore the Administrative Tools back to the Start Menu, just launch the Protect My Folders program again and remove your protected folder from the locked list. Reboot your PC for the Start Menu to reload. That’s it!