Similar to previous versions of Windows Server, there are two steps to install Active Directory: First you need to add the Active Directory Domain Services Role to your computer, then run the dcpromo commmand to promote your server to a domain controller. However, in Windows Server 2012, the dcpromo command has been deprecated.
So what replaces dcpromo in Windows Server 2012? There are now two ways to promote your server to a DC: One, through PowerShell and other is Server Manager. Here we will show you how to install Active Directory through Server Manager.
This tutorial can be divided into 2 steps. Before installing Active Directory, please assign a static IP address to your server and set a strong password for the built-in administrator account.
Part 1: Install Active Directory Domain Services
- Open Server Manager, then click on Add Roles and Features link.
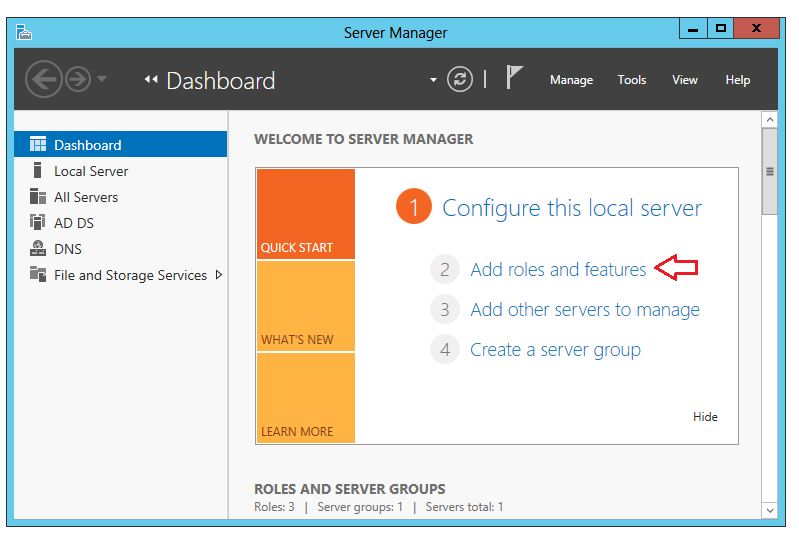
- Click Next on the Before you begin window.
- Select Role-based or feature-based installation and then click Next.
- Click Select a server from the server pool, click the name of the server to install Active Directory Domain Services to, and then click Next.
- Click Active Directory Domain Services. When the Add Roles and Features Wizard dialog box opens, select Add Features, then Next.
- On the Active Directory Domain Services page, review the information and then click Next.
- On the Confirm installation selections page, click Install.
- After the installation has completed, the server will restart.
Part 2: Promote the Server to a Domain Controller
Once above step is completed and all required features have been installed, now is the time to promote the server to a Domain Controller by following the below steps.
- Back in Server Manager, you will notice that AD DS has been added to the left navigation tree. Click on it and then click on More on the right navigation pane where it states that Configuration is required for Active Directory Domain Services.
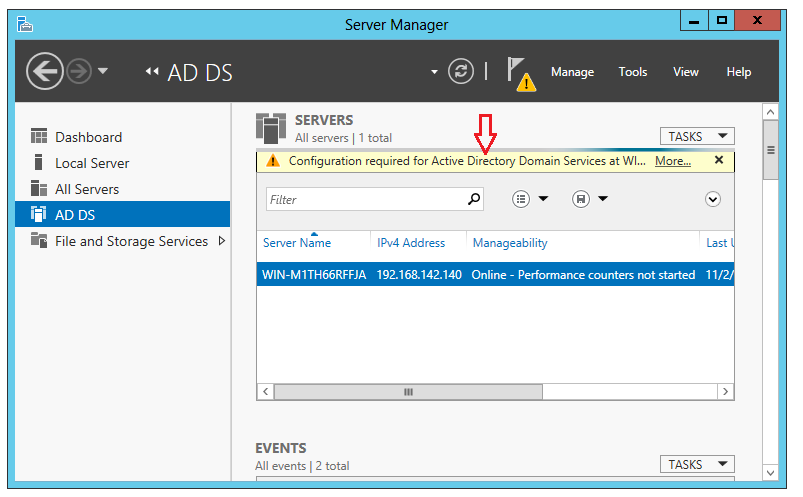
- You will now be presented with the All Servers Task Details window, in which you will click on Promote this server to a domain controller under Action.
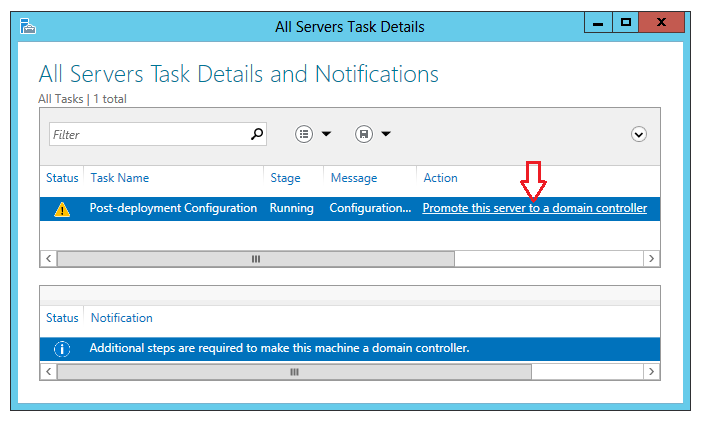
- The Deployment Configuration screen appears and we will select Add a new forest as this is the first domain controller. Enter your Root domain name and then click Next.

- On the Domain Controller Options page select your Forest and Domain functional levels, for this demo will leave the defaults of Windows Server 2012 for both, Enter a desired DSRM Password, click Next.
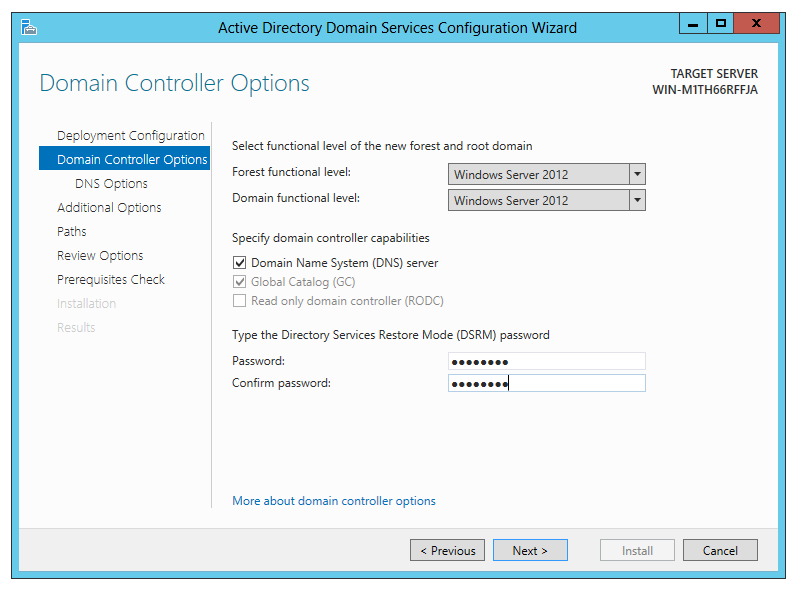
- On the DNS Options page, click Next.
- The NetBIOS domain name will then be inputted automatically. In the event of a conflict, it will suggest an alternative by appending the original name with a 0. Click Next.
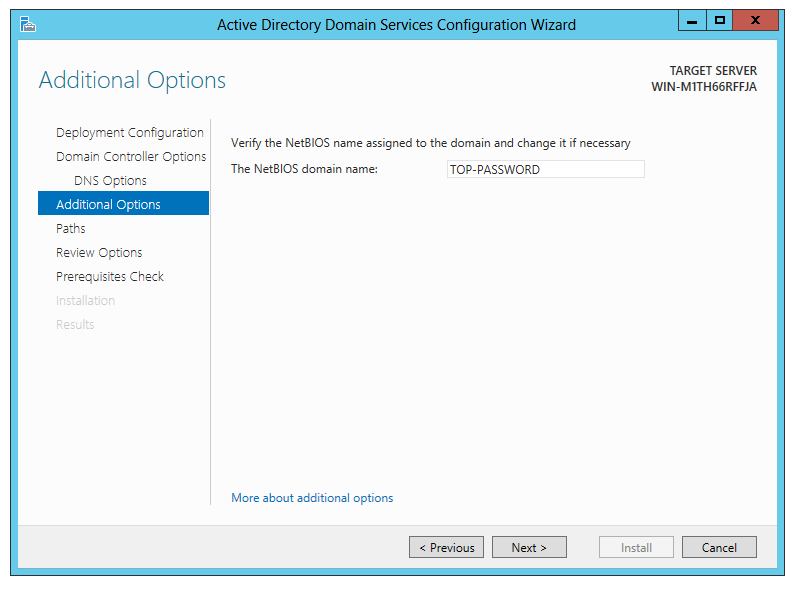
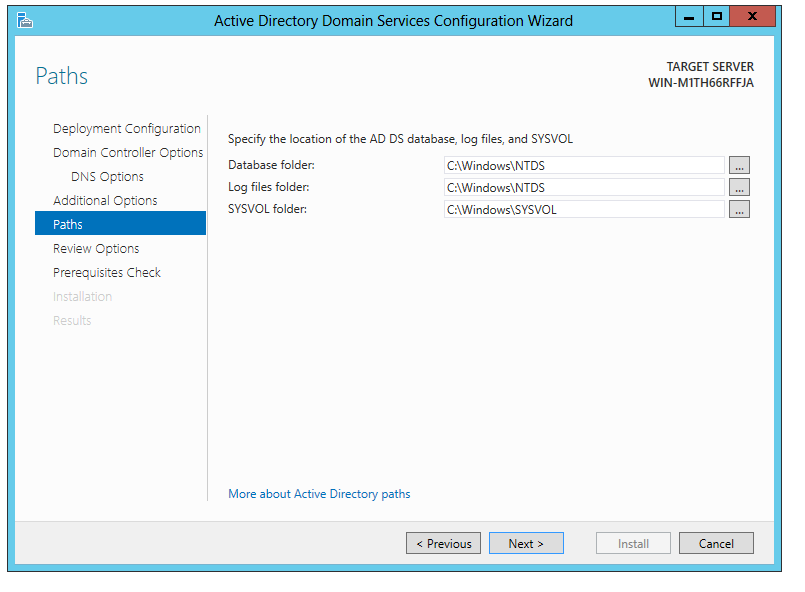
- On the Paths page verify the desired locations of the Database, Log files and SYSVOL folders, change the locations is required, click Next.
- On the Review Options page, click Next.
- The wizard will perform a Prerequisite check before the installation can continue. After the check is completed successfully click Install.

- The server will restart once the configuration has completed, the server is now a domain controller for the newly formed domain. Upon restart, you should be able to login using your domain administrator account.