When a non-admin user attempts to run a program with administrative privileges, a UAC prompt will pop up asking the user to enter password for specific Administrator account before allowing to make changes.
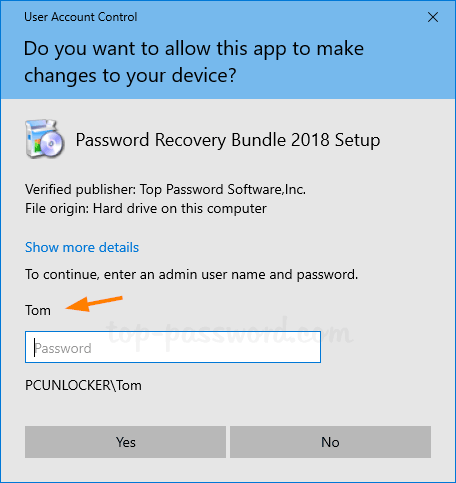
In this tutorial we’ll show you how to make Windows 10 hide the local administrator account from the UAC prompt, so standard users have to enter both user name and password of a local administrator account to elevate its permissions.
Method 1: Hide Administrator Account in UAC Prompt Using Group Policy
- Open the Local Group Policy Editor and browse to:
Computer Configuration\Administrative Templates\Windows Components\Credential User Interface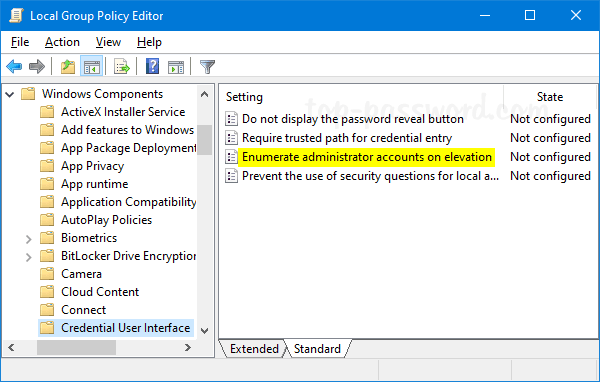
Double-click the “Enumerate administrator accounts on elevation” policy.
- Set it to Disabled. Click Apply and then OK.
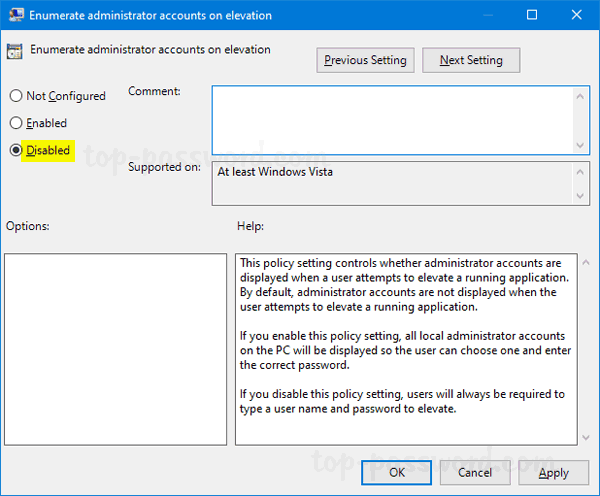
- The next time you require UAC elevation, you should be required to type in both a username and password.
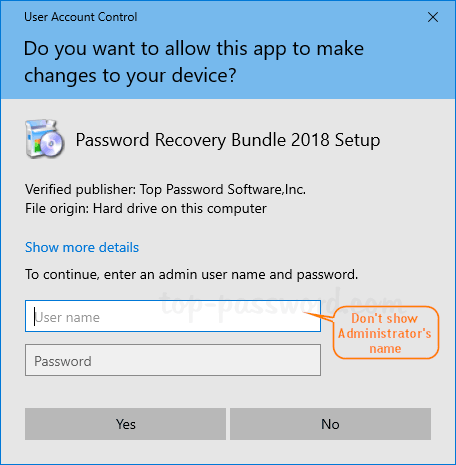
Method 2: Hide Administrator Account in UAC Prompt Using Registry Editor
For those using a Home edition of Windows 10 which lacks the Local Group Policy Editor, you can use the following registry tweak to hide the administrator accounts from the UAC prompt.
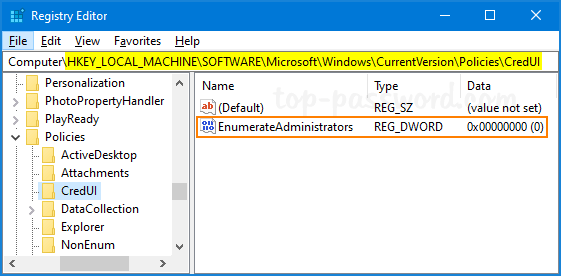
- Open Registry Editor and navigate to:
HKEY_LOCAL_MACHINE\SOFTWARE\Microsoft\Windows\CurrentVersion\Policies\CredUIIf you do not have the CredUI key, then just create it.
- Right-click any blank area in the right panel and select New -> DWORD (32-bit) Value. Name it EnumerateAdministrators and leave its value as 0.
- Close Registry Editor.
If you need to make UAC prompt show administrative accounts again, just change the value of EnumerateAdministrators to 1 and you’re done.