Every version of Windows comes with a series of default folders (such as Desktop, Document, Downloads, Pictures, Videos, and Music) for each user account. If you’re running out of space on your primary C: drive, you can move those folders to another drive to free up space. In this tutorial we’ll show you how to easily move the Desktop or Document folder to another drive in Windows 10.
How to Move the Desktop or Document Folder to Another Drive
- Open File Explorer and browse to your user account’s folder. If your user account name is
Tom, you’ll find theDesktopandDocumentfolders atC:\Users\Tom. Right-click the Desktop or Document folder you want to move, and select Properties.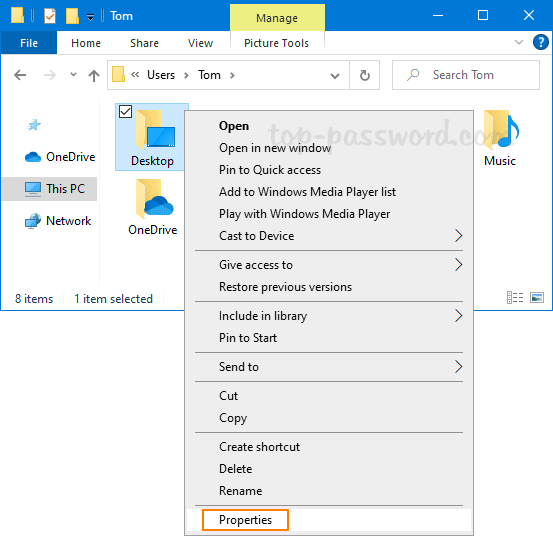
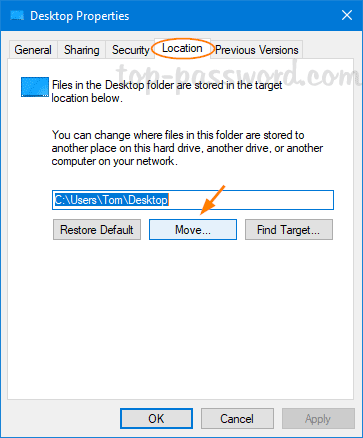
- Go to the Location tab, and click on the Move button.
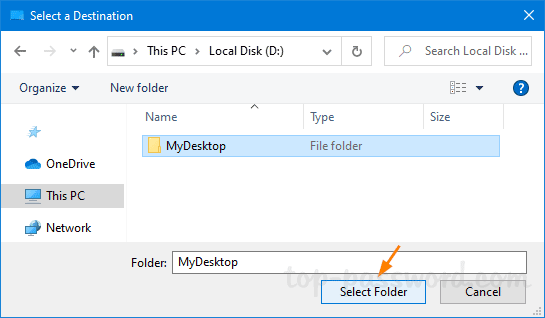
- When the folder browse dialog shows up, select a new location where you want the folder to be moved. Finally click on Select Folder.
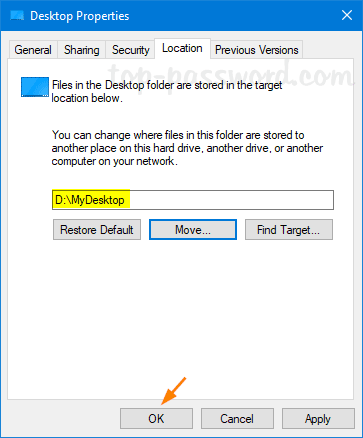
- The new location is now shown in the Location tab. Click OK to apply the change.
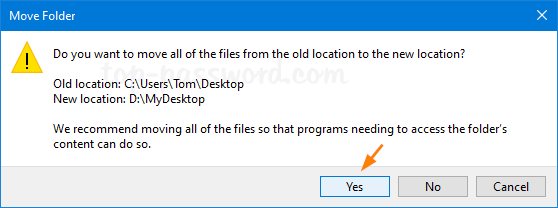
- Afterwards, click Yes to confirm moving all your files from the old location to the new folder.
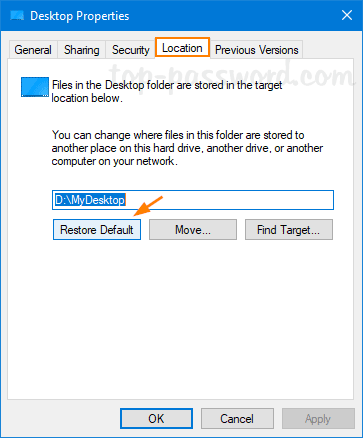
Whenever you want to restore the Desktop or Documents folders to its original location, just right-click on the folder and select Properties, then click on the Restore Default button under the Location tab.
That’s it!