Windows 10 uses the index to make searching your files faster. If you want to customize which file types are indexed or change what locations you want indexed, you have to access the Indexing Options. In this tutorial we’ll show you 4 ways to open Indexing Options in Windows 10.
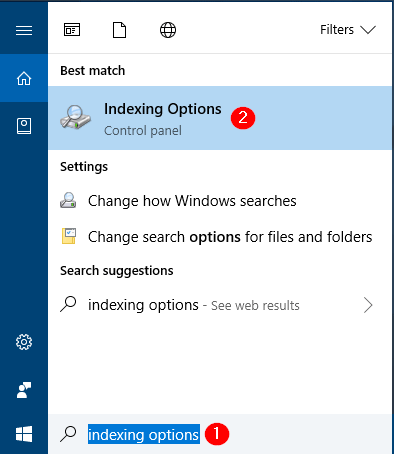
Method 1: Open Indexing Options via Cortana Search
Type indexing options in the Cortana Search box on Windows 10 taskbar. When the results appear, click the Indexing Options item and you’ll see the Indexing Options dialog box.
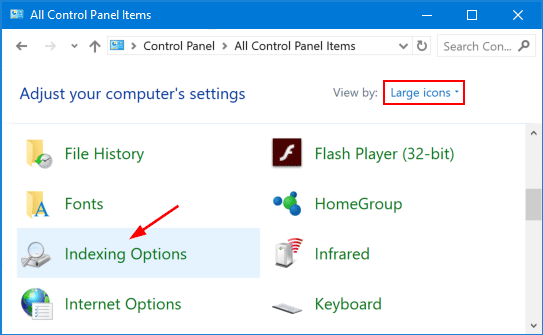
Method 2: Open Indexing Options via Control Panel
Open the Control Panel and change it to Large icons view, and then click Indexing Options to launch it.
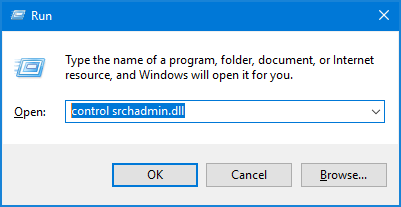
Method 3: Open Indexing Options via Run or Command Prompt
Open the Command Prompt, or press the Win + R keys to open the Run box. Type one of the following commands and press Enter.
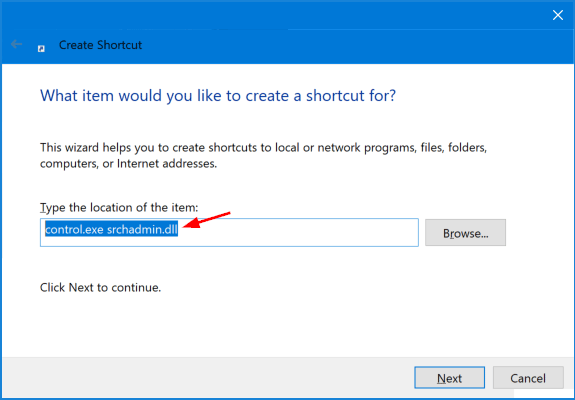
control.exe srchadmin.dll

rundll32.exe shell32.dll,Control_RunDLL srchadmin.dll

control /name Microsoft.IndexingOptions
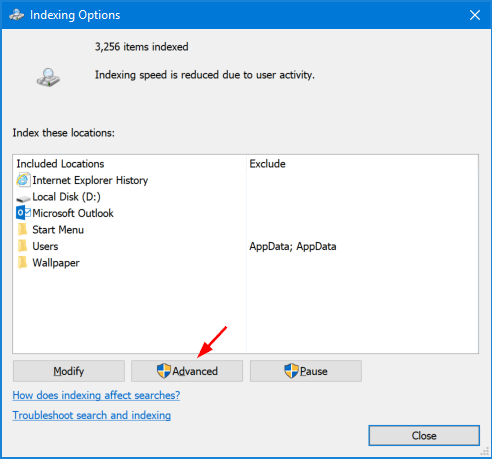
This will bring up the Indexing Options dialog box immediately.
Method 4: Create Indexing Options Shortcut
If you need to change the Windows index settings frequently, you can create a desktop shortcut to open Indexing Options in Windows 10. Here’s how:
- Right-click any empty space on your Windows 10 desktop and then select New -> Shortcut.
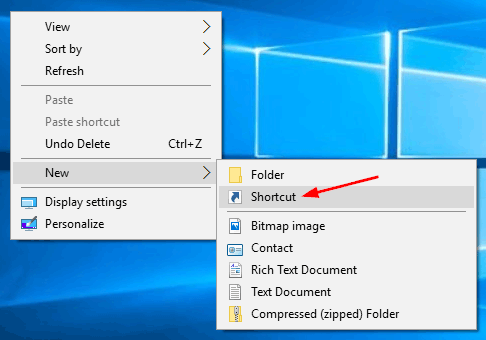
- When the Create Shortcut wizard opens, type control.exe srchadmin.dll in the location box and click Next.
- On the next screen give the new shortcut a name, and click Finish.
- By default, the Indexing Options shortcut uses the same icon as Control Panel, and you can give it a proper icon.