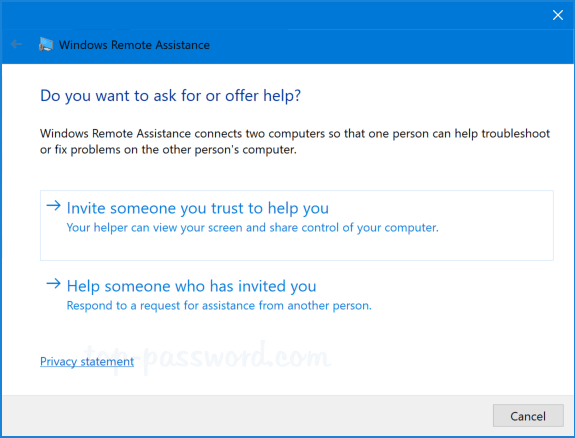
Windows Remote Assistance allows someone (or helper) you trust to take over your PC and provide remote technical support. It’s something similar to TeamViewer or UltraVNC. This tutorial will show you different ways to open Remote Assistance in Windows 10 / 8 / 7.
Method 1: Open Windows Remote Assistance from Run Command
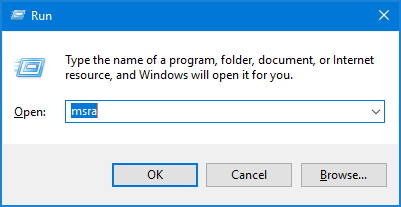
Press the Windows key and the R key at the same time to open the Run command box, type in msra and hit Enter.
This should open up Windows Remote Assistance in no time.
Method 2: Open Windows Remote Assistance via Search
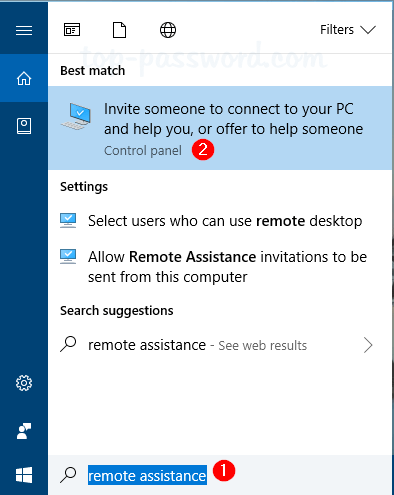
Just click the Start button and directly type “remote assistance“. The search box will show up and deliver the results. Click the option “Invite someone to connect to your PC and help you, or offer to help someone” to launch Windows Remote Assistance.
Method 3: Open Windows Remote Assistance from Control Panel
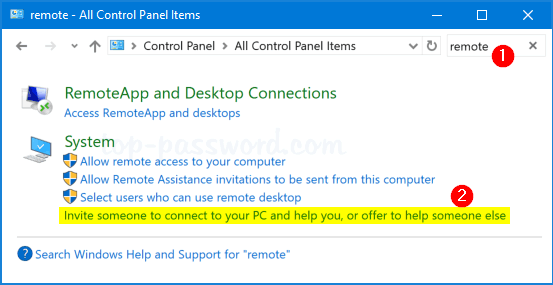
Open the Control Panel. Type “remote” into the Search box in the upper right corner of the window, and then click the link labelled “Invite someone to connect to your PC and help you, or offer to help someone else“.
Method 4: Create a Desktop Shortcut to Start Windows Remote Assistance
If you need to provide remote technical support to your customers frequently, it’s a good idea to create a desktop shortcut to start Windows Remote Assistance. Follow these steps:
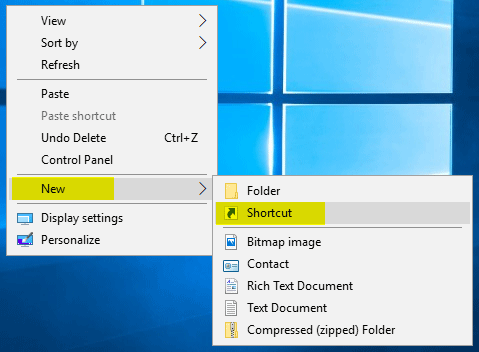
- Right-click an empty area on your desktop, and select New -> Shortcut from the context menu.
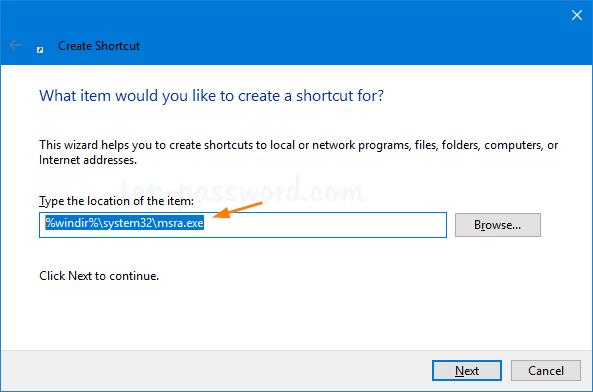
- Type “%windir%\system32\msra.exe” into the location box, and click Next.
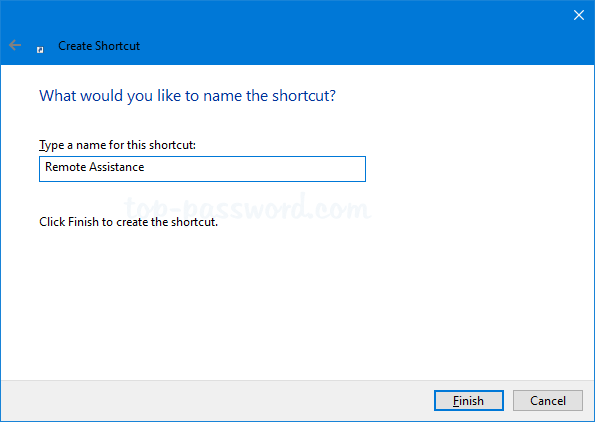
- Give the shortcut a name, and click Finish.
A new shortcut appears on your desktop. Double-click or tap it, and it will open the Windows Remote Assistance app immediately.