Snipping Tool is a built-in screen grabbing software available in all versions of Windows, which makes it easy to capture snapshot. In this article we’ll show you 4 quick ways to open Snipping Tool in Windows 10.
Method 1: Open Snipping Tool from Start Menu
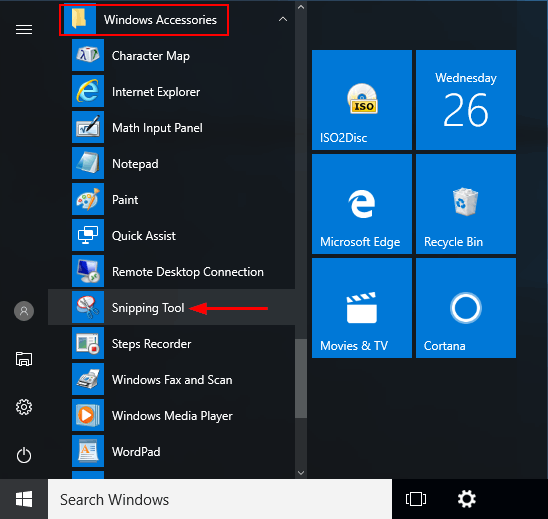
To launch the Snipping Tool in Windows 10, click the Start button. From the Start Menu, expand Windows Accessories and click the Snipping Tool shortcut.
Method 2: Open Snipping Tool from Run or Command Prompt
Press the Windows key + R keyboard shortcut, then type snippingtool in the Run box and press Enter.
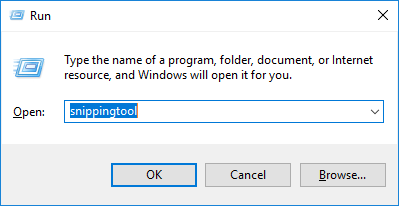
You can also launch the Snipping Tool from Command Prompt. Just type snippingtool at the Command Prompt and press Enter.

Method 3: Open Snipping Tool via Cortana Search
Just click the Search or Cortana icon in the Windows 10 taskbar and type “snipping“, You’ll see the Snipping Tool shortcut appear at the top of the list.
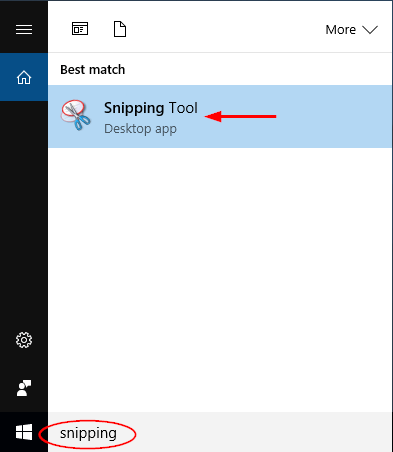
Click the shortcut and Snipping Tool will open immediately.
Method 4: Create a Keyboard Shortcut for Snipping Tool
If you need to use the Snipping Tool regularly, you can create a keyboard shortcut that lets you open Snipping Tool by pressing a hotkey. Here’s how:
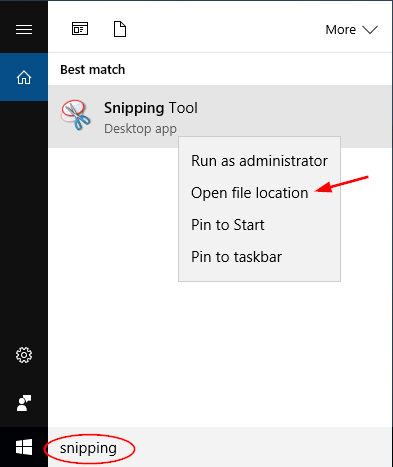
- Click the Search or Cortana icon in the Windows 10 taskbar and type “snipping“. Right-click the Snipping Tool shortcut from the result, and select “Open file location“.
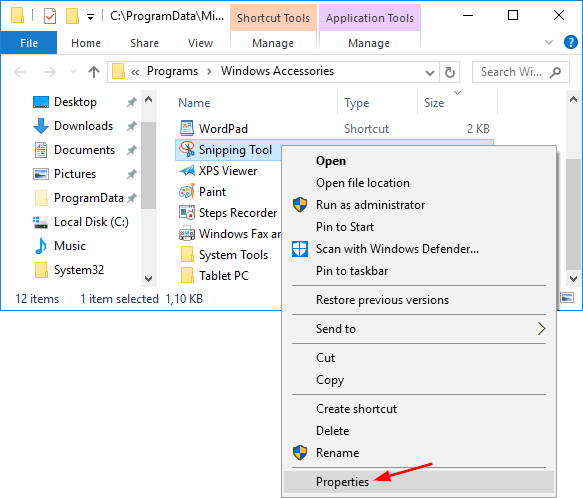
- Windows Explorer will open the Snipping Tool shortcut in the Program/Accessories folder. Right-click on Snipping Tool and select Properties from the context menu.
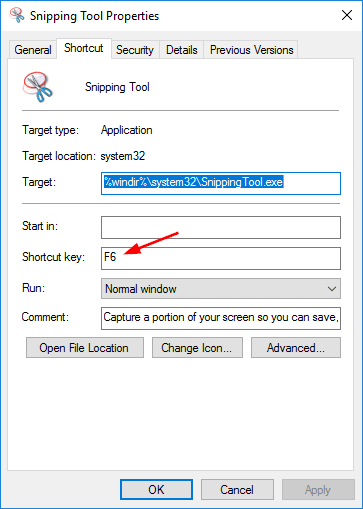
- Under Shortcut tab, click the Shortcut key text box, and then enter a keyboard shortcut that you would like to use to launch Snipping Tool. For example, if you want to use Ctrl + F12 keyboard shortcut, just hold down the Ctrl key and press F12.
