How to change Windows administrator account name? The built-in administrator account is one of the most Windows accounts targeted by attackers. To improve security on your computer, you should rename the administrator account to less common name because this lowers the risk of brute force attacks.
In this tutorial we’ll show you 4 ways to rename Windows 10/8/7 user account, including the local administrator and guest accounts.
Method 1: Change Windows Account Name from Command Prompt
How to rename a Windows account from Command Prompt? Well, you can use the net user command to either reset a user password or activate a disabled/locked account, but it doesn’t support renaming user account. To rename a Windows account, we need to use the WIMC command. Here’s how:
- Open an elevated Command Prompt. In Windows 10 or 8, press the Windows key + X and select “Command Prompt (Admin)” from the power user menu.
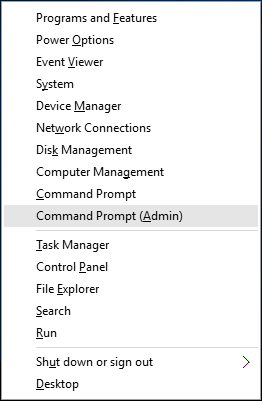
If you’re using Windows 7 or Vista, click Start, then All Programs -> Accessories, right-click Command Prompt and select Run as administrator.
- At the Command Prompt, run the following command for renaming the administrator account, replacing Admin with your desired name.
wmic useraccount where name='Administrator' rename 'Admin'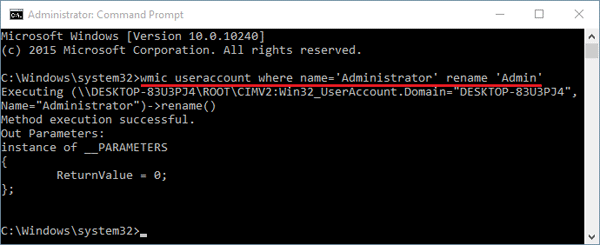
- You’ve successfully changed the built-in administrator account name.
Method 2: Change Windows Account Name in Computer Management
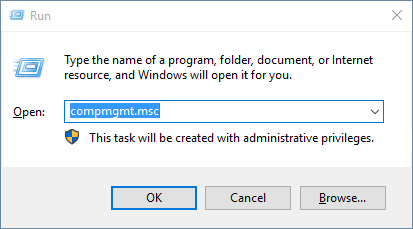
- Press the Windows key + R to bring up the Run box. Type compmgmt.msc and hit Enter.
- The Computer Management console should open. Expand System Tools -> Local Users and Groups -> Users and you’ll see a list of local user accounts in the right pane.
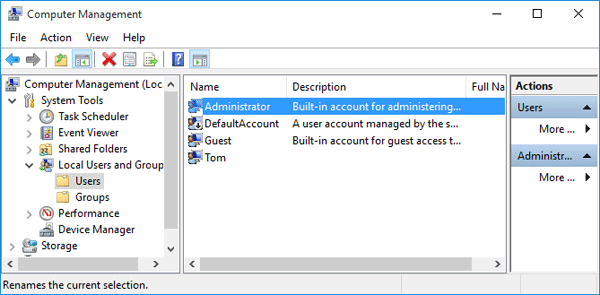
- Right-click on the local account you wish to rename, and then select Rename from the drop-down context menu.
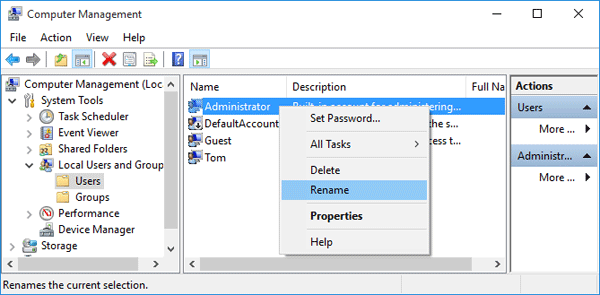
- Once you click on the Rename option, you will be able to edit the account name. Type in the new name you want to give the account and press Enter.
Method 3: Change Windows Account Name from Control Panel
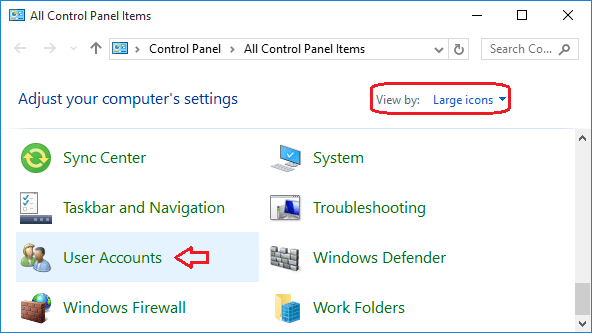
- First of all, you need to open the Control Panel applet. Set the View by option to Large icons and then click User Accounts.
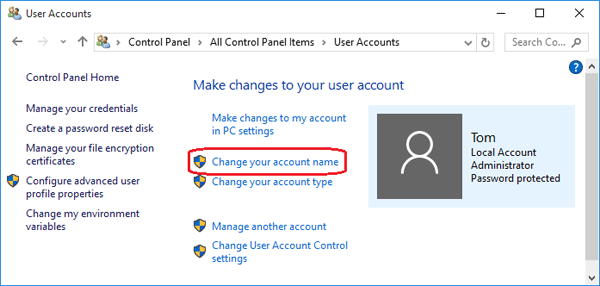
- On the User Accounts window, click the “Change your account name” link.
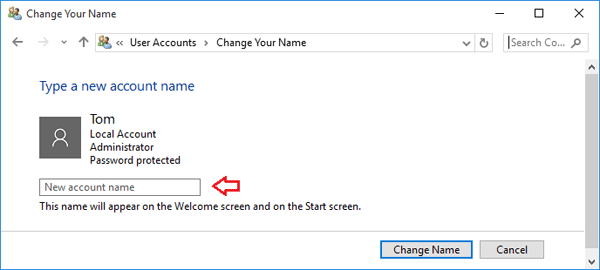
- Now you can change the account name to something of your choice. When done, click on the Change Name button.
Method 4: Rename Windows Administrator/Guest Using Local Security Policy
This method only allows you to rename the built-in local administrator and guest accounts in Windows.
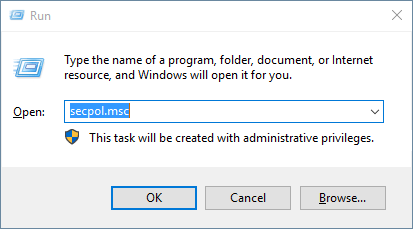
- Press the Windows key + R to open the Run box. Type secpol.msc and press Enter.
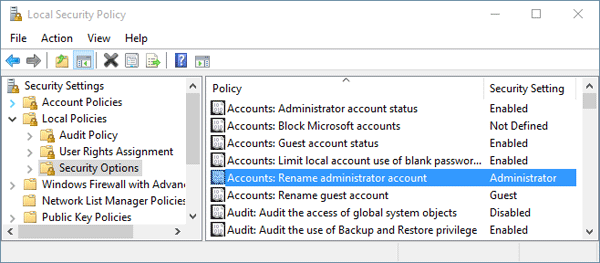
- The Local Security Policy Editor should open. Navigate to Security Settings -> Local Policies -> Security Options.
- In the right pane, find the policy “Accounts: Rename administrator account“, and double-click on it to open the respective policy setting.
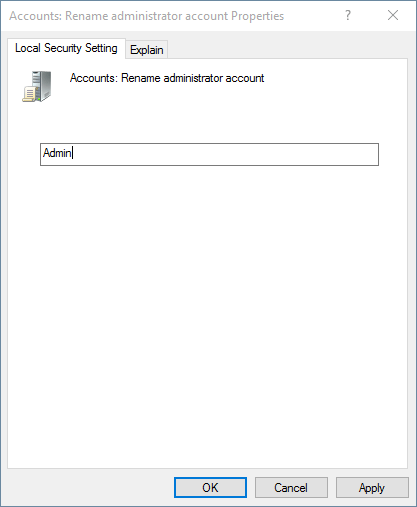
- Simply enter the new administrator account name and click OK. Your Administrator account has now been renamed to the one you entered.
Note that you can also change the name of the built-in Guest account because there is also a local policy “Accounts: Rename guest account” for guest account.