Your old program doesn’t work properly or can’t run at all after upgrading to Windows 10? To get some older programs to run on a modern version of Windows, you may need to turn on compatibility mode. In this tutorial we’ll show you 2 simple methods to run a Windows program in compatibility mode.
Method 1: Enable Compatibility Mode for a Program in Properties
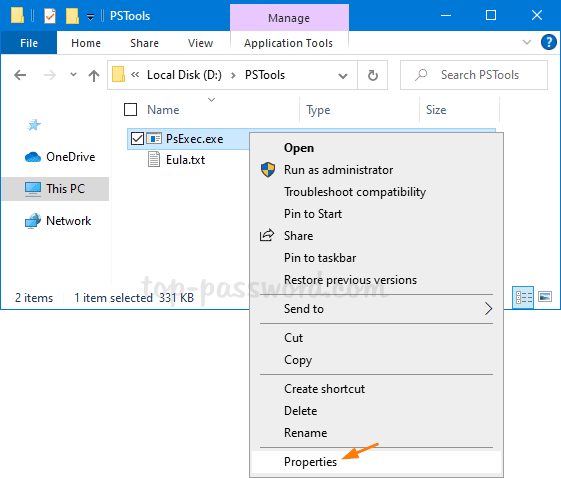
Right-click your program’s shortcut or the .exe file, and then select Properties from the context menu.

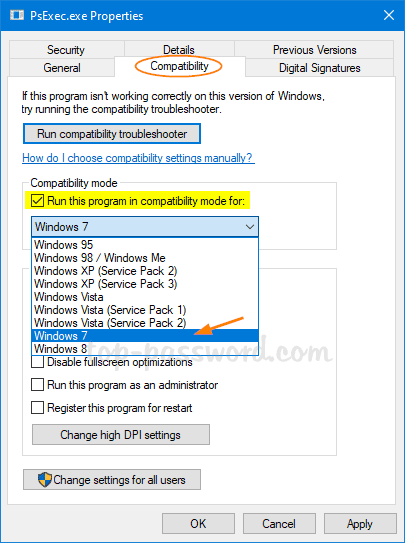
Under the Compatibility tab, check the “Run this program in compatibility mode for” option, and then choose which version of Windows you want to use.

For example, if your program doesn’t run properly on Windows 10 but did run properly on Windows 7, then select “Windows 7” from the drop-down menu. This will force the program to run in Windows 7 compatibility mode.
Method 2: Enable Compatibility Mode for a Program Using Command Prompt
First of all, you need to know which compatibility mode you want your program to run with. The following tables show the values for different compatibility modes.
| Description | Value Data |
| Windows 8 | WIN8RTM |
| Windows 7 | WIN7RTM |
| Windows Vista SP2 | VISTASP2 |
| Windows Vista SP1 | VISTASP1 |
| Windows Vista | VISTARTM |
| Windows XP SP3 | WINXPSP3 |
| Windows XP SP2 | WINXPSP2 |
| Windows 98 | WIN98 |
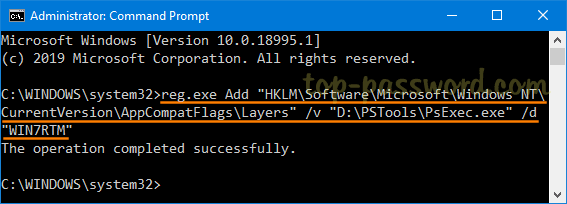
Next, Open an elevated Command Prompt and run the following command. Replacing "D:\PSTools\PsExec.exe" with the full path of your .exe file, and “WIN7RTM” with your desired compatibility mode.
reg.exe Add "HKLM\Software\Microsoft\Windows NT\CurrentVersion\AppCompatFlags\Layers" /v "D:\PSTools\PsExec.exe" /d "WIN7RTM"

Once this is done, your program will run in compatibility mode by default.