Is there a way to switch from RAID to AHCI without losing everything and having to reinstall Windows? Sometimes an SSD might not be detected by bootable CD when in RAID mode, and you have to enable AHCI mode. In this tutorial we’ll show you how to switch from RAID to AHCI without reinstalling Windows 10.
How to Switch Windows 10 from RAID to AHCI?
- To get started, you need to force Windows 10 to boot into Safe Mode by default. Just open the Command Prompt as administrator and run this command:
bcdedit /set {current} safeboot minimal
or launch Windows PowerShell with admin privileges and execute this command:
bcdedit /set safeboot minimal
- Next, restart your computer and press either F2 or DEL key to enter the BIOS Setup depending on your particular computer.
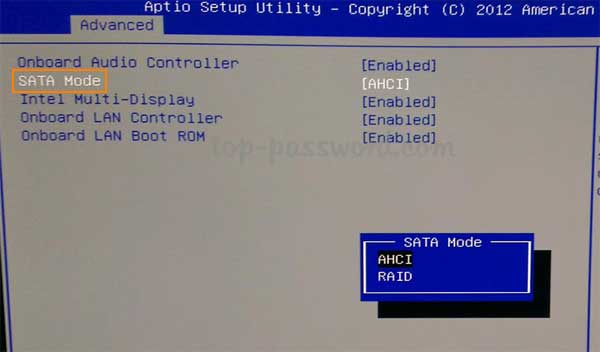
- In the BIOS Setup, look for an option such as “SATA Mode”, “Configure SATA As” or “SATA Mode Selection”, and change it to from RAID to AHCI.

- Then, save and exit the BIOS. Your computer will automatically boot to Safe Mode. Once logged in, open an elevated Command Prompt again and run the following command to disable Safe Mode:
bcdedit /deletevalue {current} safeboot
or launch an elevated PowerShell window and type this command:
bcdedit /deletevalue safeboot - Reboot again and Windows 10 will automatically start with AHCI drivers enabled. Whenever you want to switch back to RAID again, just try the same process above to enable RAID mode. It is important you should first boot into Safe Mode after changing the SATA mode in the BIOS.