Nowadays, more and more computers come with Trusted Platform Module (TPM), which is a tiny chip required for turning on BitLocker disk encryption. No matter if you prefer to enable BitLocker or not, Windows 11 may automatically activate it during the fresh installation. In this tutorial we’ll show you 2 methods to prevent Windows 11 from automatically activating BitLocker during a clean install.
Method 1: Prevent BitLocker Automatic Activation During Installation
If you just got a brand new Windows 11 PC or you’re performing a clean install, it’s easy to prevent BitLocker automatic activation before the out-of-box experience (OOBE).
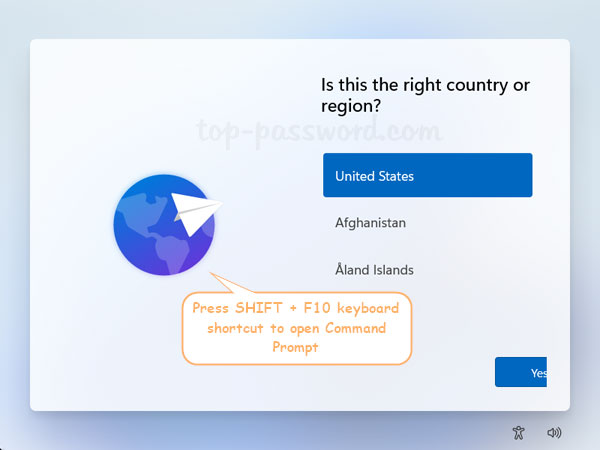
- On the first page of the out-of-the-box experience (OOBE), Windows 11 setup will ask you to choose a language. Just press the SHIFT + F10 keyboard shortcut to launch Command Prompt.
- Type regedit and press Enter.

- Use the left pane of Registry Editor to navigate to:
HKEY_LOCAL_MACHINE\SYSTEM\CurrentControlSet\Control\BitLocker. In the right pane, right-click the blank area and choose New -> DWORD (32-bit) Value.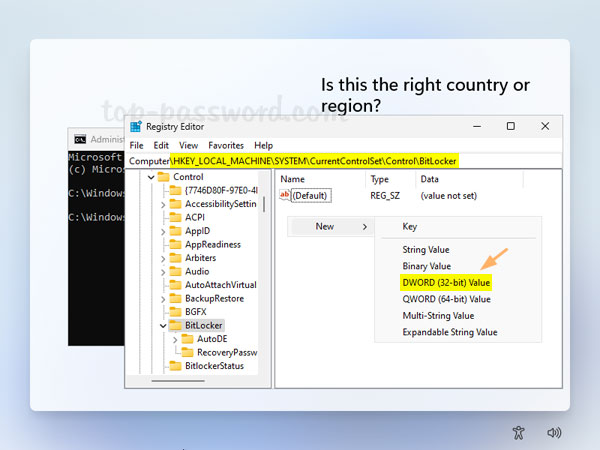
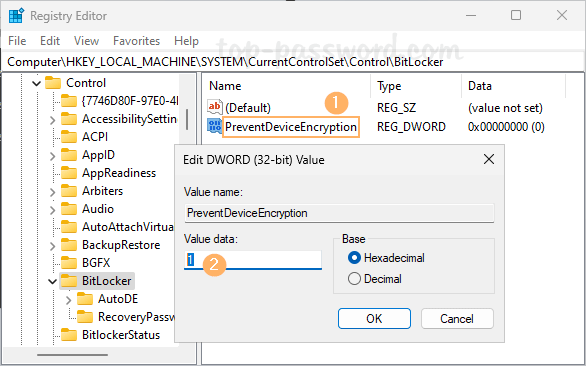
- Name the newly-created DWORD PreventDeviceEncryption, and then double-click it and set its value data to 1. Click OK.
- Close Registry Editor and then quit Command Prompt, proceed to select your language, keyboard layout and go through the setup process. BitLocker device encryption will not start automatically.
Method 2: Prevent BitLocker Automatic Activation Before Installation
If you plan to do a clean install of Windows 11, you can create a Windows 11 installation USB which contains a predefined setting (unattend.xml) to explicitly disable BitLocker automatic device encryption. Follow these steps:
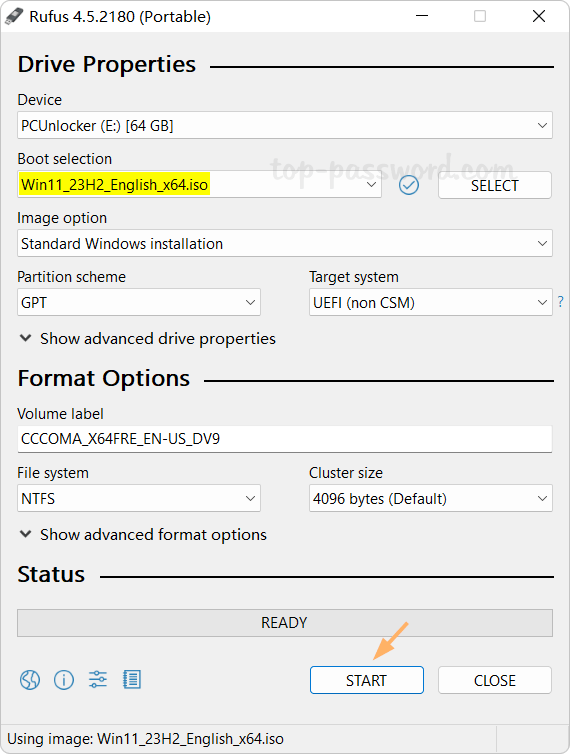
- Before getting started, download the free USB bootable creator utility Rufus. When Rufus is opened, select your USB device and choose your Windows 11 installation ISO image, and then click START.
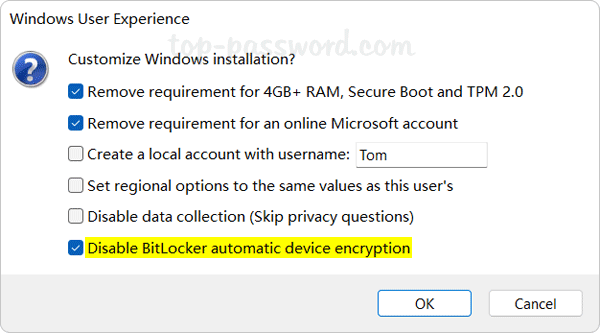
- When the the Windows User Experience window opens, check the “Disable BitLocker automatic device encryption” option and click OK. The program will format your USB drive and prepare the files.
- When done, you can use the USB drive to perform a clean install of Windows 11 without automatically activating BitLocker device encryption.
That’s it!