How can I enable 5GHz WiFi network band on Windows 10 computer? WiFi is not appearing as available or network speed is very slow on 2.4GHz WiFi? 2.4 GHz connection travels farther at lower speed, while 5GHz provides faster speed at shorter range. If you’re experiencing problems with WiFi connection, you could try to change the preferred band. In this tutorial we’ll show you how to view or change preferred band for WiFi adapter in Windows 10.
Part 1: Check Which WiFi Band Your Computer is Connected to
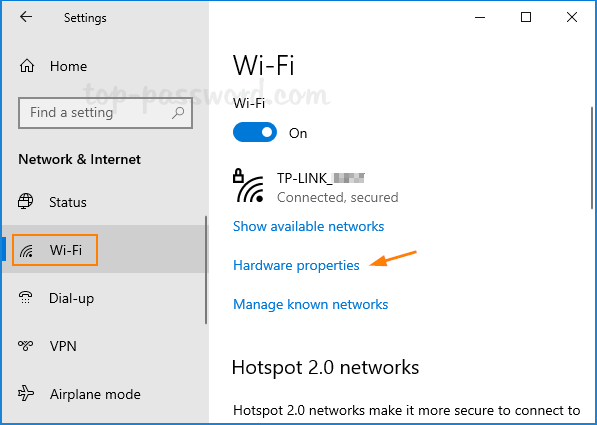
Press the Windows key + I to open the Settings app. Navigate to Network & Internet -> Wi-Fi. On the right side, click the “Hardware properties” link under your current WiFi connection.

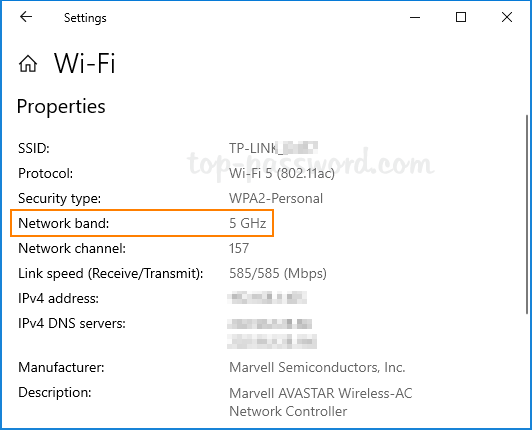
In the Properties page, you’ll see the band of your WiFi network connection, as well as SSID, protocol, security type, IP and MAC address.

Part 2: Change Preferred Band for WiFi Adapter via Device Manager
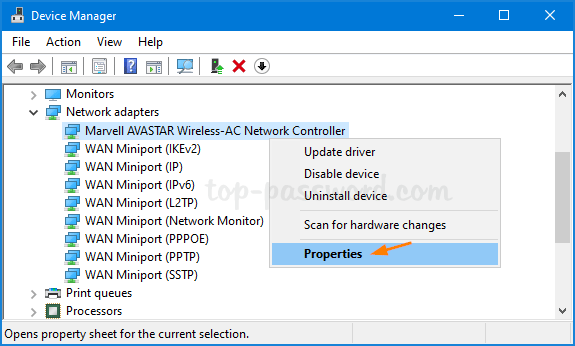
Press the Windows key + R to open the Run dialog, type devmgmt.msc and press Enter to launch Device Manager.

Expand Network adapters and right-click on your WiFi adapter, then select Properties.

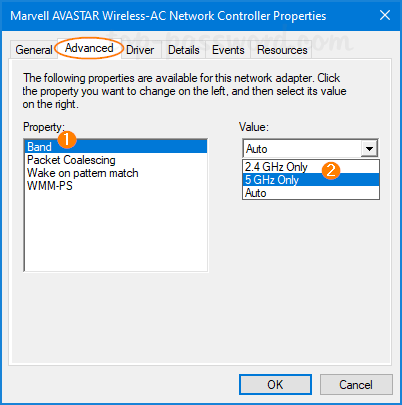
Go to the Advanced tab. Select the “Preferred Band” or “Band” property, change its value to 2.4GHz or 5GHz, and click OK. In my case, I would like to use 5GHz for a faster WiFi experience.

Note: If the “Band” property is missing, it’s possible that your WiFi adapter doesn’t support 5GHz.