How can I delete unwanted TCP/IP printer ports? If you keep changing printers, the inactive ports associated with your old printers are left behind and your system can become sluggish or even hang. In this tutorial we’ll show you 2 simple ways to delete unused or inactive printer ports in Windows 11.
Notes: The LPT, COM, Local and USB ports cannot be deleted. You can use the following methods to delete TCP/IP port and WSD ports with ease.
Method 1: Delete Unused Printer Ports Using Settings App
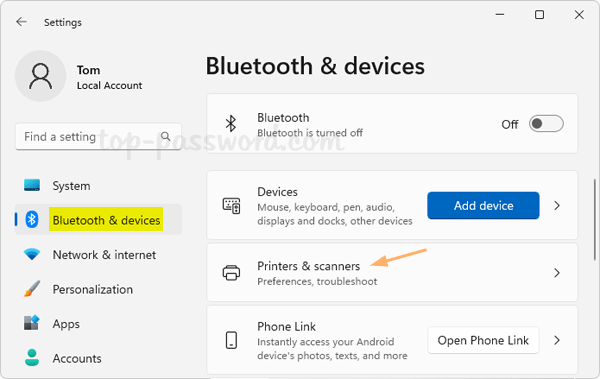
- Open the Settings app (Win + I), select the “Bluetooth & devices” category and then click “Printers & scanners” on the right side of the window.
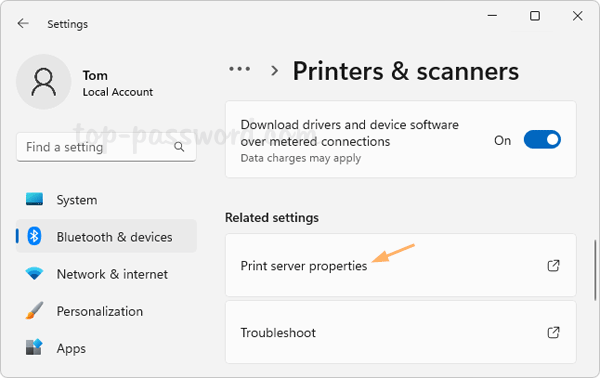
- Scroll down to the “Related settings” section, click the “Printer server properties” option.
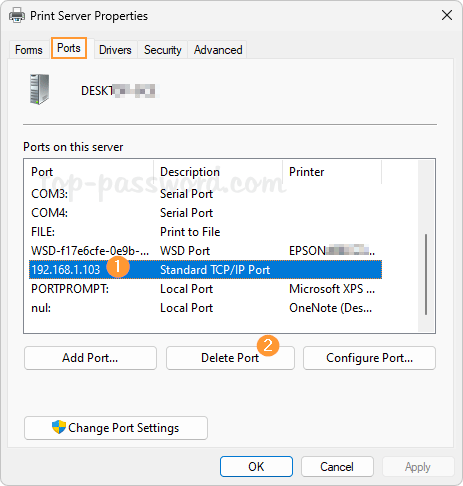
- Go to the Ports tab, select the port which you want to delete from the list, and then click the “Delete Port” button.
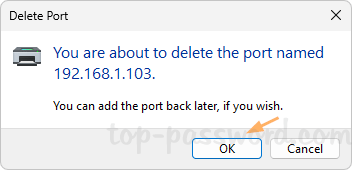
- Click OK to confirm. After deleting, you can assign the freed port to another device in future.
Method 2: Delete Unused Printer Ports Using Windows PowerShell
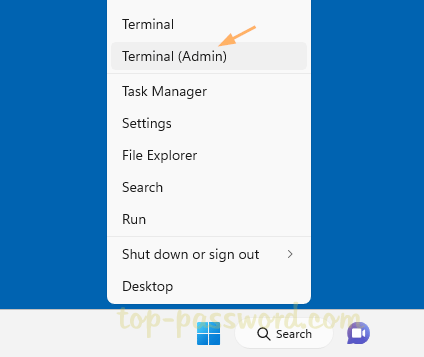
- Right-click the Start button on the taskbar, and select “Terminal (Admin)” from the pop up menu.
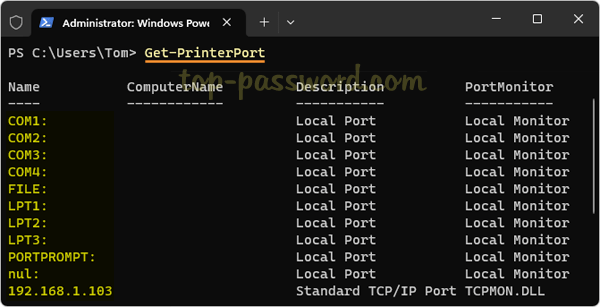
- When it opens a PowerShell window, type Get-PrinterPort and press Enter. It will display a list of printer ports that are installed on your computer. You need to write down the name of unused or old printer port.
- To delete a printer port, execute the following command. Replace “
your_port_name” with the actual name of the printer port you want to delete.
Remove-PrinterPort -Name "your_port_name"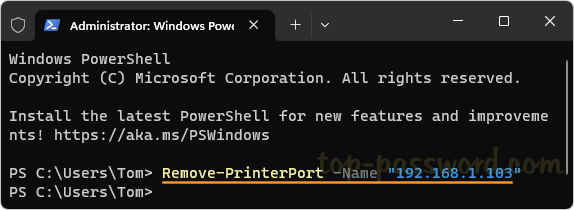
- It will quickly free up the old port which is occupied by your printer.
That’s it!