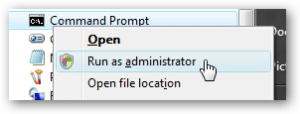
The built-in Administrator account is hidden & disabled by default in Windows. There is always a built-in Administrator account associated for every Windows installations. It’s a super administrator account that gives you some extra privileges over the normal administrator account. In this tutorial we’ll show you 4 ways to enable the built-in Administrator on Windows 11 / 10 / 8.
Method 1: Enable Built-in Administrator from Command Prompt
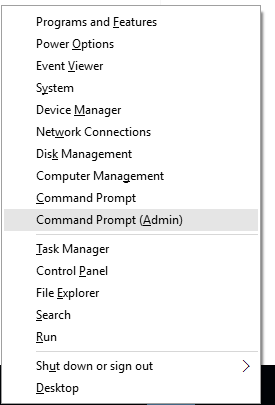
- Press the Windows key + X to open the Quick Access menu, and then select Command Prompt (Admin). If you’re running Windows 11, choose “Windows Terminal (Admin)” instead.
- In the Command Prompt, type the following command and press Enter.
net user Administrator /active:yes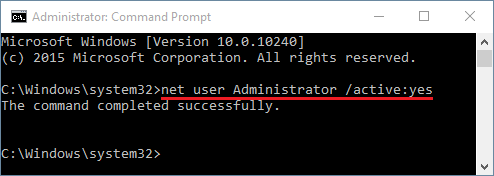
- As soon as you execute the command, the super built-in Administrator account is enabled, and you can access it by switching the accounts.
Method 2: Enable Built-in Administrator from Computer Management
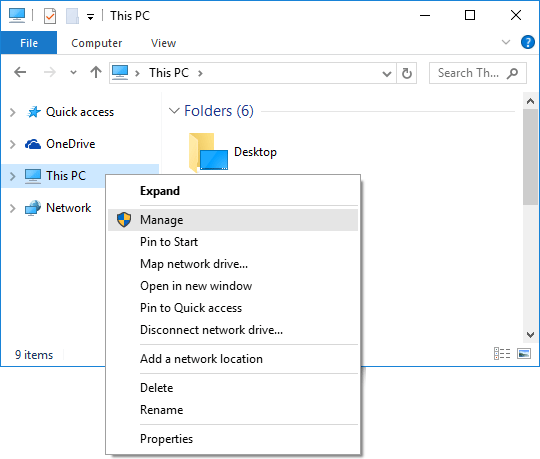
- After opening the File Explorer, right-click on “This PC” (or “This Computer”) on the left navigation pane, and then select Manage.
- When the Computer Management window opens, expand System Tools > Local Users and Groups > Users.
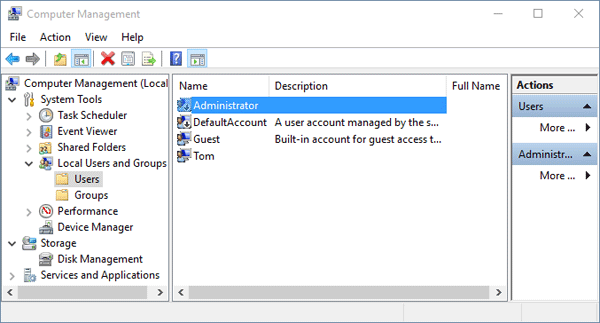
- In right-side pane double-click on Administrator account. It’ll open its Properties window. Uncheck the “Account is disabled” option.
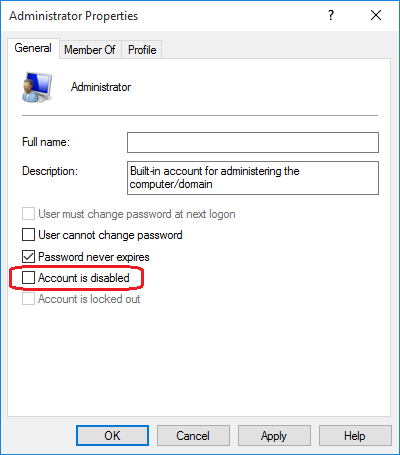
Click Apply and then OK.
Method 3: Enable Built-in Administrator Through Local Security Policy
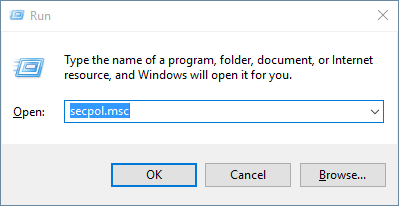
- Press Windows key + R to open the Run box. Type secpol.msc and hit Enter.
- When the Local Security Policy window opens, expand Local Policies > Security Options. In right-side pane, double-click on the policy “Accounts: Administrator account status” and set it to Enabled.
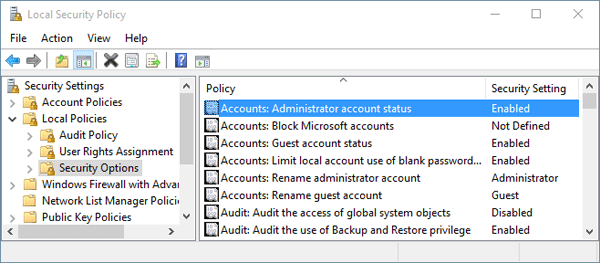
Click Apply and then OK.
Note: Local Security Policy Editor is not available on home editions of Windows.
Method 4: Enable Built-in Administrator without Logging In
All the above methods are fairly simple, but they work assuming you can still log on to Windows 10/8 with admin rights. What to do if you’re locked out of your computer? Follow the procedure described below and it allows you to activate the built-in Administrator account without logging in:
- Boot your problematic computer from Windows installation DVD. Make sure that your PC’s BIOS (UEFI) Setup is configured to boot from a DVD and that UEFI and Secure Boot are disabled.

- After booting into the DVD media, you’ll see the Windows Setup screen.
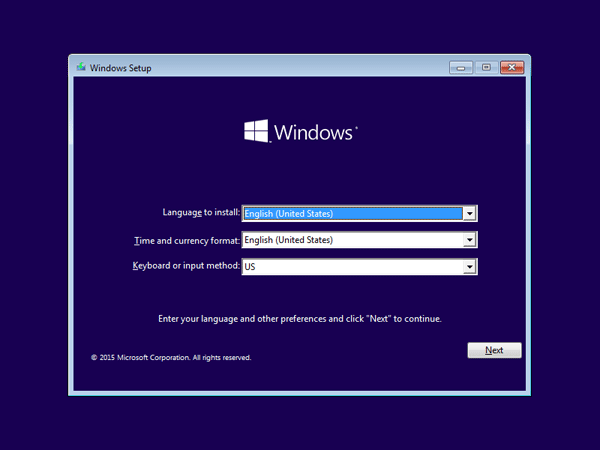
Just press SHIFT + F10 to open a Command Prompt.
- In the Command Prompt, type the following commands one by one, press Enter after each. That will make a copy of the utilman.exe file, and then replace utilman.exe with cmd.exe. In most cases, Windows 10 or 8 is located on drive d:\. If that’s not your case, make sure you replace d:\ with the drive letter of the partition where Windows 10/8 is installed.
copy d:\windows\system32\utilman.exe d:\

copy /y d:\windows\system32\cmd.exe d:\windows\system32\utilman.exe
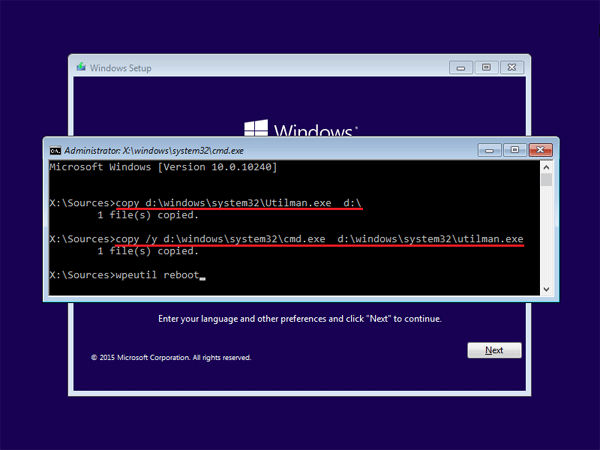
- Now type wpeutil reboot and hit Enter to reboot your computer. Eject the DVD media and let your computer boot from local hard drive.
- Wait until Windows boots to the login screen. Click the Ease of Access button in the lower-left corner of your screen.
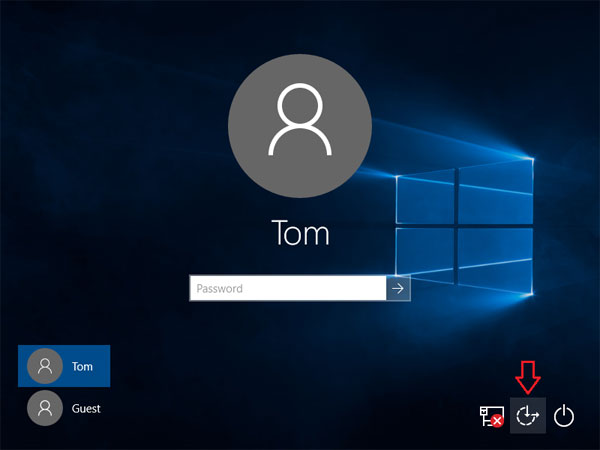
Since we replaced the utilman.exe with cmd.exe, a Command Prompt should open now.
- At the Command Prompt, type the following command to activate the built-in Administrator account:
net user Administrator /active:yes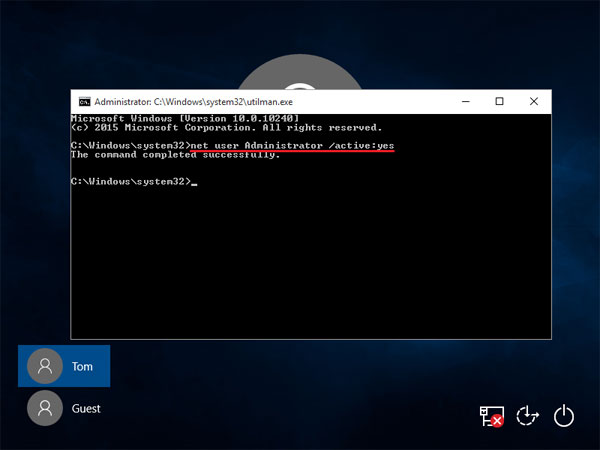
- Close the Command Prompt and reboot your computer. You can sign in to Windows 10/8 with the newly activated Administrator account.
