How can I print the hierarchical structure of a particular directory so I can share it to other people? Printing a directory listing sounds so easy, but Windows doesn’t provide a straightforward way to do this. In this tutorial we’ll show you how to use Command Prompt or PowerShell to export a directory structure in Windows 10 / 8 / 7.
Method 1: Export Directory Structure Using Command Prompt
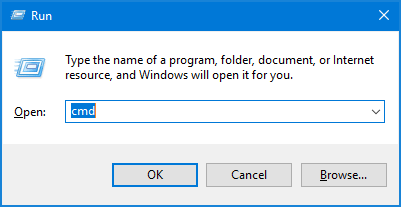
- Press the Windows key + R to launch the Run box. Type cmd and hit Enter to open Command Prompt.

- You can run the “tree” command to export the directory tree of any folder to a text file. In our case, the “d:\demo” is the folder we want to export the directory tree, and the result is saved in a plain text file (*.txt).
tree d:\demo /a /f > d:\list.txt
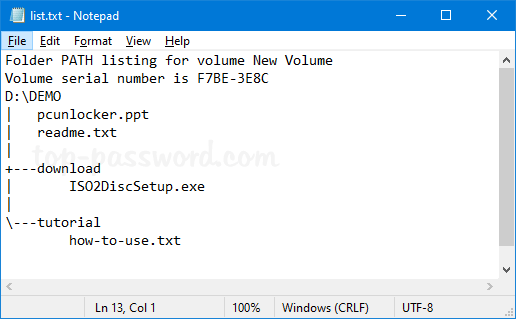
- Open the text file using Notepad and the entire directory tree is listed inside, and you can print them out.

If you look for a way to export the directory structure in .csv format so you can open it with Microsoft Excel, proceed to the next method.
Method 2: Export Directory Structure Using PowerShell
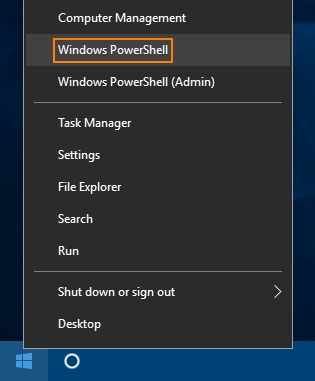
- To get started, you need to open the Windows PowerShell window. If you’re running Windows 10, press the Windows key + X together and select “Windows PowerShell“.

- Enter the following command and press Enter. Make sure you replace “d:\demo” with the folder which you want to export the directory structure.
Get-ChildItem -Recurse 'd:\demo' | Select-Object FullName, name | Export-Csv -path d:\list.csv -noTypeInfo
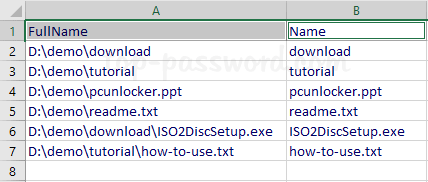
- It will generate a .csv file which lists all files and sub-folders in your target directory. But it doesn’t show you the hierarchical levels like the Method 1 will.

That’s it!