Windows 10 has changed the Start Menu layout, and you can access the list of installed apps on the left and the tiles on the right. As I almost never use the list of all apps, I prefer to have the list collapsed. In this tutorial we’ll show you how to hide the All apps list from Windows 10 Start Menu, or even disable the “All apps” button as well.
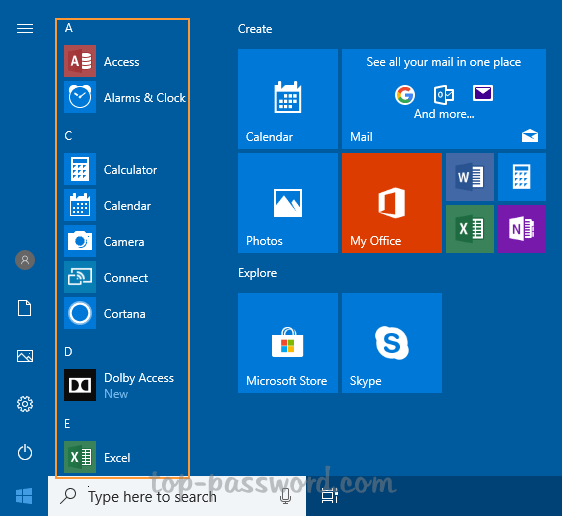
Method 1: Hide All Apps List from Start Menu via the Settings
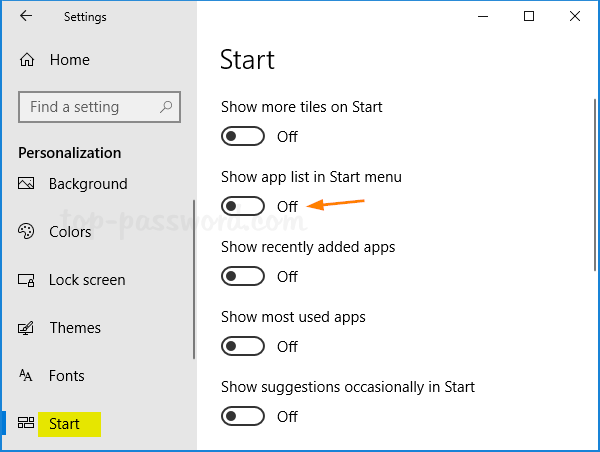
- Press the Windows key + I to open the Settings app, click the Personalization category and then select the Start tab in the left sidebar.
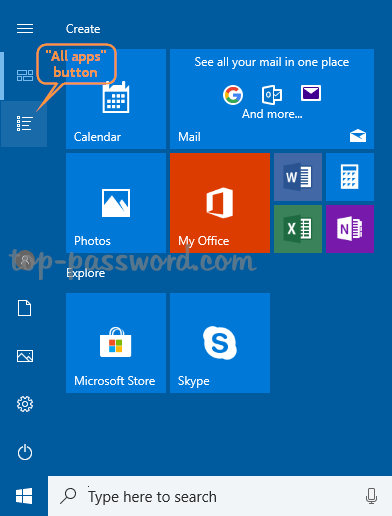
- You’ll see the “Show app list in Start menu” option in the right-side pane. If you turn it off, you’ll see only live tiles in the Start Menu.
- However, you can still click the “All apps” button at the top left of the Start Menu to expand the apps list you’ve hidden.
Method 2: Using GPO to Hide or Disable All Apps List in Start Menu
- Open the Local Group Policy Editor and browse to:
User Configuration -> Administrative Templates -> Start Menu and Taskbar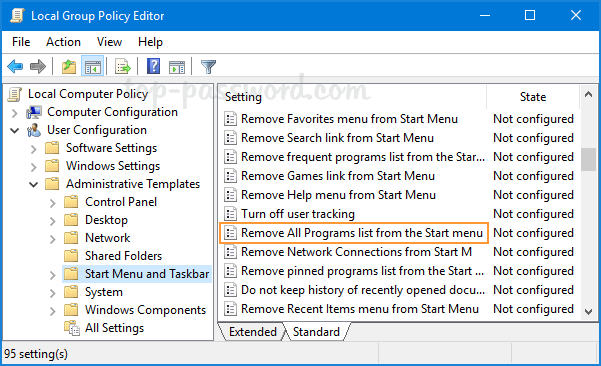
Then, double-click on the policy “Remove All Programs list from the Start menu” appearing in the right pane.
- Click the Enabled option. Under the “Choose one of the following actions” drop-down list, you can choose:
- None
- Collapse
- Collapse and disable setting
- Remove and disable setting
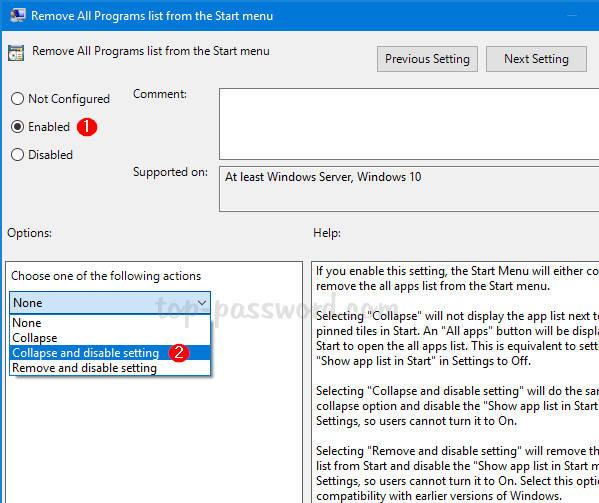
The “Collapse” option is equivalent to turn off the “Show app list in Start menu” in the Settings app. If you’ve selected the “Collapse and disable setting” option, the “Show app list in Start menu” in the Settings app will be greyed out as well.
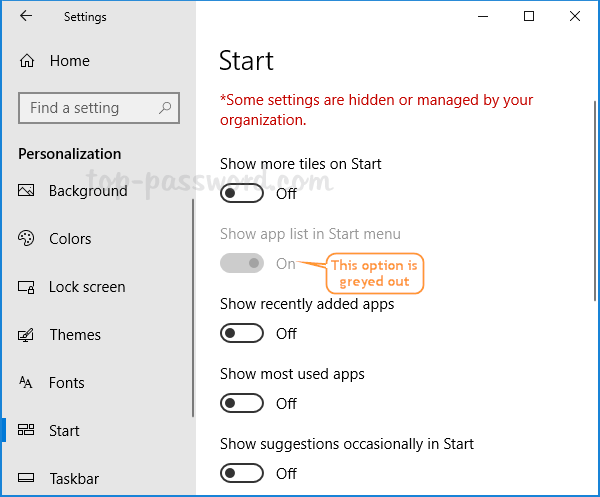
If you’ve chosen the “Remove and disable setting” option, it will also disable the “All apps” button so you have no option to access the apps list from the Start Menu.
That’s it!