By default all Windows versions such as Windows 7, Vista, Windows 8 or Windows 10 don’t show file name extensions for known file types. This means that as long as a file type is associated with a program, Windows will show only a file name and not its extension. But sometimes this may cause unnecessary confusion. For example, if there are two files with the same file name but a different extension, it’s difficult to distinguish one file from another. In this tutorial we’ll explain how to show file name extensions in Windows 11, 10, 8 and 7.
Part 1: How to Show File Name Extensions in Windows 11
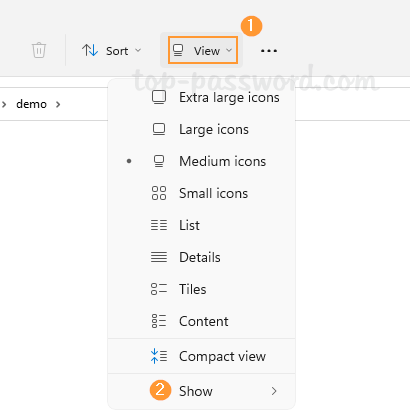
- Open File Explorer, click on View at the top and then select Show from the drop-down menu.

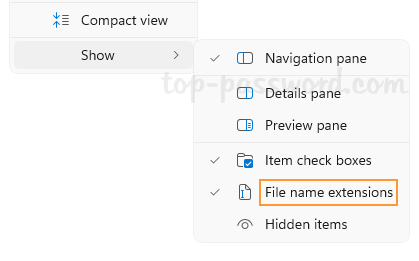
- Next, choose “File name extensions” so that there’s a tick next to it. The extensions of all your files will become visible.

Part 2: How to Show File Name Extensions in Windows 10 / 8
- Open up File Explorer.
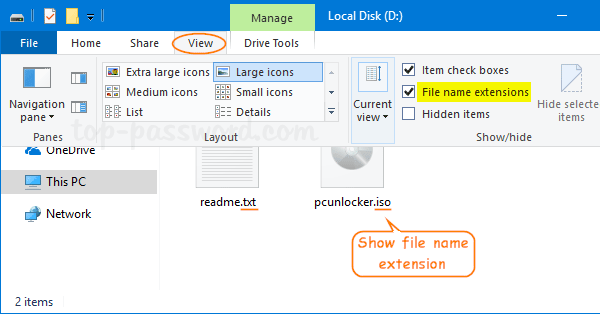
- When the File Explorer window opens, click on the View tab at the top. Check the box next to “File name extensions“.

- Now, you should be able to see file name extensions for every file on your computer.
Part 3: How to Show File Name Extensions in Windows 7
- Open up Windows Explorer.
- click Organize in the toolbar on the top, and then select Folder and search options.

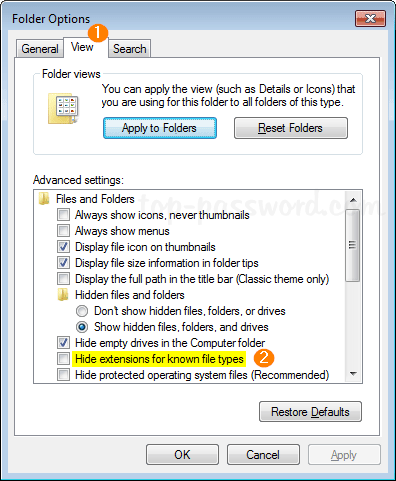
- Click the View tab in the Folder Options dialog box. Deselect Hide extensions for known file types and click OK.

- This will make Windows 7 show file name extensions immediately.