When you install Windows XP on a SSD or SATA hard disk, Windows installer may give you a blue screen on boot. There is also a problem when we’re going to boot a crashed computer from Windows PE bootdisk to repair your computer, the Windows PE bootdisk may can’t recognize your SATA hard drive. What’s the root cause of these problems? Let me uncover the real truth and offer an easy way to get around this issue.
Windows XP is incompatible with SATA?
SATA is a new type of interface that connects hard drives to computers’ mainboard (motherboard) and replaces the older IDE standard. As of 2009, SATA has replaced IDE in most desktop and laptop computers. The difference between a SATA hard drive and the old IDE drives, among other things, is that SATA can provide for a faster data rate and speed.
This should not affect you unless you just bought a new computer with SATA hard drive and then decided that you want to install your old version of Windows XP on that instead of the new Microsoft Windows 7 operating system that it comes with.
Well the problem is that your good old Windows XP installation CD, when it was made, never knew about SATA drives so obviously, it doesn’t include the driver. When you try to install your operating system, you will notice that the installation procedure fails and usually a blue screen is displayed declaring a missing driver for the hard drive.
Solution to fix the compatibility issue:
No reason to worry. There is a very easy solution that will make the SATA hard drive act as if it were an IDE one. By following the simple steps below, you can put your computer into SATA Compatibility mode and once again be able to use your Windows XP operating system.
- Turn on your computer. While the computer starts keep pressing and releasing the F2 button to enter the BIOS setup utility. (Some computers may use a different key to load BIOS such as Del, F1, F12, Esc, etc. )
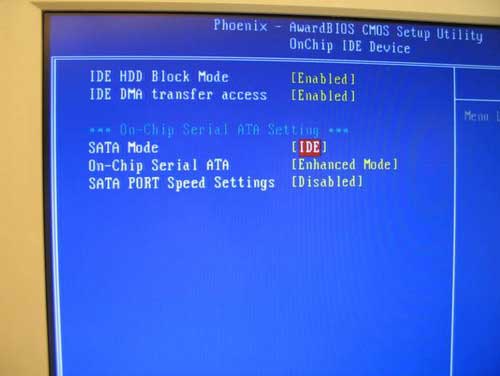
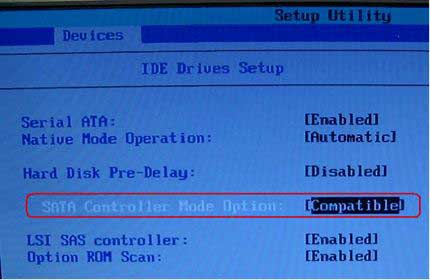
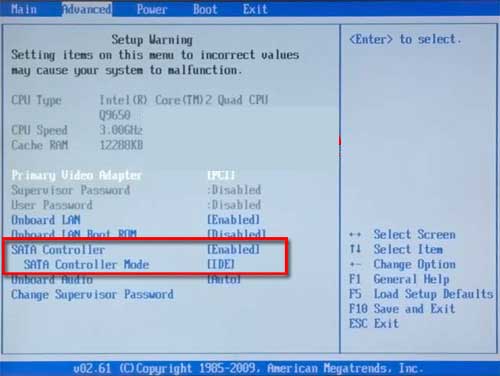
- When you enter BIOS, navigate to the Advance menu and under that section choose SATA Controller Mode.
- Change SATA controller Mode to [Compatibility].
- Save the new settings and exit BIOS. Let your computer start up.
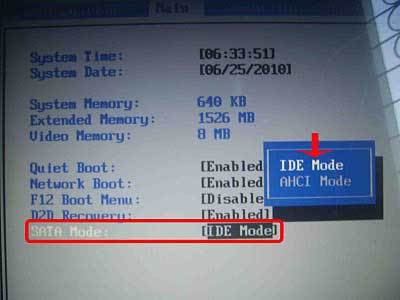
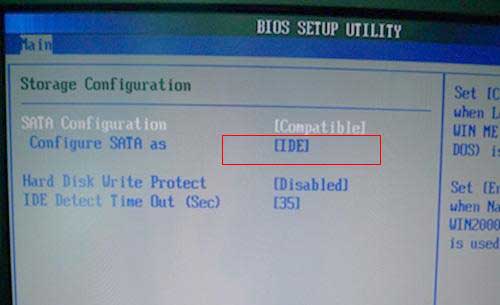
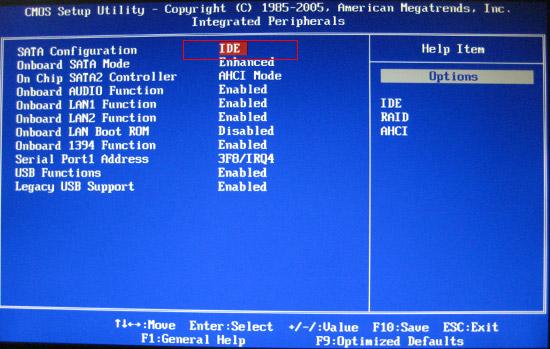
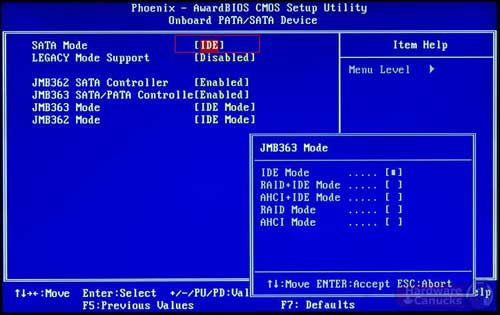
The exact menu option in your motherboard’s BIOS may differ but look for phrases like “SATA Configuration”, “SATA Mode”, “SATA Controller Mode”, “SATA Operation”, “Configure SATA as”, etc. Change SATA mode from AHCI / RAID to IDE compatible mode.
Restart your computer. The SATA drive will be emulated as an IDE drive. Everything should be working again.
PS: Take a look at the following pictures, you should be able to find out how to change SATA mode in different BIOS:
