Posts Tagged ‘install windows 8 from usb’

How to Create A Bootable UEFI/GPT-Based Windows 8 Installation USB Drive

June 28th, 2013 by Admin

In order to perform a clean install of Windows 8 on my computer, I’ve made a bootable Windows 8 installation USB drive using Microsoft’s Windows USB/DVD download tool. However, the USB drive never showed as UEFI bootable in the Boot Menu. After some Google searching I discovered that this is because UEFI boot only recognizes FAT32 and will not show up NTFS devices during boot selection. What’s more, the USB drive must also be partitioned with GPT (GUID Partition Table) instead of traditional MBR.

So here I’m going to walk you through how to create a bootable UEFI/GPT-based Windows 8 installation USB drive. It’s very useful in case your computer doesn’t have optical drive, especially if you’re using a tablet such as Microsoft Surface Pro. To make the job easier, we’ll use a free ISO burning software – ISO2Disc, which provides you a super easy way to make a bootable UEFI/GPT-based USB drive from an ISO image.

How to Create A Bootable UEFI/GPT-Based Windows 8 Installation USB Drive?

Step #1: First download and install ISO2Disc utility on your computer.

Step #2: Launch ISO2Disc program. Click on the Browse button to specify a 64-bit Windows 8 ISO image file. Remember that only x64 versions of Windows 8 and Windows Server 2012 support UEFI Secure Boot.

Step #3: Click on the Burn to USB Flash Drive option, then select your USB drive from the list. Choose the GPT from the partition style. This allows you to partition your USB drive with a GUID Partition Table.
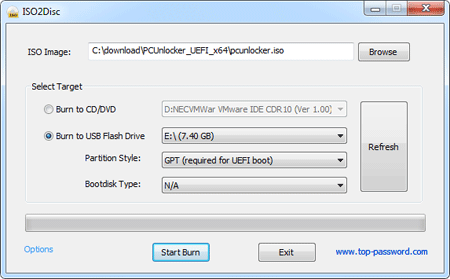
Step #4: Next click on Burn. The program will begin creating a UEFI/GPT-based Windows 8 installation USB drive.

Step #5: When the burning procedure is complete, unplug the USB drive and you can then use it to boot off any UEFI-based computers and perform Windows 8 installation from your USB drive. It’s that simple!
How To Install Windows 8 from USB Flash Drive

July 24th, 2012 by Admin

Some times you may prefer to install windows 8 from USB, there may be wide variety of reasons like, you don’t have a DVD drive or you wanted to install windows 8 in you netbook etc. No matter what the reason is, there is an easy way to do this. In this tutorial we’ll show you how to create a bootable Windows 8 installation USB drive and then use it to do a clean install of Windows 8.

Step 1: Create a Bootable Windows 8 Installation USB Drive

  1. First of all, insert your pen/USB drive and back up any data inside it.
  2. Now download Windows 7 USB/DVD tool and open it.
  3. Browse to your windows 7 ISO image using the “Browse” button.
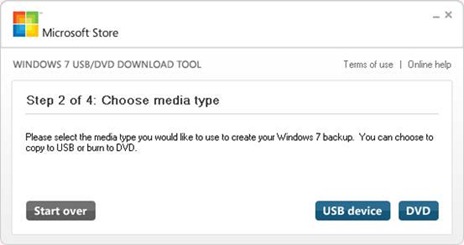
  4. As we are going to create a bootable USB drive, select “USB device” option.
  5. Now select the USB drive letter and click “Begin copying”.

Step 2: Configure the BIOS of Your Computer

  1. Turn on your computer. When it is powered on, check the boot-screen for setup key (i.e. DELETE key, F8 key, F2 key) to enter BIOS Setup Utility.
  2. Use the arrow keys to select the BOOT tab, then change the Boot Device Priority: Set 1st Boot Device to Removable Device so you can boot from a USB flash drive and perform Windows installation.
  3. Press F10 to save your changes.

Step 3: Install Windows 8 from USB Flash Drive

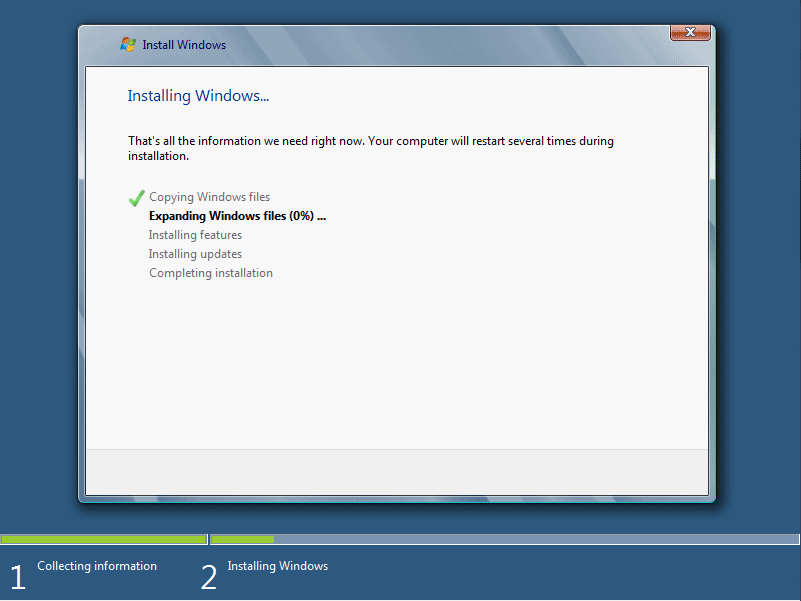
Assuming that you properly configured your BIOS, insert the Windows 8 Installation USB Drive into the USB port on your computer. Turn on the computer. Windows 8 setup program should now load, you can now continue to finish setting up Windows 8  from USB drive. Depending on the speed of your USB device, this may take a while.

Conclusion

This guide is quite easy to follow and anyone who has basic computer skill will able to create a bootable Windows 8 installation USB drive and install Windows 8 with any hassle. Many computers ship without Windows installation discs. So it’s necessary to create a Windows installation disk in case you need to do a fresh install of Windows on your own. Enjoy!