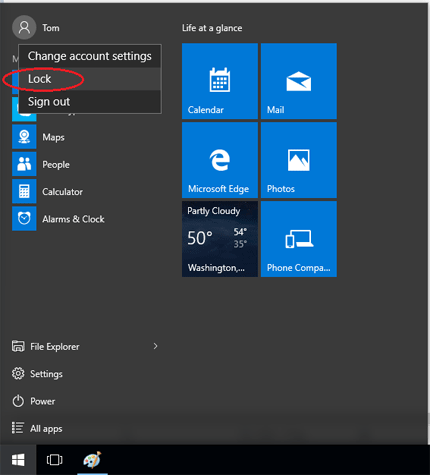
In previous post we’ve covered 3 ways to lock a Windows computer. If you are unable to lock your Windows system or want to disable the computer lock option completely, here’s how you can enable / disable lock workstation feature in Windows 10, 8, 7 and Vista. When the lock feature is disabled, you will be unable to lock your computer by either pressing Windows + L, Ctrl + Alt + Del, or clicking the Lock option from the Start menu.

How to Enable / Disable Lock Workstation Feature?
- Press the Windows + R key combination to bring up a run box, type gpedit.msc and hit Enter.
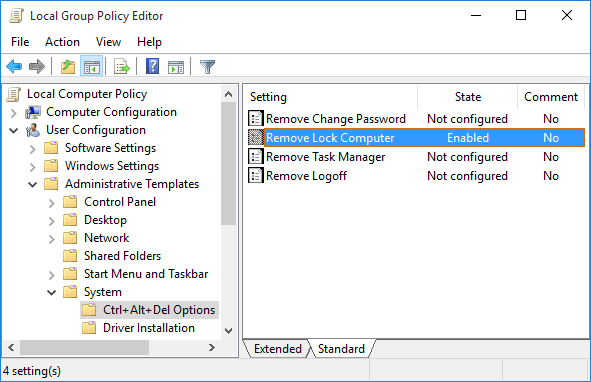
- When the Local Group Policy Editor opens navigate to:
User Configuration\System\Ctrl+Alt+Del Options - On the right hand side you should see a setting called “Remove Lock Computer“. Double-click on it.
- Then change the radio button over to Enabled if you want to disable the lock workstation feature.

To enable this feature later, just change it to Disabled or Not Configured. Click OK to save your changes.
- Now you will need to enforce the updated policy to take effect on your PC, to do this press the Windows + R key combination, when the Run box open run:
gpupdate /force - Once you press enter you Local Group Policy will be automatically updated. Windows will no longer show the lock option when that you press the Windows key + L or Ctrl+Alt+Delete keyboard combination.