How can I move the pagefile to another drive when the C:\ drive runs out of space? Should I disable the pagefile if I have a large amount of RAM? In this tutorial we’ll show you how to change pagefile size, disable pagefile or move it to another disk drive in Windows 10.
What is Pagefile?
Windows uses a page file to store memory data that can’t be held by the RAM. When you run a program that needs more RAM than you have available, the system will move the least used memory data out to a hidden file named pagefile.sys to free up more RAM for the program you’re actually using.
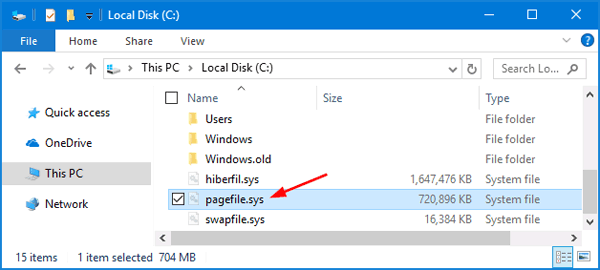
The page file, also known as the swap file, pagefile, or paging file, is a system file that is located at the root path of your drive, but you won’t see it unless you set Windows Explorer to show hidden files and protected operating system files.
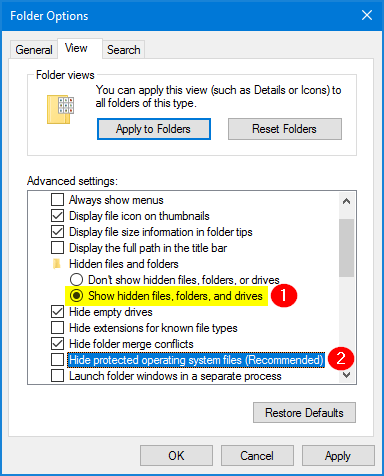
In order to change, disable or move pagefile in Windows 10, you have to access the Virtual Memory settings. Follow these steps:
- Right-click on This PC icon on your desktop, and then select Properties.
- Once you get to the window as shown below, click on the “Advanced system settings” link on the left.

- In the System Properties window, select the Advanced tab, and then click the Settings button under the Performance section.

- Select the Advanced tab and then click the Change button under the Virtual memory section.
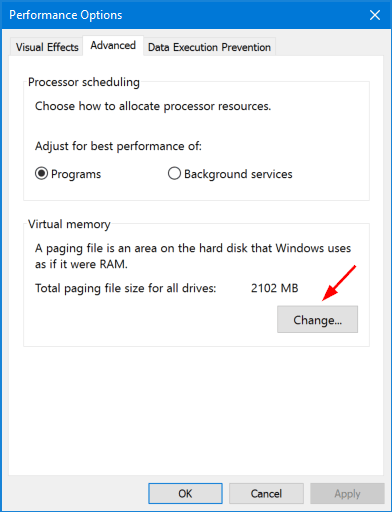
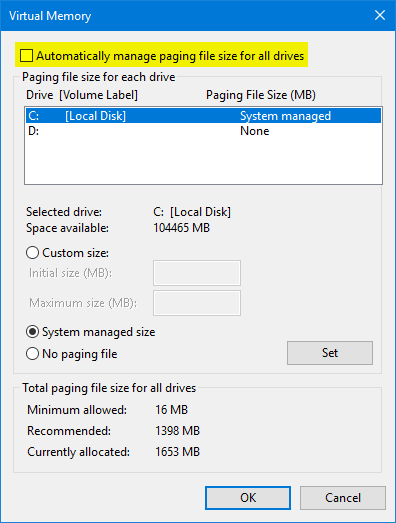
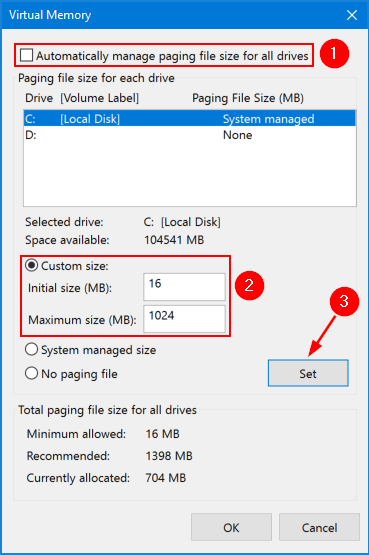
- Now you’ll see the Virtual Memory settings as shown below. By default, the Automatically manage paging file size for all drives box is checked. You need to uncheck this box if you want to configure page file for every drive individually.
Option 1: Change Pagefile Size
Select a drive you want to change pagefile size for, click the Custom size option. Enter the initial size and maximum size for your pagefile and click the Set button to save the changes.
Option 2: Disable Pagefile
Select a drive you want to disable pagefile for, click the No paging file option and click the Set button.
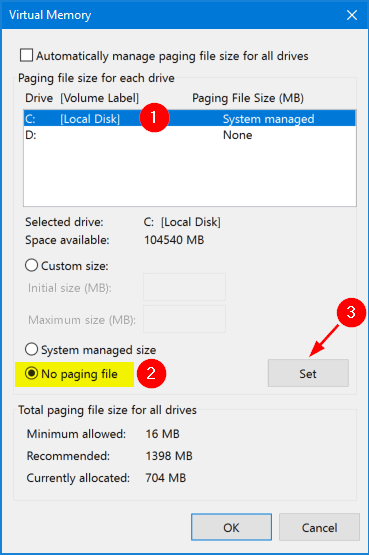
When programs start to use up all your available memory, they’ll start crashing instead of being swapped out of the RAM into your pagefile. While Windows can run without a pagefile if you have a large amount of RAM, there’s no performance benefit to disabling the pagefile.
Option 3: Move Pagefile to Another Drive
By default, the C: drive has a system managed paging set for itself. The pagefile can occupy as much as 8 GB of space at times and it is best to move this file out of the C: drive to save valuable space. Follow these steps to move pagefile from C: to another drive:
-
Select the default paging file drive. Choose the No paging file option and click on Set.

-
Now specify a new page file on another drive you have. To do that, select the desired drive from the list and choose the System managed size option. Click Set to apply your changes.
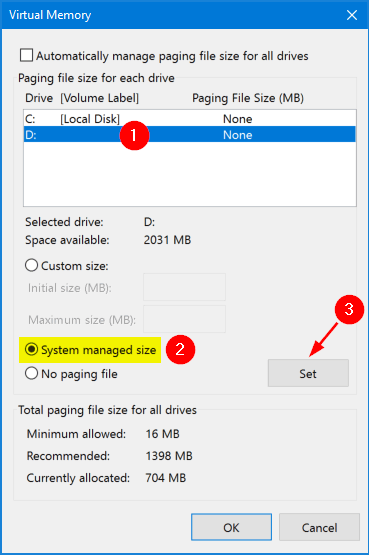
- Close all the windows and restart your computer. Windows will automatically delete C:\pagefile.sys, and then create a new pagefile on your desired partition. Now you have successfully changed Windows pagefile location.