Posts Tagged ‘password’

How to Secure USB Drive with BitLocker To Go

October 26th, 2012 by Admin

Losing a USB flash drive can be the stuff of nightmares if it contains sensitive or valuable information. If your computer is running the Ultimate or Enterprise edition of Windows 8/7/Vista, you can use Microsoft’s included BitLocker To Go feature to encrypt your entire USB drive.

BitLocker To Go allows you to encrypt the data stored on a USB drive and restrict access with a password. Without the password, the USB drive is worthless. When you connect the encrypted USB drive to a Windows computer, you are prompted for the password, and upon entering it you can read and write to the drive as you normally would.

In this article I will walk through the steps of securing a USB drive (thumb drive) with Bitlocker To Go in Windows 7.

How to Secure USB Drive with BitLocker To Go?

Connect the USB drive for which you want to enable BitLocker Encryption.

Click Start, then click Control Panel. Click System and Security.
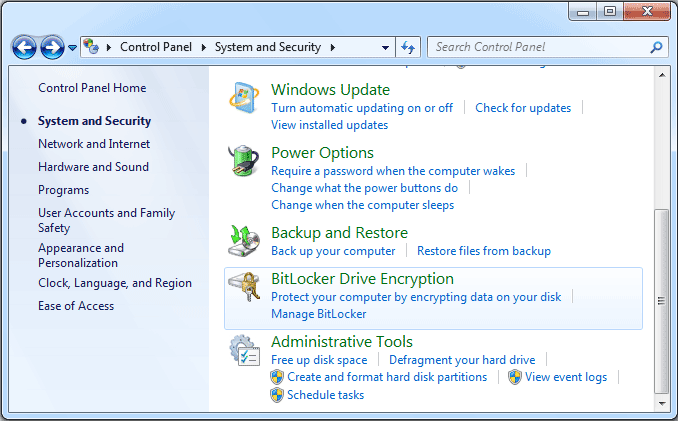
Click BitLocker Drive Encryption. This screen presents a list of all the drive partitions and the connected USB drives which could be protected with BitLocker To Go.
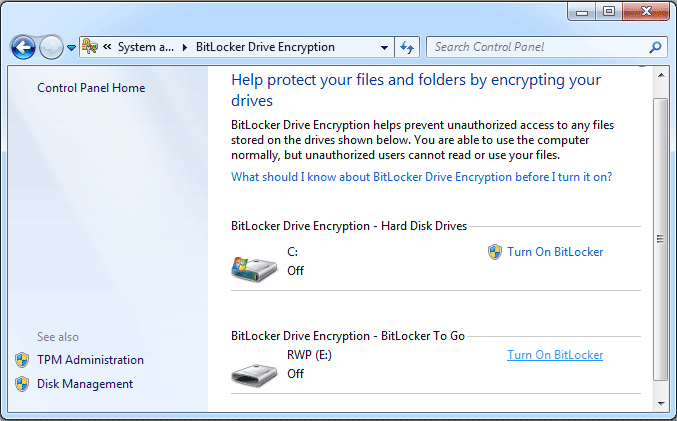
Click the Turn On BitLocker link option near your USB drive. It starts the initialization process of BitLocker Drive Encryption.
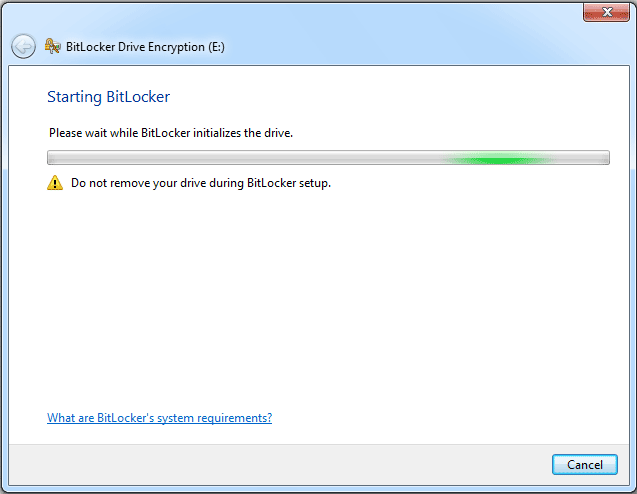
Once the initialization process is complete, BitLocker To Go will prompt you to set up a password that you will use to unlock the drive. If you have a smart card, you can use its PIN to unlock the drive.
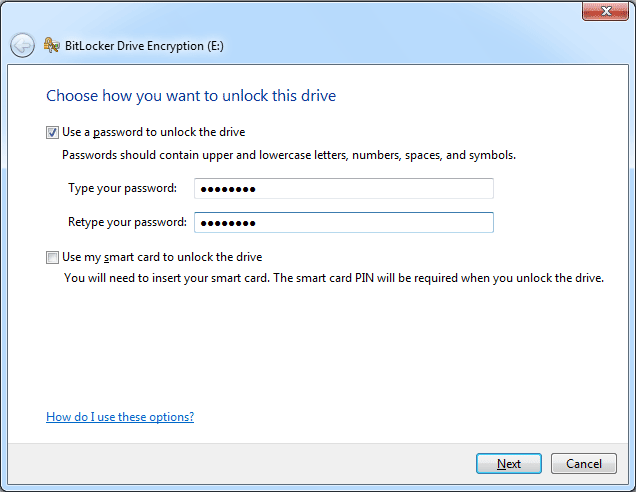
After you set up a password or use a smart card, BitLocker To Go will prompt you to store a recovery key. You can use the recovery key to unlock your drive in the event that you forget the password or lose your smart card.
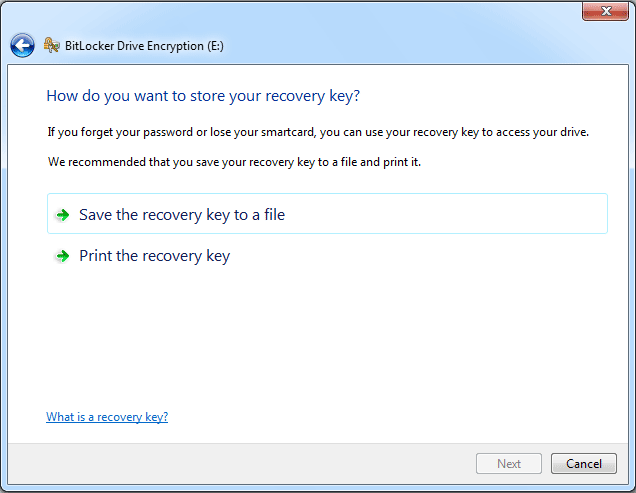
When you create the password and save your recovery key, you’ll be prompted to begin the encryption process.
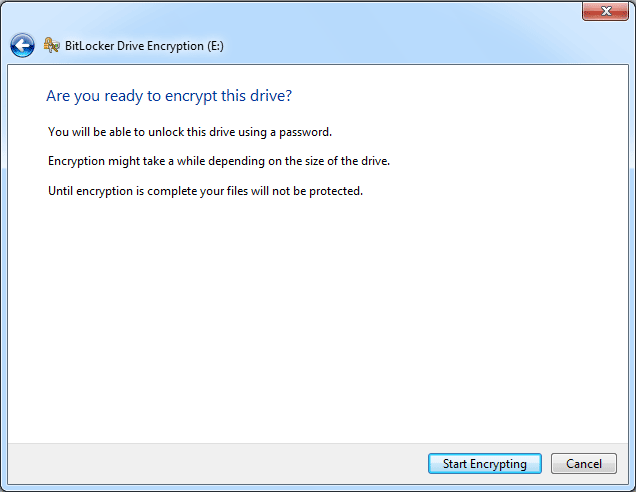
Click on Start Encrypting button. The amount of time that it will take to complete the process will depend on how large the drive is.
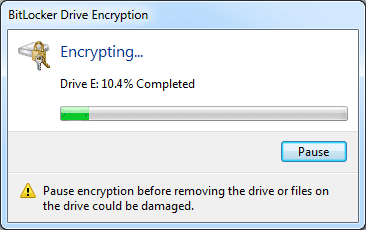
When the encryption is complete, you’ll notice that the drive icon shows a lock on the drive.

The next time you plug in the USB drive to a Windows machine you will be prompted to enter the password to gain access to the drive.
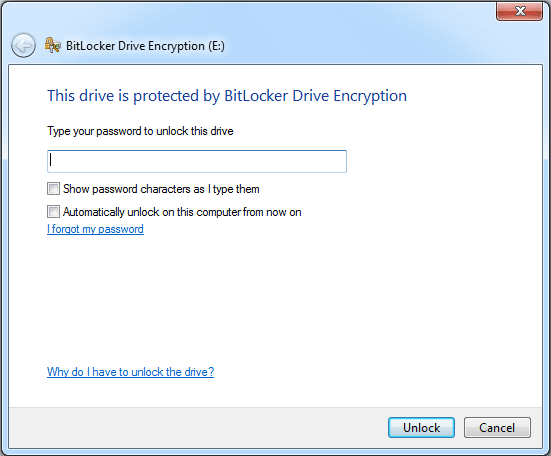
In future, any file you save on that drive will be encrypted automatically.
How to Password Protect Your Running Programs

June 13th, 2012 by Admin

You might have faced a situation where you have to leave your work in front of somebody and move away from them. You only have the choice to leave the system and can’t logoff Windows. Think of such a situation. Yes it can happen some times. So how can we protect your running programs from being seen by somebody else?

Here’s where LockThis! comes into your rescue. LockThis! is a tiny Windows utility that makes it possible to password protect almost any programs or documents that’s currently running/open. This tool is perfect for people who often lend their PC to others, because with this tool they can keep the content of some programs or documents from other people eyes without need to close them first. Huge time saver if you really often lend your PC.

It’s very easy to apply the protection. Mostly it only involves pressing keyboard Ctrl button when minimizing the window of the program/document and supply the password in the dialog that follows (or you might had chosen to use a predefined common password, which in this case you won’t be asked for password). Now the content is save because the window can not be restored or maximized without supplying correct password. Whenever the window is about to restore or maximize a dialog asking for password will pop up. If the correct password is not supplied, the restore or maximize request will be ignored and the window stays minimized.

Pros: A great freeware app that assure you more privacy and you can safely give your laptop with opened windows to any body without the fear of them seeing it.

Cons: LockThis doesn’t work with Internet Explorer 8/9, it can’t be used to protect 64-bit applications , so if you want to hide the open windows contents from them, think of it before giving your laptop or pc to any body else.

Download LockThis!

Recover Your Lost Wireless Network Key with WirelessKeyView

May 26th, 2012 by Admin

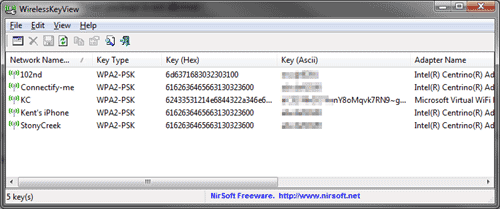
WirelessKeyView is a portable free network utility by NirSoft that recovers your wireless network security key/passwords stored in your computer. The latest version adds a feature that allows you to export these keys into a simple text file and then later on import them into another computer.

Because it’s a portable tool you can just download it from the link below and launch it without first installing it. It supports on both 32bit and 64bit of Windows, so make sure you know which edition of windows you are using and pick one that matches.

Select the keys you want to export, and Export Select Items from File menu. It’s worth noting that the keys exported in the text file are not encrypted. So make sure to keep the file in the safe place if you are concern about the security of your network.

If you find the keys that are obsolete from the network adapter that are no longer existed, you can even delete the keys from the tool directly. The key deleted from the tool will also be removed from your computer. Note that only the keys from the inactive network adapter can be deleted.

WirelessKeyView works perfectly in XP and Vista but has a bit of difficulty working flawlessly in Windows 7 due to the new encryption and hashing algorithms used by the Windows Data Protection system. The author has to make a workaround but claims that he will still keep the research and development going. However, I test its 64bit version of this tool on my Windows 7 64-bit system and it has no problem revealing all my wireless network keys I ever inputted.

As always, WirelessKeyView has a list of command-line options and can be executed in Command Prompt window or be a scheduled command.

Download WirelessKeyView

Download WirelessKeyView for x64

Password Protect Folders in Windows Without Any Software

March 27th, 2012 by Admin

Most of us have private data. Not all of us have a private computer to keep that data. So, we just end up with other people viewing that data. Although password protecting software do work, it is almost useless to hide private data with these software (because we are always questioned as to what it is that we are hiding with the help of these software).

Hidden folders do not work as they can be easily searched with Windows Search. So, we need an alternative way to create hidden password-protected folders which only we can access. And that is exactly what we will learn in this post.

With this trick, you can create a secure password-protected folder in Windows which no one except you can access. To use this trick, please click here to download a self-extracting file and save it to your desktop or other location. Uncompress the .zip file, you’ll see the batch file: protectfolder.bat.

How to Lock Your Folder with Password:
1) Double-click on the batch file. A new folder will be created.
2) Copy your personal data or secret files into that folder. Again, double-click on the batch file. Type Y and press Enter. The folder will be hidden from view.

How to Unlock Your Folder:
1) To re-view your folder, double-click on the batch file.
2) Enter password as “www.top-password.com” without quotes and press Enter key. This is also the default password. Your folder will be visible again.

The overall usability of this trick can be improved by deleting the batch file after hiding your folder and re-creating it when you wish to access your folder again. If you face any problem using this trick, you can write a comment and I will do my best to help you.

Note: This works on Windows 7, Windows XP and Vista. First try this on useless data to be sure and then only hide your personal data. If you need a more secure and reliable method to protect your private data, please refer to our product – Protect My Folders.

2 Methods to Recover Forgotten iTunes Password

March 21st, 2012 by Admin

iTunes is a great piece of software for anyone that likes music. Even if you don’t have an iPod, it is very useful for organizing your music library and adding to your library by buying new songs at low prices. Of course, you need to have the appropriate account for the iTunes store. If you have an Apple account that you use with iTunes, then you will have to remember your account username and password. The username should just be your email address, but the password has to be created by you.

If you forgot your iTunes password, then you will need to go through a short and fairly painless procedure to get it back. In this article we’ll show you two methods to recover lost or forgotten iTunes password.

Solution 1: Online iTunes Password Reset

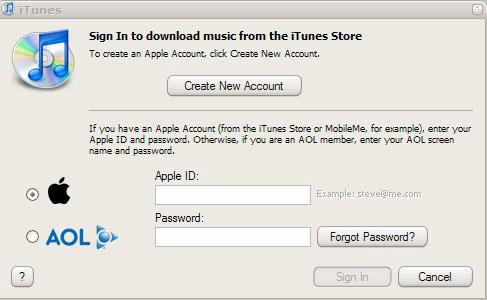
If you forgot your iTunes password, then don’t panic. Just launch the iTunes program, click on your username in the top right corner (or the sign in tab if it doesn’t remember you) and then try to sign in. There’s a button to the right of the password field that is labeled “Forgot Password?”. Click on this button to bring up the next screen.

This one needs you to enter the username for the related account. As I said, this should just be the relevant email address. Type it in to pull up the next screen that’s specific for your account. You have two options for recovery at this stage.

Option 1: If you still have access to the email account, then you can have it just reset the password. iTunes will send a new link to your email address. If you click on the link, it will just reset your password to something new. Use this new password to log into your iTunes account and then bring up your account information again. Change the password to something that you’ll remember and then call it a day.

Option 2: If you don’t have access to the email or don’t want to go through the email reset process, you can have it ask you your secret question. It will first ask you to confirm a piece of account information, like your birthday, and then it will give you the secret question that you used when you signed up for the iTunes account. You just have to answer it to get your account back. Hopefully you can remember you secret question. If not, then you’ll need to use the iTunes.

Solution 2: Recover iTunes Password with Password Recovery Tool

Nearly most Web browsers have a pretty nifty password manager, including Internet Explorer, Firefox, Chrome, Safari, Opera. When you log into iTune account from the iTunes Store, the Web browser offers to save your user name and password. The next time you visit that page, user name and password fields are auto completed for you. A real time-saver.

But have you ever forgotten your iTune password and need to recover the password saved in your browser? Once you have let your web browser remembers your password, it’s quite easy to recover the password with Password Recovery Bundle. Let’s take the example of Firefox browser.

1) Download and install Password Recovery Bundle.
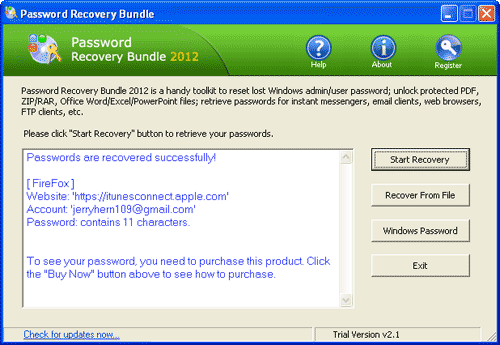
2) Run Password Recovery Bundle, then click the Start Recovery button. It will bring up a drop-down menu that shows all supported password types.
3) Select the Firefox Password option.
4) The program will instantly decrypt the passwords saved in Firefox’s password manager, then display the logins and passwords to all your iTune accounts.

If neither of these works, then you will have to call iTunes support to try and find a human who can help you. If you have some other account details, then they might be able to help.

Hopefully these instructions should help anyone who forgot their iTunes password get their account back in order.