By default, the scrollbars in Windows 11 are hidden until activated by scrolling. This might cause you miss out on content because your system doesn’t tell you that you could scroll. In this tutorial we’ll show you 2 simple methods to make Windows 11 always show scrollbars, when there is content that must be scrolled to access.
Method 1: Set Scrollbars to Always Display Using Settings App
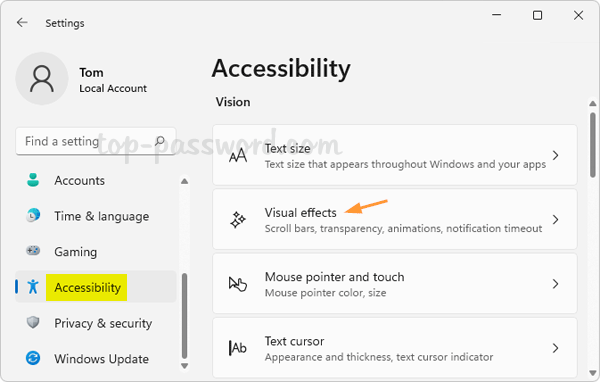
- Press the WIN + I keyboard combination to launch the Settings app. Choose Accessibility from the left navigation pane, and then click Visual effects on the right side.
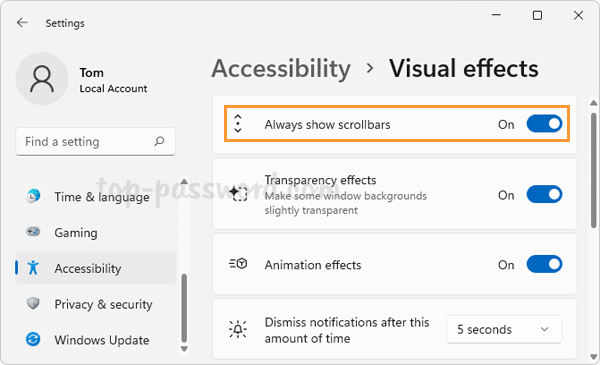
- Turn on the “Always show scrollbars” toggle switch.
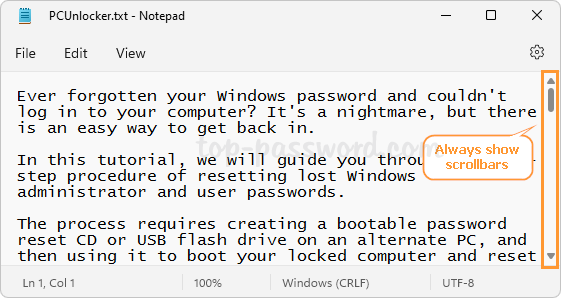
- Now the scrollbars will always appear in all of your applications, including the Settings app and Notepad.
Method 2: Set Scrollbars to Always Display Using Registry Editor
- Open Registry Editor and navigate to:
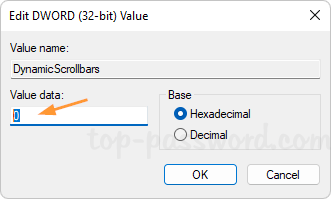
HKEY_CURRENT_USER\Control Panel\Accessibility. On the right, double-click the 32-Bit DWORD value DynamicScrollbars.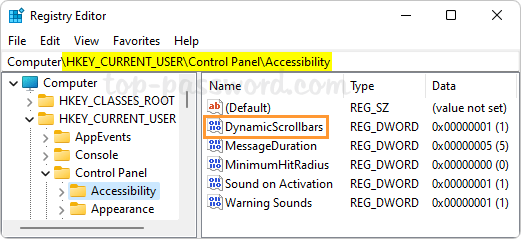
- Change its value data from 1 to 0 to make Windows 11 always show scrollbars, click OK.
- Close Registry Editor and log off your account. The next time you sign back into your account, the scrollbar will always show up on windows.
That’s it!