Just upgrade to Windows 10 and find Windows Photo Viewer is missing from right-click context menu? Windows 10 comes with a new default image viewer app – Photos, which is meant to replace the old Windows Photo Viewer. Though Windows Photo Viewer hasn’t been removed from Windows 10. It’s just hiding so well you might never ever find it.
In this tutorial we’ll show you how to restore missing Windows Photo Viewer in Windows 10, and set Windows Photo Viewer as default image viewer.
Part 1: Restore Missing Windows Photo Viewer in Windows 10
- To get started, download the restore_windows_photo_viewer.reg file and save it to your Windows 10 computer. Next, right-click this file and select Merge. If prompted by UAC, click on Yes.
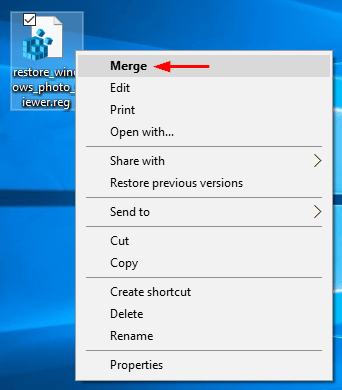
- Click on Yes to confirm that you want to add the registry keys.

- This will register Windows Photo Viewer with Default Programs, and associate all image files types (.jpg, .jpeg, .bmp, .png, .tif, .dib, etc) to Windows Photo Viewer.
- Now, right-click on an image and select Open with from the context menu, you can then click Windows Photo Viewer to view your image.
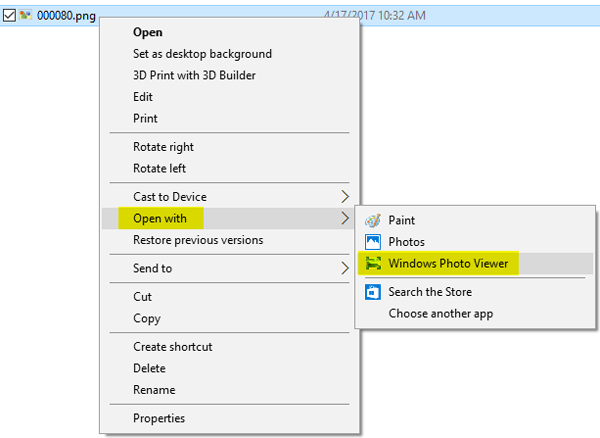
Part 2: Set Windows Photo Viewer as Default Image Viewer
After restoring the classic Windows Photo Viewer in Windows 10, you can now set it as the default image viewer. Follow these steps:
- Open the Control Panel. Set the View by option to Large icons and then click Default Programs.
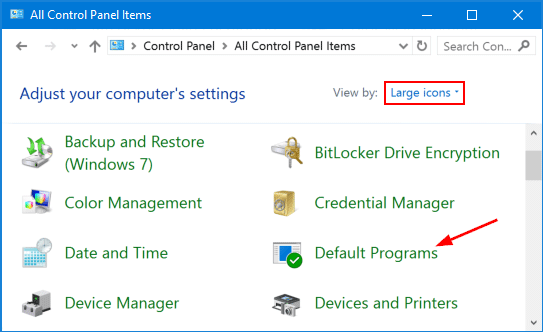
- Click Set your default programs.
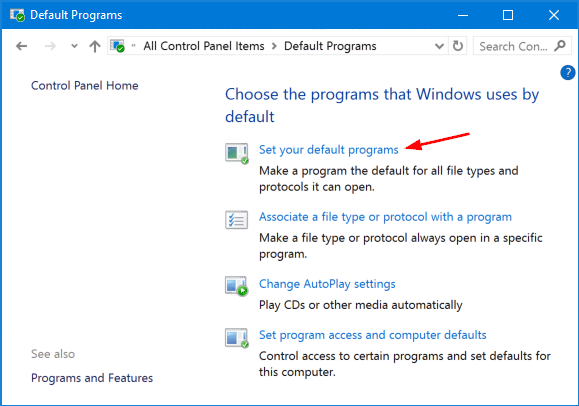
- Select Windows Photo Viewer from the list, and then click Set this program as default on the right-hand side.
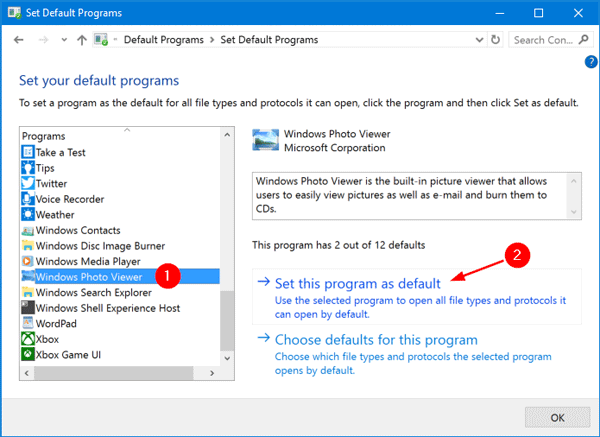
- Now, double-click on any image files and Windows 10 will open them with Windows Photo Viewer by default.