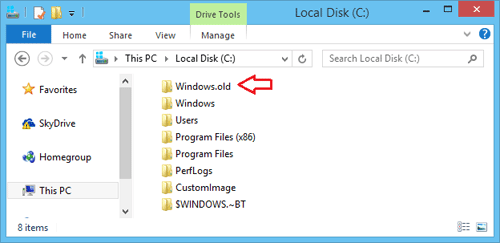
When you perform a custom Windows installation or upgrade Windows to a newer version, the old Windows folder is renamed to Windows.old in case you’d like to revert the upgrade. Windows 8 or 10 users might also have seen the Windows.old folder after performing a PC refresh.
Windows.old contains not only your old Windows installation files, but also your old Documents, Settings and Programs. The folder is usually gigantic in size and can take up considerable space in your system partition. So if you are pretty sure that you no longer need any data from Windows.old then it would be a wise decision to delete it.

Unfortunately, you can’t remove the Windows.old folder by simply pressing the Delete key because your user account doesn’t have ownership of the folder. Here’s how to take ownership all files and subfolders in Windows.old, so you can then delete the whole folder to reclaim some space.
How to Delete the Windows.old Folder?
- Download and install the freeware TakeOwnershipPro on your local computer.
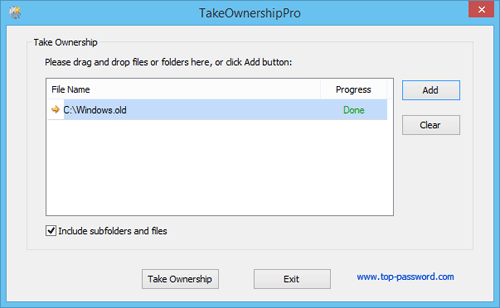
- Start the TakeOwnershipPro program and drag the C:\Windows.old folder to the program. Tick the “Include subfolders and files” box.

- Click Take Ownership. The program will begin to take ownership of all files and subfolders in the Windows.old folder. It could take you one or two minutes, depending on number of files and folders it contains.
- Once it is done, you can then delete the Windows.old folder without any permission issue.
It’s that simple. Deleting the Windows.old folder can save you quite a large amount of hard disk space and it will not affect the present state of the new OS.