How to stop websites from asking your location in Chrome? While surfing online, you may noticed that some websites ask for permission to access your location. If you’re concerned about websites tracking your physical location, you can configure your web browser (Chrome, Edge, Firefox, Internet Explorer) to disable websites asking for your location in Windows 10.
Part 1: Turn Off Location Tracking in Google Chrome
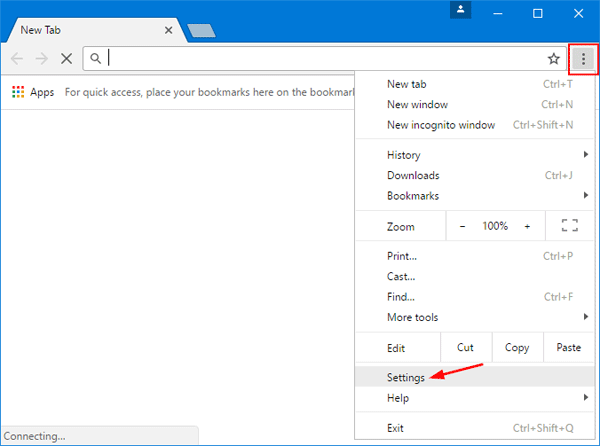
- Click on the three-dot menu on the right-hand side of the address bar, go to Settings.
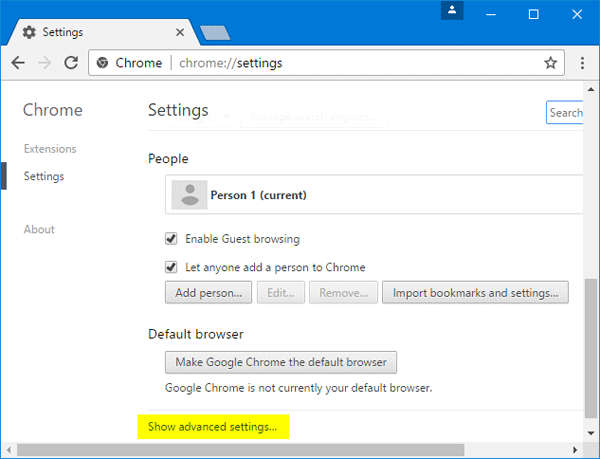
- Scroll till the end and click on Show advanced settings.
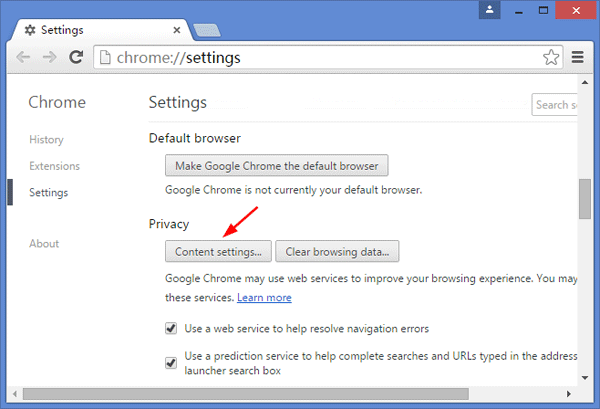
- Click on Content settings and under the Privacy section.
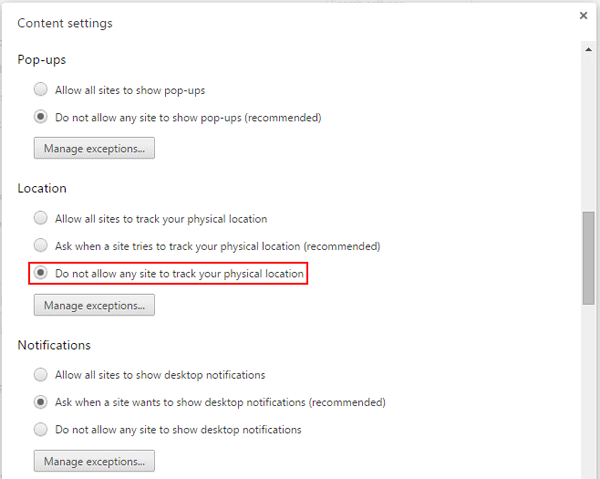
- Scroll down to the Location section and select “Do not allow any site to track your physical location“. Now click Done
Part 2: Turn Off Location Tracking in Microsoft Edge
Just like other Windows 10 Store apps, Microsoft Edge’s location tracking settings cannot be controlled from within the browser itself. You have to turn off location tracking through the Settings app. Follow these steps:
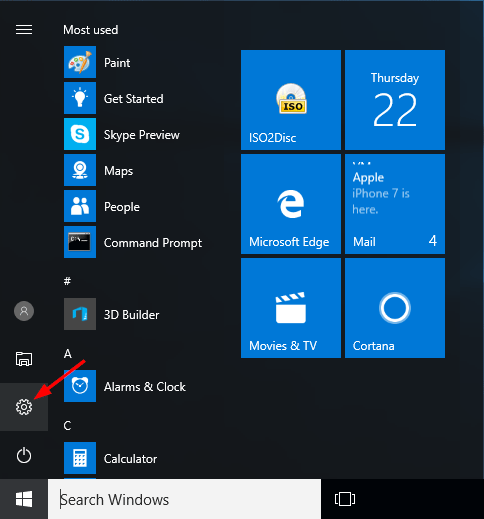
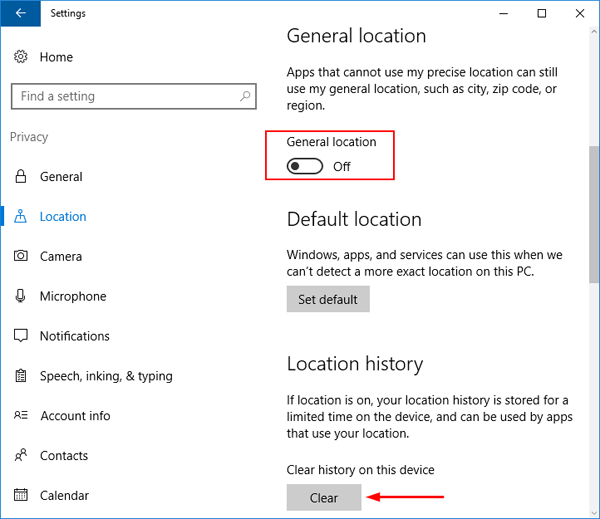
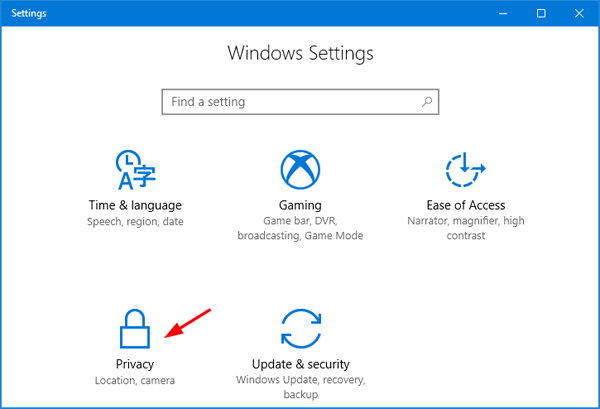
- Open the Settings app and then click Privacy.
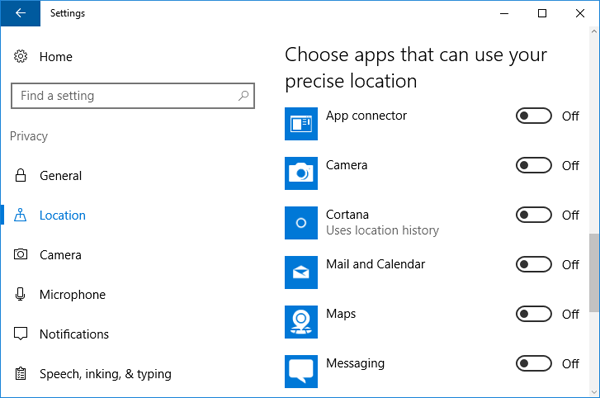
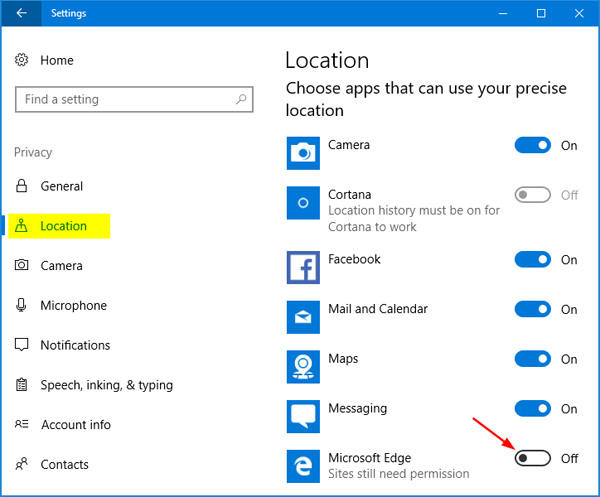
- Select Location tab in the left side. Scroll down to the “Choose apps that can use your precise location” section and turn the slider next to Microsoft Edge to Off.
Part 3: Turn Off Location Tracking in Firefox
- Open your Firefox browser. Type about:config into the address bar and press Enter.
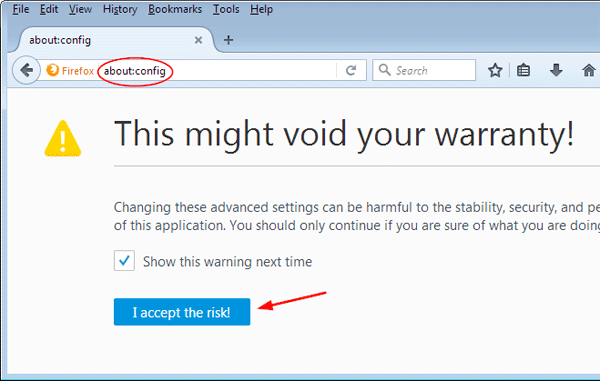
- You’ll see a warning message “This might void your warranty!“. Just click I accept the risk and move on.
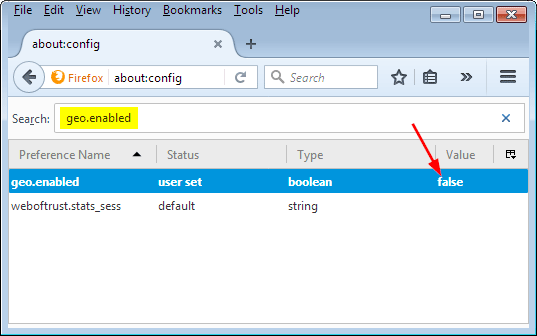
- Type geo.enabled into the Search box and hit Enter. The Geo Enabled option should show up. Double-click that option with your mouse to disable it.
Part 4: Turn Off Location Tracking in Internet Explorer
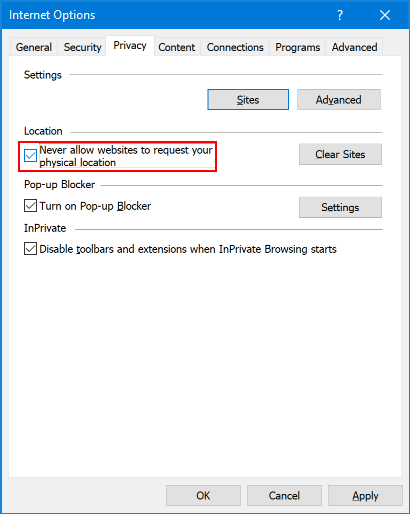
- Open your Internet Explorer. Click on the gear shaped Settings icon in the upper-right corner. From the drop-down menu, select Internet options.

- The Internet Options dialog box will open. Click on Privacy tab and check the box “Never allow websites to request your physical location“. Click OK and you’re done!
