Battery stuck at the same percent all the time while plugged in? The battery indicator shows “plugged in, not charging” even when the AC power is connected? If you experience such issues with your Windows 10 laptop or tablet, here are some useful tips to get your battery back to charging when it’s plugged in.
Part 1: Restart Battery Device or Update Driver
- Press and hold the Windows key and then press R once, enter devmgmt.msc and click OK to launch Device Manager.

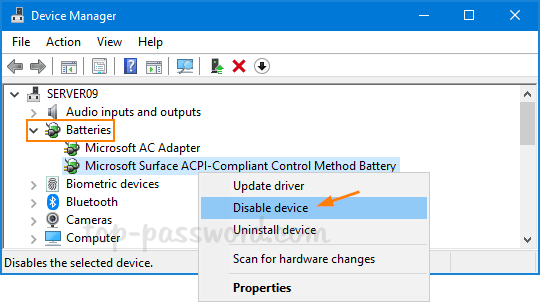
- Expand the Batteries category, right-click on the Microsoft ACPI Compliant Control Method Battery and select Disable from the pop-up menu. Click Yes to confirm.

- Restart your computer and then open up Device Manager again. Right-click on the Microsoft ACPI Compliant Control Method Battery and select Enable. If your battery still doesn’t charge, try to select the “Update driver” option and let Windows search automatically for newer driver.
Part 2: Using the Power Troubleshooter
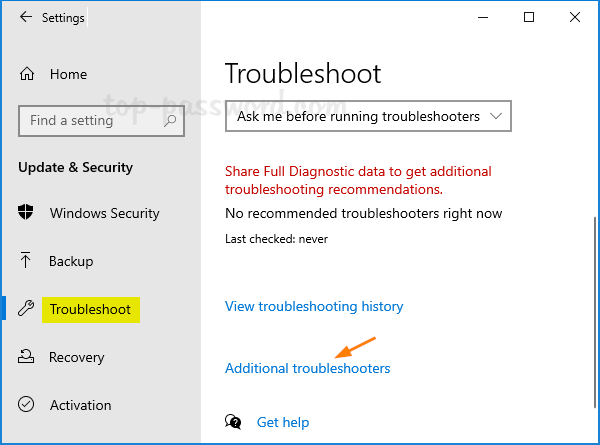
- Press the Windows key + I to open the Settings app. Click on Update & Security.

- Select the Troubleshoot tab. On the right, click on the “Additional troubleshooters” link.

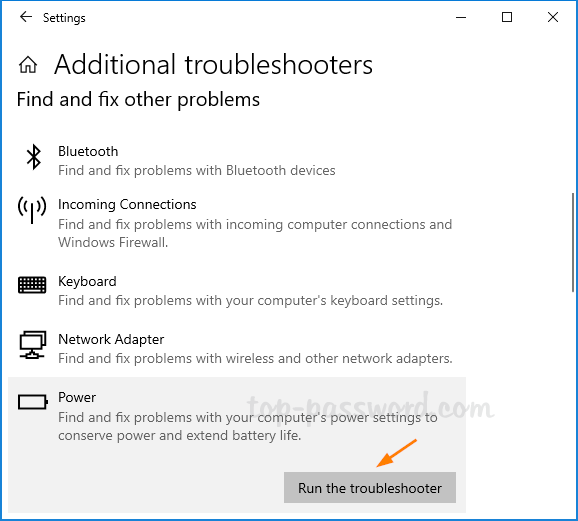
- Scroll down to the “Find and fix other problems” section, select the Power option and then click on the “Run the troubleshooter” button.

-
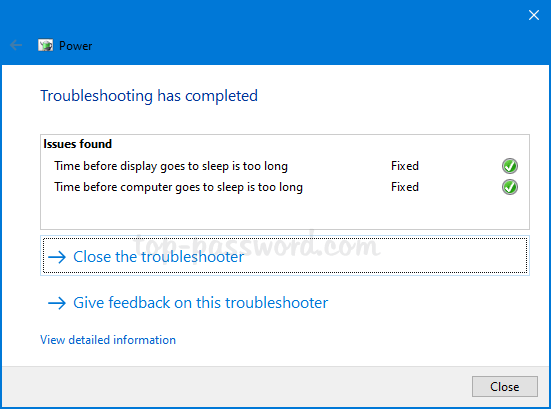
The troubleshooter will fix all the issues related to the power supply and improve power usage.

Hopefully these tips could get your battery back to charging. If your Windows 10 PC still shows plugged in but the battery percentage not changing, it should be a hardware issue related to your power cord or battery.