PowerShell script cannot be loaded because the execution of scripts is disabled on this system? By default, Windows restricts running PowerShell scripts, as a security mechanism. To verify the PowerShell execution policy on your computer, you can use the Get-ExecutionPolicy cmdlet.

If the execution policy is displayed as Restricted, you can change it to other settings as shown below.
- Restricted – No scripts can be run. Windows PowerShell can be used only in interactive mode.
- AllSigned – Only scripts signed by a trusted publisher can be run.
- RemoteSigned – Downloaded scripts must be signed by a trusted publisher before they can be run.
- Unrestricted – No restrictions. All PowerShell scripts can be run.
In this tutorial we’ll show you how to change PowerShell execution policy in Windows 10 using command line, group policy or registry tweak.
Method 1: Change PowerShell Execution Policy with Command Line
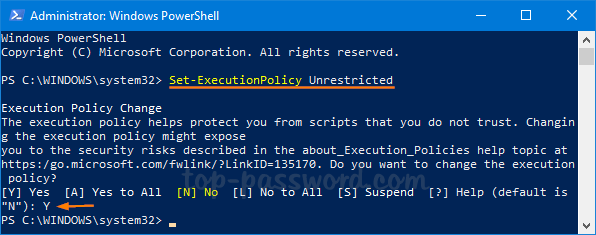
Open the PowerShell as administrator. You can use the Set-ExecutionPolicy command to set the PowerShell execution policy as per your requirement.
Set-ExecutionPolicy Unrestricted
Method 2: Change PowerShell Execution Policy with Group Policy
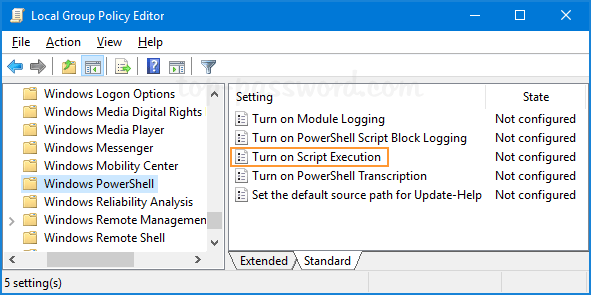
Open the Local Group Policy Editor and navigate to Computer Configuration -> Administrative Templates -> Windows Components -> Windows PowerShell. Double-click a setting called “Turn on Script Execution” on the right pane.
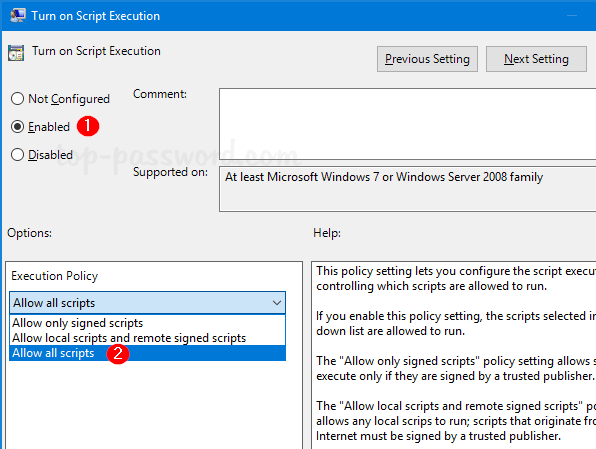
Select the Enabled option. Beneath it, you can click the drop-down list to set the execution policy to “Allow all scripts“. Click OK to save your changes.
Method 3: Change PowerShell Execution Policy with Registry Editor
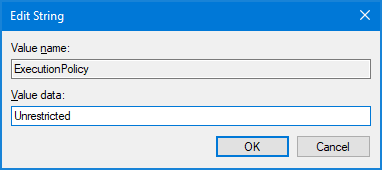
Open Registry Editor and browse to the following registry key by copying and pasting it in the address bar and pressing Enter. Next, double-click the string ExecutionPolicy on the right pane.
HKEY_LOCAL_MACHINE\SOFTWARE\Microsoft\PowerShell\1\ShellIds\Microsoft.PowerShell
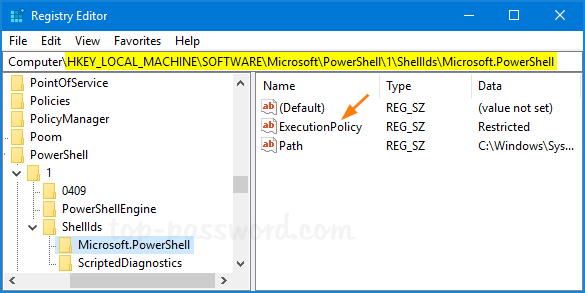
Set the value data to one of the following values: Restricted, AllSigned, RemoteSigned, Unrestricted, Undefined. Click OK and then close Registry Editor.
That’s it!