How do I make Windows 10 always display all user accounts on the login screen when I turn on or restart the computer? By default, Windows 10 or 8 will display only the last logged-on user on the sign-in screen. If your user doesn’t have a password, the system will automatically log in to that user account even if you haven’t enabled the automatic logon feature.
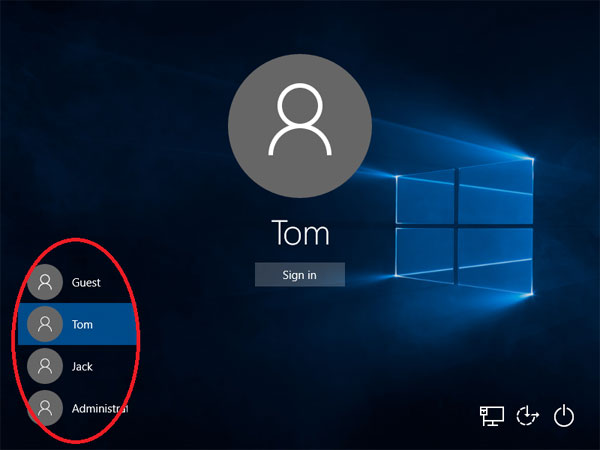
In this tutorial we’ll show you how to make Windows 10 / 8 show a list of all user accounts on the login screen, rather than just the last logged in user. The procedure requires you to use Task Scheduler to run a batch file.
How to Make Windows 10/8 Show All User Accounts on Login Screen?
To have Windows 10/8 display all user accounts on the sign-in screen, all you need to do is access the following registry key and set the value of Enabled to 1.
HKEY_LOCAL_MACHINE\SOFTWARE\Microsoft\Windows\CurrentVersion\Authentication\LogonUI\UserSwitch
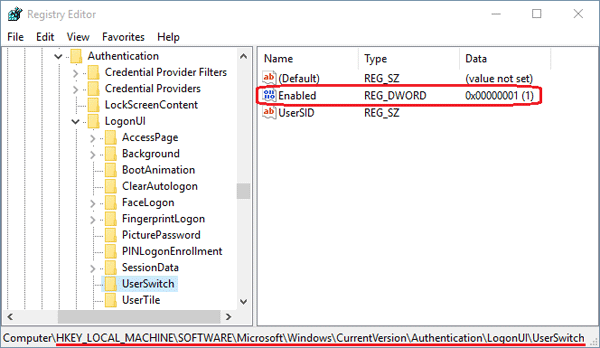
However, the system will automatically restore the Enabled value back to 0 when a user logs on. To force Windows to always show all user accounts, we have to create a scheduled task that changes the Enabled value to 1 at logon. Here’s how:
-
Before getting started, we need to create a batch file. Just open Notepad, copy the following command line and paste it into the file, next save the file as UserSwitch.bat.
REG ADD HKLM\SOFTWARE\Microsoft\Windows\CurrentVersion\Authentication\LogonUI\UserSwitch /v Enabled /t REG_DWORD /d 1 /f
-
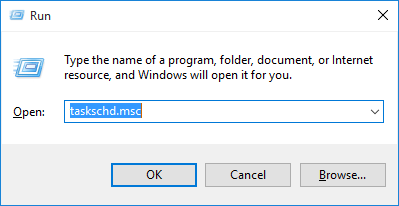
Press the Windows key + R to bring up the Run box. Type taskschd.msc and hit Enter to launch Task Scheduler.
-
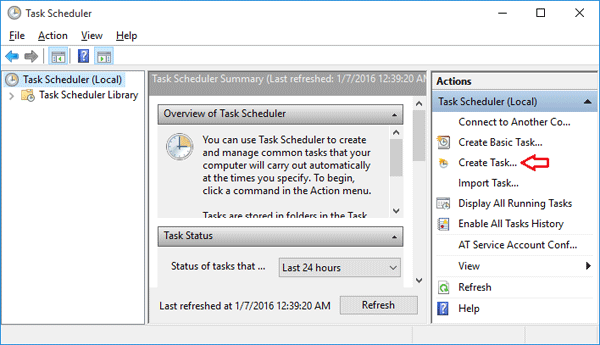
When the Task Scheduler window opens, click the Create Task link in the Actions panel.
-
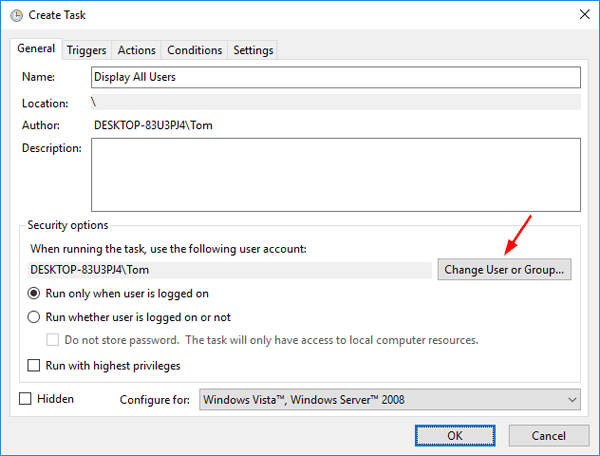
On the next dialog, go to the General tab. Give your task a Name so that you can identify it among other if when you decide to make some changes later. Click the Change User or Group button.
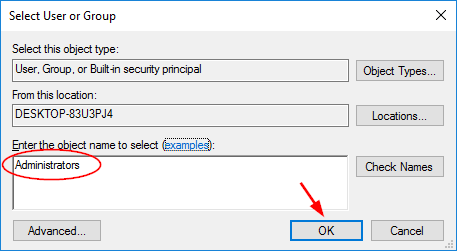
- On the Select User or Group window, type Administrators in the object name box and click OK.
-
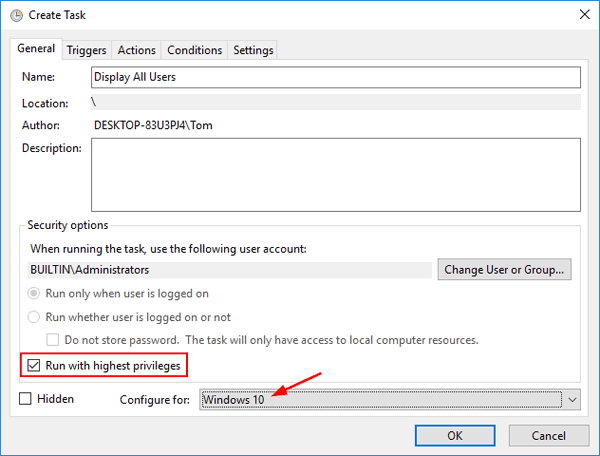
Now you’re back at the General tab. Check the “Run with highest privileges” check box. Tick the Hidden checkbox and select your operating system from the “Configure for” drop-down box.
-
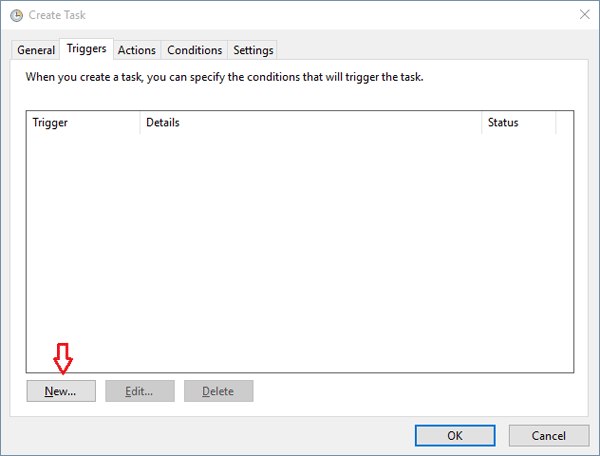
Next, switch to the Triggers tab. Click on the New button on the bottom left of the window to define trigger details.
-
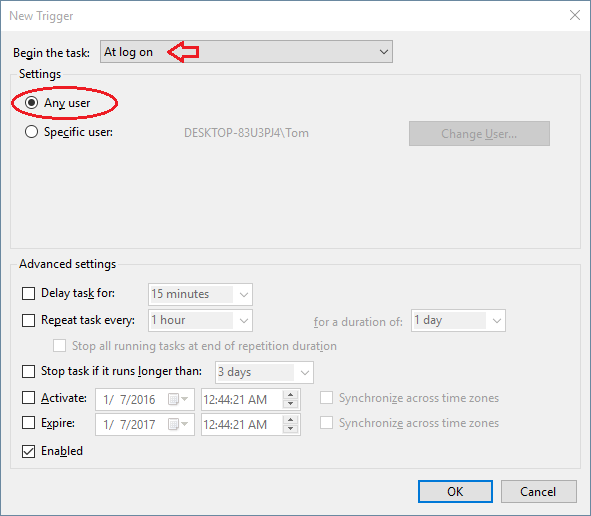
The New Trigger dialog box should open. Select At log on from the Begin the task drop-down menu and select the Any user option. Leave all the other settings as they are and click OK.
-
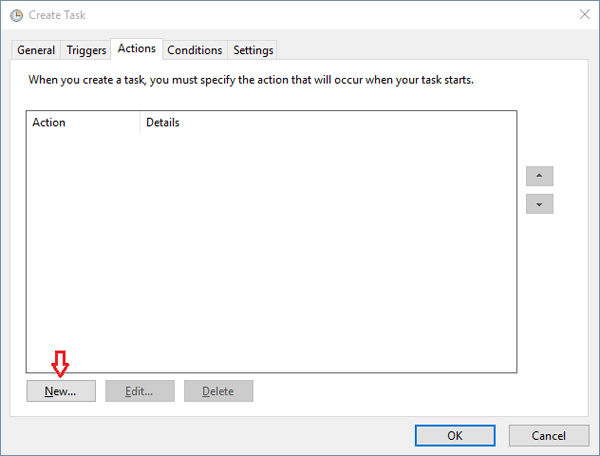
Back on the Create Task window, switch to the Actions tab and click the New button.
-
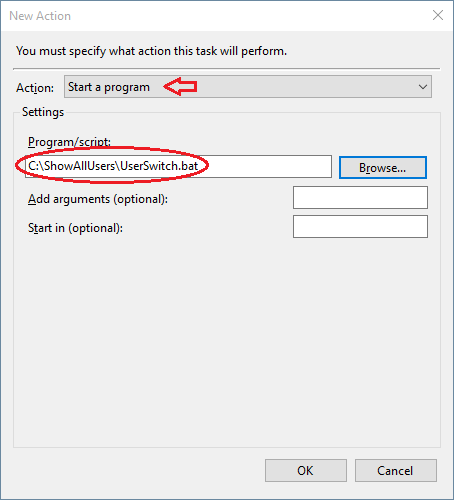
When you see the New Action dialog box, select Start a program from the Action drop-down menu. Click the Browse button and locate the ShowAllUsers.bat file we have created previously. Click OK.
- You don’t need to change anything on the Conditions or Settings tabs, so just click OK to close the Create Task dialog box and your task is ready to run.
- Log off and then log back into your user account, this task will automatically run and change the Enabled registry value. The next time you reboot or start your computer, you will always see that all user accounts are displayed on Windows 10/8 login screen.
Note: If your task is created correctly but the login screen only displays “Other user” that requires you to type username and password, it’s likely that you’ve enabled the group policy “Interactive Logon: Do not display last username“, and you have to disable it.