Kiosk mode allows you to convert a Windows PC into a kiosk that runs only a single app in full screen, so customers can focus on product catalog or placing orders, without distraction. In kiosk mode, users can’t access the desktop, Start Menu or anything outside of the kiosk app. In this tutorial we’ll walk you through the steps of setting up a kiosk on Windows 11 computer to have a basic kiosk experience.
How to Set Up a Kiosk on Windows 11 Computer
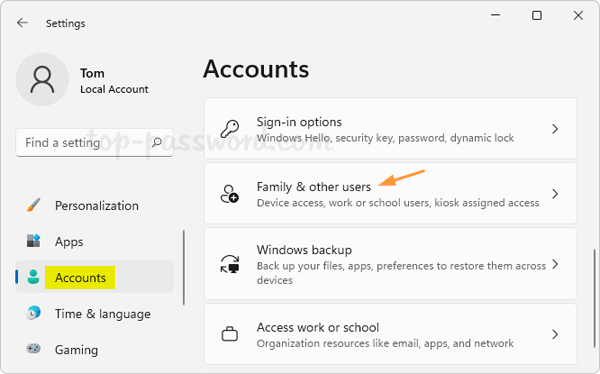
- Press the WIN + I keys together to launch the Settings app. Select the Accounts category on the left side, and click Family & other users on the right pane.
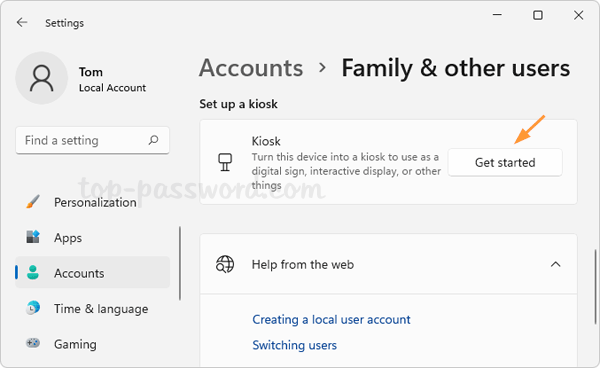
- Under the “Set up a kiosk” section, click the Get started button.
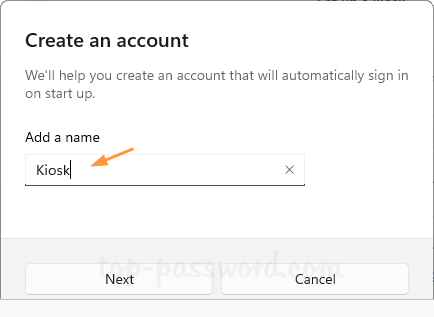
- In the pop-up window, enter a name for your kiosk account and click Next. The system will create a new local account with limited privileges and assign it as the kiosk account.
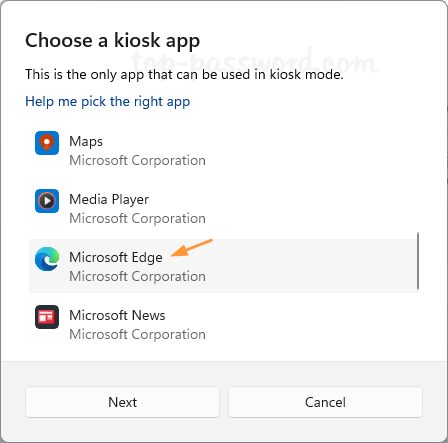
- Select a single app you want to run in kiosk mode, and click Next.
-
If you’ve selected other apps except Microsoft Edge, the setup procedure is almost done and you can reboot the computer to access kiosk mode.
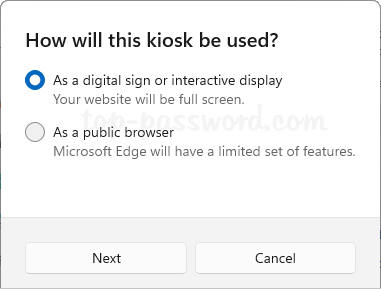
If you’ve chosen to use Microsoft Edge as the kiosk app, select one of the following options for how Microsoft Edge displays, and click Next.
- As a digital sign or interactive display – Displays your website in full-screen mode.
- As a public browser – Runs a limited multi-tab version of Microsoft Edge.
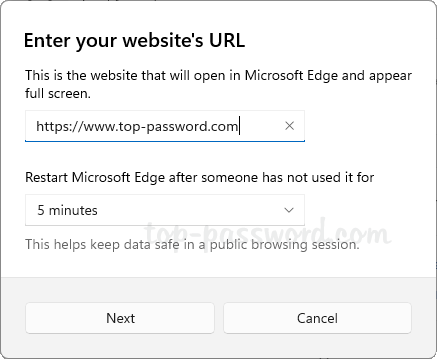
- Enter a website’s URL for home page, and specify the minutes of inactivity before restarting Microsoft Edge. Click Next.
- Click on Close.
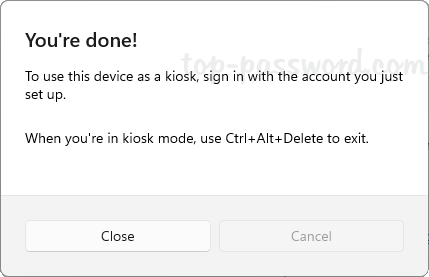
Log out of your primary account and then sign in with this Kiosk account, it will automatically launch your specified kiosk app in full screen. To exist from the kiosk account, you need to press the Ctrl + Alt + Del keyboard shortcut.
That’s it!