Is there an easy way to arrange all open windows on the screen without overlapping? If you need to work with multiple apps and see all windows side by side, the Snap feature can improve your productivity by splitting up your screen with multiple windows, without using Alt-Tab to switch between apps. In this tutorial we will walk you through the steps to enable the Snap windows feature and use snap layouts in Windows 11.
Part 1: Enable the Snap Windows Feature in Windows 11
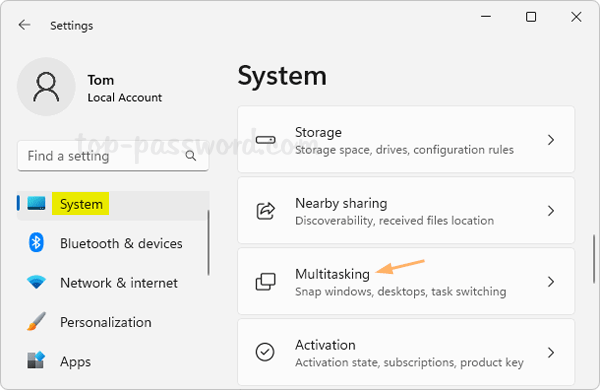
- Open the Settings app by pressing the keyboard shortcut Windows + I, and then select the System category and click the Multitasking option.
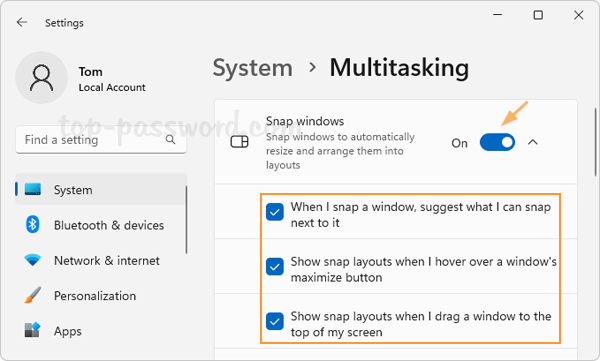
- Turn on the Snap windows toggle, and click the arrow icon on the right side to expand the settings. Make sure you check at least the following options:
- When I snap a window, suggest what I can snap next to it.
- Show snap layouts when I hover over a window’s maximize button.
- Show snap layouts when I drag a window to the top of my screen.
- Once you’ve finished the above steps, you can proceed to use snap layouts to arrange multiple windows on a single screen efficiently.
Part 2: Use Snap Layouts in Windows 11
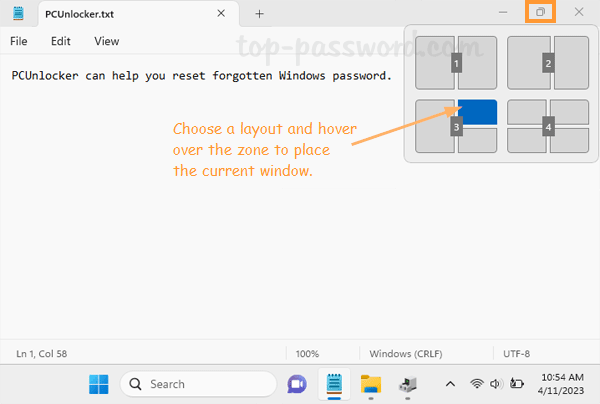
- Hover the mouse over the maximize button of an app window, and you’ll see four predefined layouts. If you need to arrange only two open windows, the first two layouts are good choices. In my example, I have three windows open, so I’ll use the third layout. Hover over the zone of your desired layout to place the current active window.
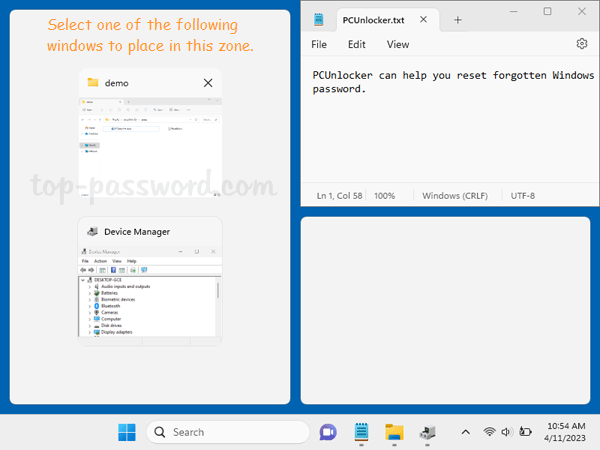
- All your other apps will appear as thumbnails in the second zone of the chosen layout. Simply click an app thumbnail, and it will be resized and snap into this zone.
- Use the same method to place other apps in the other zones of the layout.
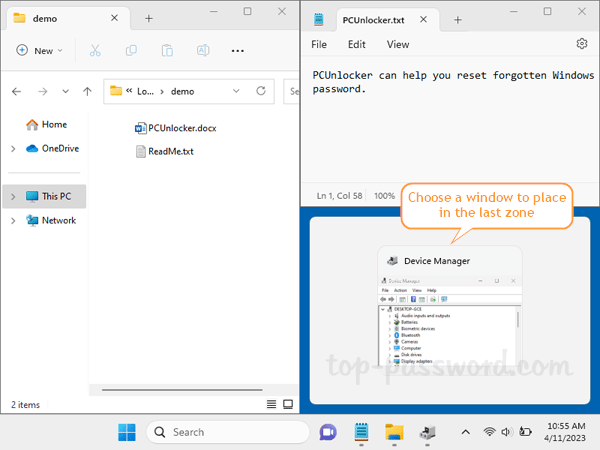
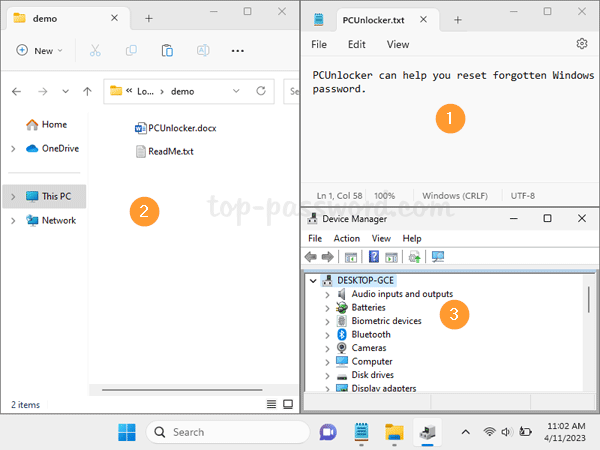
- Now your screen shows the different programs you’re using, and you can work with multiple windows at the same time. However, if a window can’t resize into a zone of your snap layout, it may cause overlapping.
That’s it!