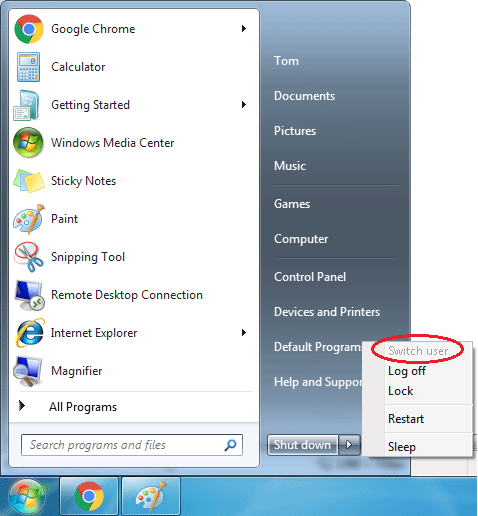
Fast user switching is disabled or missing on your Windows 10 system? Unable to switch to a different account as the “Switch user” option is greyed out?

In this tutorial we’ll show you 2 ways to enable or disable Fast User Switching in Windows 11, 10, 8, 7 and Vista.
Method 1: Using Local Group Policy Editor
- Press the Windows key + R to open the Run dialog box. Type gpedit.msc and press Enter.
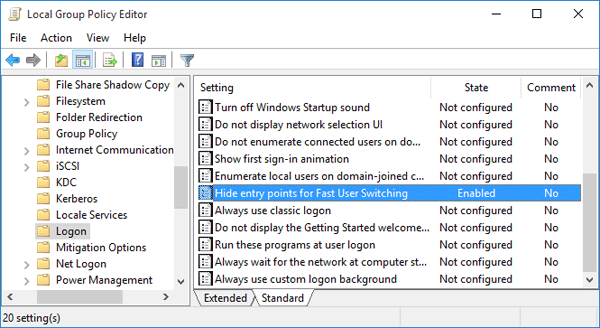
- The Local Group Policy Editor console should open. In the left pane, expand the following nodes:
Local Computer Policy\Computer Configuration\Administrative Templates\System\Logon - In right-side pane, double-click on the “Hide entry points for Fast User Switching” policy and its properties screen will open.

- If you want to turn off / disable the Fast User Switching feature, set it to Enabled. Or click Disabled or “Not configured” to re-enable Fast User Switching.
By disabling the Fast User Switching feature, the “Switch user” option will be greyed out or removed from Windows logon screen,Start menu and the Task Manager.
Method 2: Using Registry Trick
Since Group Policy Editor doesn’t come with the Home and Starter editions of Windows, here is another method to enable / disable Fast User Switching using Registry Editor:
- Press the Windows key + R to open the Run dialog box. Type regedit and press Enter.
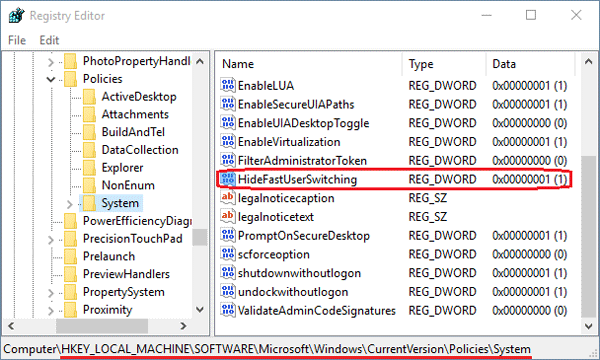
- In the Registry Editor window, navigate to the following key:
HKEY_LOCAL_MACHINE\SOFTWARE\Microsoft\Windows\CurrentVersion\Policies\System - In the right-side pane, search for the value named HideFastUserSwitching. If it doesn’t exist, you can create one by right-clicking in the empty space on the right pane and choose New –> DWORD (32-bit) Value.

- Set the Value data for HideFastUserSwitching to 1 if you want to disable the Fast User Switching feature. To re-enable it, change that value to 0.
- Close the Registry Editor. You will have to log off and then log back on for the changes to take effect.