Adaptive brightness is a new feature in Windows 8 / 10 that uses an ambient light sensor to automatically adjust your screen’s brightness to your surroundings. When you have mostly dark stuff on screen (like a text editor with dark background), the screen will dim automatically. While on a white background it will brighten. These changes happen automatically after a few seconds, and they can also sometimes manifest as noticeable flickering.
If the brightness switching is driving you crazy, you can disable this feature so your screen will stay at the brightness level you want. In this post we’ll show you how to turn on / off adaptive brightness in Windows 10 and 8.
Updated: For the latest build of Windows 10, open the Settings app and navigate to System -> Display, you can check or uncheck the “Change brightness automatically when lighting changes” option to enable or disable adaptive brightness.
How to Turn on / off Adaptive Brightness in Windows 10 / 8?
- Press the Windows logo key + X to open the Quick Access menu. Click Control Panel.
- When Control Panel is open, set the View by option to Large icons. Click Power Options.

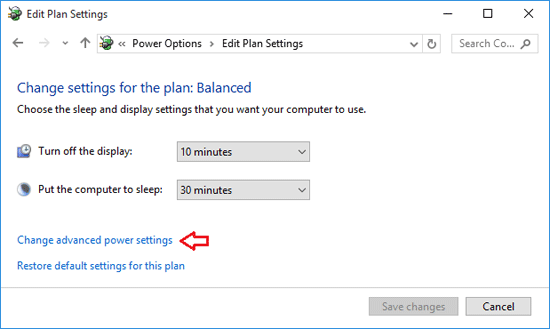
- Find your currently selected power plan and click on the associated “Change plan settings” link.

- Now click on “Change advanced power settings“.

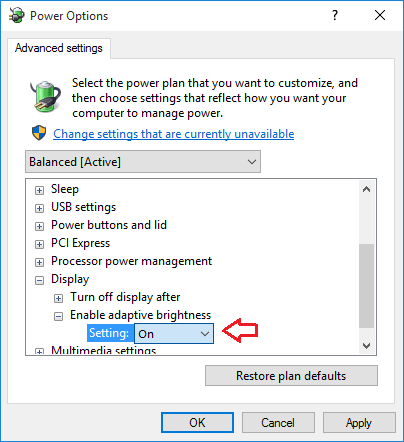
- Scroll down to Display –> Enable adaptive brightness, and change the settings there to Off or On.

If you set it to off, your screen will maintain a constant brightness level. If you don’t see this setting, it means that your computer doesn’t come with light sensors.