How can I enable spatial audio for speaker or headphone in Windows 11? Spatial sound is a feature that creates an enhanced immersive 3D sound experience, making the sound like they’re coming from all around you. In this tutorial we’ll show you 2 methods to turn on or off spatial sound in Windows 11.
Method 1: Turn on / off Spatial Sound Using Settings App
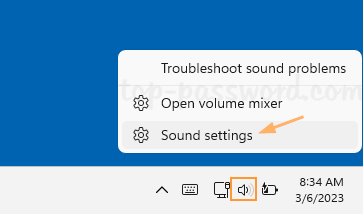
- Right-click the Volume icon located at the bottom-right corner of your screen, and then choose “Sound settings” from the pop-up menu.
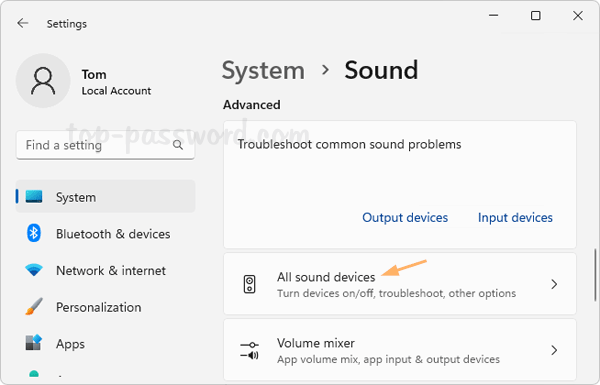
- The Settings app will launch and open to the Sound page. Click the “All sound devices” option under the Advanced section.
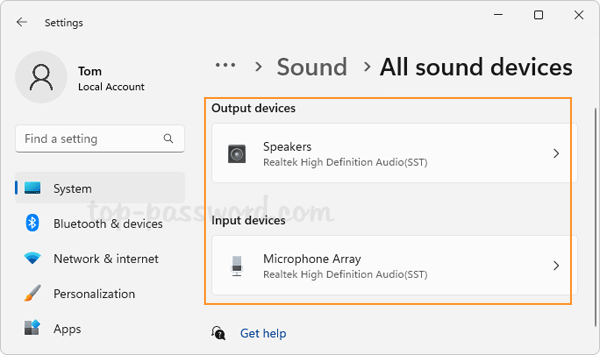
- Locate and click the headphone or speaker which you would like to enable / disable the spatial sound setting for.
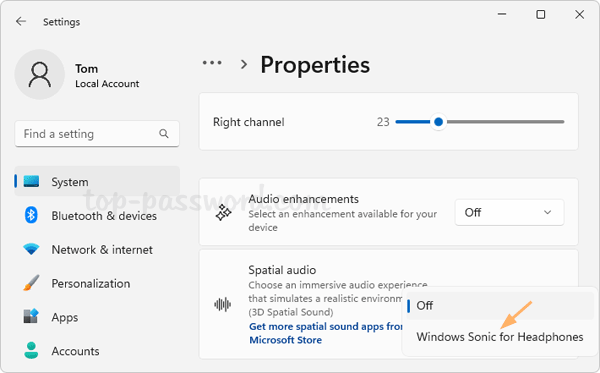
- Scroll down to the bottom and you should see the Spatial audio drop-down list. Just click it to select Windows Sonic for Headphones for enabling spatial sound, or choose Off to disable spatial sound.
Method 2: Turn on / off Spatial Sound Using Sound Control Panel Applet
- Press the Windows key + R together to launch the Run dialog box, type
control mmsys.cpl soundsand press Enter to open the Sound Control Panel applet.
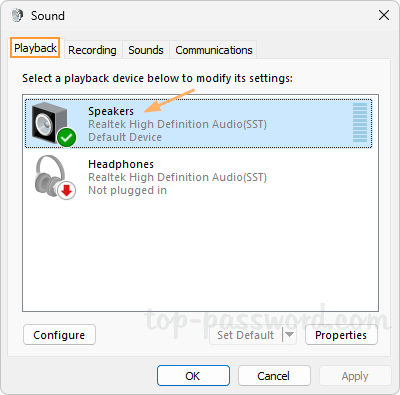
- Go to the Playback tab, double-click the speaker or headphone you would like to enable/disable spatial sound for.
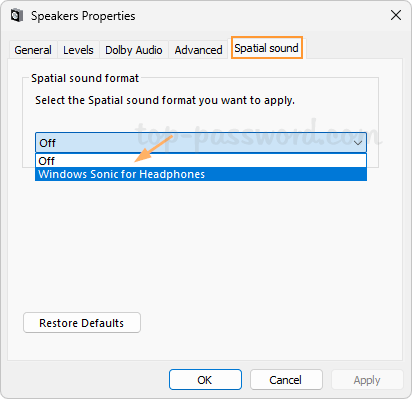
- Select the Spatial sound tab. Click the drop-down box under the “Spatial sound format” section, you can choose Windows Sonic for Headphones to turn on spatial sound, or set it to Off if you want to disable spatial sound.
That’s it!