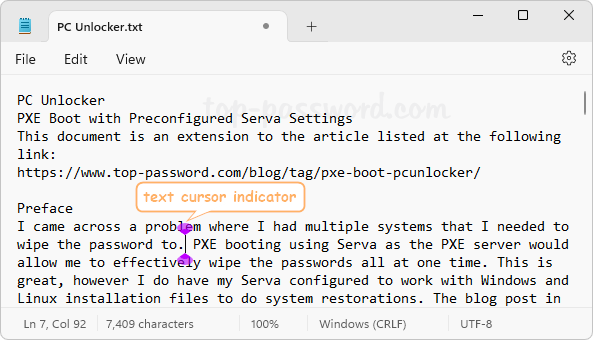
When you’re typing in your text editor, the text cursor appears as a vertical thin line which may make it hard for you to see it in a pile of text. If you experience the difficulty of finding where your text insertion point is located, the most effective method is to enable the text cursor indicator. In this tutorial we’ll show you 2 ways to turn on the text cursor indicator in Windows 11, making your cursor more visible and easier to be seen.
Method 1: Turn On Text Cursor Indicator in Windows 11 via Settings App
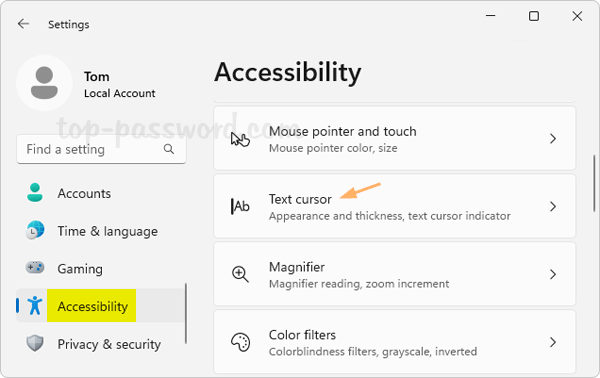
- Press the Windows key + I together to start the Settings app. Choose Accessibility on the left side, then click on “Text cursor” on the right pane.
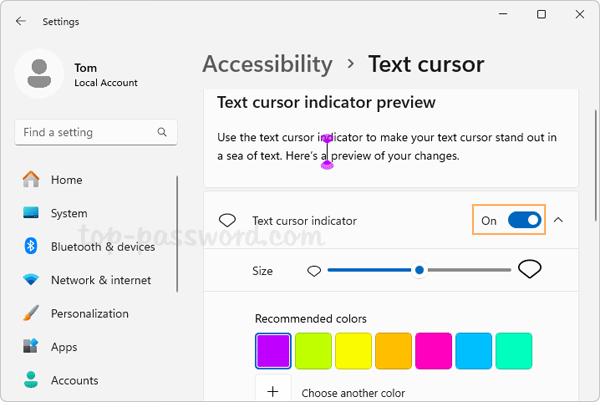
- Toggle the “Text cursor indicator” option to the ON position. From there you can also customize the color or size of the cursor indicator to make it stand out more in the sea of text.
- Close the Settings app and it will immediately activate text cursor indicator feature on your Windows 11 computer.
Method 2: Turn On Text Cursor Indicator in Windows 11 via Registry Editor
- Open Registry Editor and navigate to the location:
HKEY_CURRENT_USER\SOFTWARE\Microsoft\Windows NT\CurrentVersion\Accessibility, then double-click the Configuration entry on the right pane.
- Enter
cursorindicatorin the value data box and click OK to enable the text cursor indicator.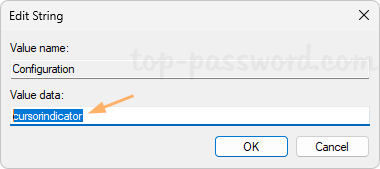
Whenever you need to turn off text cursor indicator later, just set the value data to be empty.
- Close Registry Editor. You need to log off or restart Windows to make the changes take effect.
That’s it!